


Monday, November 19, 2012
*click image to view full-sized*
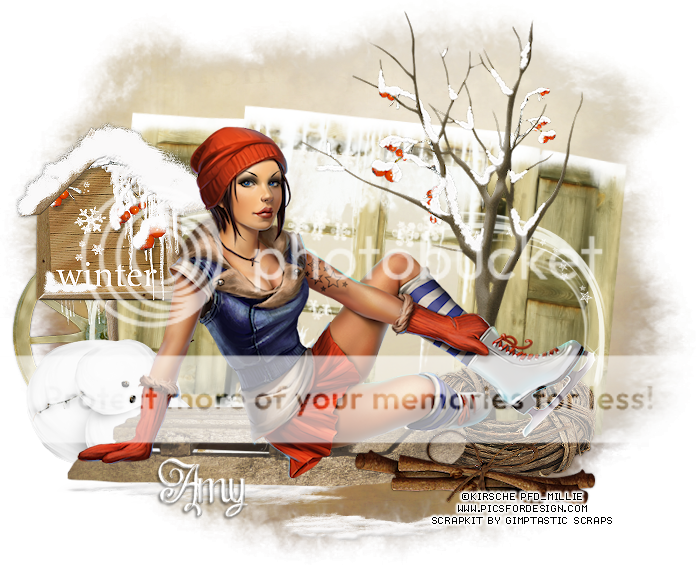
PTU Ready for Sledding and Skating
This tutorial was written by Millie on November 19, 2012.
If you're trying this tut I assume you have psp knowledge.
Any similarity to any is purely coincidence and I used pspx2.
Let's get started.
Artist: Kirsche
Scrapkit: Winter Woods by Gimptastic Scraps
Mask: Designs By Vaybs Mask 111
Font: Chalk Hand Lettering
Plugins: xero - porcelain
*add dropshadow of your liking to your elements with the exception of snow and swirl*
I used 1 1 65 5 black but you can use whatever looks best to you.
File - New - 700x700 flood fill w black
Open window, c/p as new layer
Open your tube - I resized mine by 70%, c/p as new layer
Open your sled, c/p as new layer and place it under your tube
Place it so it looks like your tube is sitting on top of it
Resize your tube again by 85% so it can fit on top of the sled
Effects - xero - porcelain - change blue channel to 0 - sharpen
With your deform tool, rotate your window to the right some
Open your swirl, resize by 50%, c/p as new layer, move to left
duplicate and mirror
Open sign, c/p as new layer, move to left of tag below sled layer
Open snowman, resize by 50%, c/p as new layer and place to the left
Open tree, resize by 75%, sharpen, c/p as new layer, place to the right
Open wreath, c/p as new layer and place to the right
Open the wheel, resize by 50%, sharpen, c/p as new layer
Place to the left and move it below the frame layer
Open snow, c/p as new layer, place so its under the slay
Open sticks, resize by 80%, sharpen, c/p as new layer
Place to the right and move above sled layer
Close your background layer and merge visible
Open background layer and crop your tag to your liking
Click on background with magic wand, open paper 10
new layer, c/p into selection, apply your mask
Duplicate your mask and change blend mode to screen
Merge down and change opacity to 71
Delete your background layer, merge visible, add your credits, and name
We are finished!
Thanks for trying my tutorial.
Subscribe to:
Post Comments
(Atom)


0 comments:
Post a Comment