


Thursday, February 28, 2013

This tag was made with artwork of Verymany.
You can find this tube in Pics for Design :)
I used PTU Crazy Rock by Creations By Sanie
You can find this kit in O'Scrap Shack.
Made some snags for ya.
Enjoy!
*Click on image to save full-size.*
Thanks for stopping by :)


Showing off some awesome tags some girls have made with my templates!

Pamela made this awesome St. Patty's freebie tutorial.
It is called "Kiss My Shamrocks"
You can find her tut on her blog HERE

Julie made me this fabulous St Patrick's taggie.
I just love it.
Check out her blog HERE
She has tons of awesome cluster frame freebies.

Liz made this gorgeous taggie using another one of my templates :)
You can visit her blog HERE

Gina from Creative Chicks made this lovely tag using my template!
Thank you all so much for my beautiful tags and for working with my templates!
Very appreciated :)
Wednesday, February 27, 2013

*click on image to view full size*
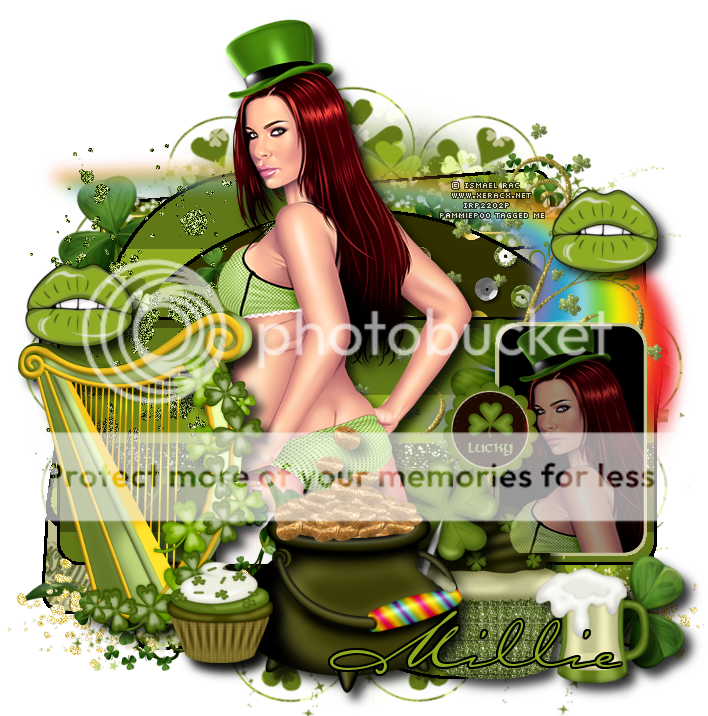
FTU Lady Luck
This tutorial was written by me on February 27, 2013.
It was made out of my own creation and any similarity is purely coincidental.
I used pspx2 but any version should work without problems.
Let's get started!
Artist: Ismael Rac
Scrapkit: Lady Luck by Designs By Vaybs
Mask: St Patrick Mask2 by Mincrisar from FabTags Forum Blog
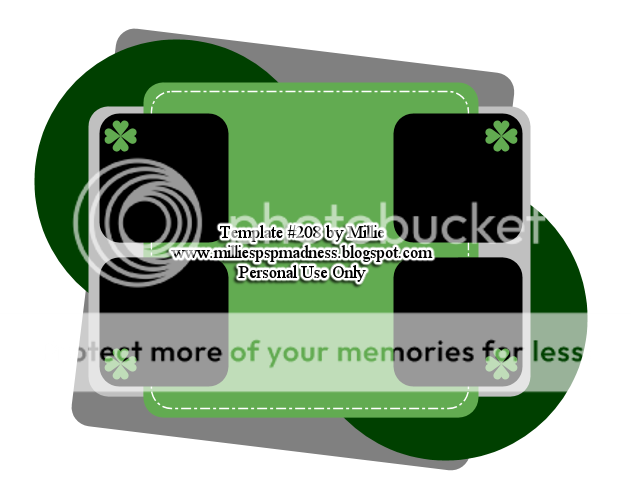
Template: 208 by me HERE
Plugins: xero - porcelain
Font: Before The Rain
*open your mask and minimize it in your workspace*
Open template - duplicate - close original
Delete cr layer - make background visible
Canvas 700x700 - flood fill background w white
Layer 1 - selections all - float - defloat - new layer
Selections - modify - smooth selection - amount 10 - anti-atlas checked
Open paper6 - c/p into selection - deselect - add drop shadow
Merge layer 3 down to 2
Selections all - float - defloat - new layer
Selections - modify - smooth selection - amount 10 - anti-atlas checked
Open paper4 - c/p into selection - new layer
Selections modify - select selections borders - both sides - border width 2
Flood fill with light color from paper - add noise - uniform 100
deselect - add drop shadow
Open ele51 - resize by 65% - c/p as new layer - place to left
Layer 4 - selections all - float - defloat - new layer
Selections - modify - smooth selection - amount 10 - anti-atlas checked
Open paper7 - c/p into selection - deselect - add drop shadow
Open ele20 - c/p as new layer
Layer 5 - selections all - float - defloat - new layer
Selections - modify - smooth selection - amount 10 - anti-atlas checked
Open paper9 - c/p into selection - deselect - add drop shadow
Layer 6 - add drop shadow
Open ele45 - resize by 75% - c/p as new layer
Merge layer 8 down to 7
Open tube - c/p as new layer - place to left - duplicate - mirror - merge down
Click inside the squares of layers 7 w magic wand
On tube layer - invert - delete - deselect
Xero - porcelain default - change blend mode to luminance (L)
Open ele 63 - resize by 50% - c/p as new layer - place to right
Merge layer 10 down to 9 - change blend mode to screen
Open ele47 - c/p as new layer - place to the right
Open ele39 - resize by 50% - sharpen - c/p as new layer - place to left
duplicate - mirror
Open ele41 - resize by 50% - sharpen - c/p as new layer - place to left
Open ele32 - resize by 50% - sharpen - c/p as new layer - place to left
Open tube - resize to fit tag - c/p as new layer - xero - porcelain - default
duplicate - change blend mode to soft light - opacity to 60
Open ele30 - c/p as new layer - place at bottom of tube
Open ele34 - c/p as new layer - place at bottom of bow
ON background layer - click inside with magic wand - new layer
Open paper5 - c/p into selection
Layers - new mask layer - from image
Find mask name in source window - create mask from source luminance - hit ok
Merge group - resize mask by 85% - duplicate - change blend to screen
Open ele25 - resize by 90% - c/p as new layer
Delete background - merge visible - add credits and name
Tuesday, February 26, 2013

*click on image to view full size*
PTU Love Wings
This tutorial was written by me on February 26, 2013.
It was made out of my own creation and any similarity is purely coincidental.
I used pspx2 but any version should work without problems.
Let's get started!
Artist: Tony Tzanoukakis
Scrapkit: Wings Of Love by Candy's Treats
Mask: any of choice
Plugins: xero - porcelain
Font: Pea Annie
*open your mask and minimize it in your workspace*
File - New - 700x700 - Fill with white
Open frame glitter 6 - resize by 80% - c/p as new layer
Move down a little bit
Click inside frame w magic wand - expand by 15 - new layer
Open paper11 - c/p into selection - deselect - move under frame
Open wire - resize by 50% - sharpen - c/p as new layer
Move down some - duplicate - change blend to overlay - merge down
On frame layer
Open grass - c/p as new layer - place to the right
Open leaves 3 - resize by 70% - sharpen - c/p as new layer - move up some
Open flower3 - resize by 50% 2x - sharpen - c/p as new layer - place to left
Duplicate - mirror
Open flower cluster - c/p as new layer - move down
Duplicate - change blend mode to screen - merge down
Open ribbon1 w charm - c/p as new layer - move down
Open string1 - c/p as new layer - place down
Open butterflies-Lilac - c/p as new layer - place to the left
Open blue butterfly - resize by 50% - sharpen - c/p as new layer
Open your tube - resize by 50% - c/p as new layer
Xero - porcelain - default - change blue channel to 0
Go to background layer - click on it with magic wand - new layer
Layers - new mask layer - from image
Find your mask in source window - create mask from source luminance - hit ok
Merge group
Open glitter splats - c/p as new layer - place to bottom left
Duplicate - mirror - merge down
Delete background layer - merge visible - add credits and your name
Monday, February 25, 2013

*click on image to view full size*
FTU Spring is Citrus-y
This tutorial was written by me on February 25, 2013.
It was made out of my own creation and any similarity is purely coincidental.
I used pspx2 but any version should work without problems.
Let's get started!
Artist: Ismael Rac
Scrapkit: Summer Citrus by A Space Between
Mask: moonbeams and spiderwebs - mask 19 HERE
Plugins: xero - porcelain
Font: KG Falling Slowly
*open your mask and minimize it in your workspace*
File - New - 700x700 - Fill with white - rename background
Click background with magic wand - new layer
Open paper4 - c/p into selection - deselect
Layers - new mask layer - from image
Find mask name in source window - make mask from source luminance - hit ok
Merge group
Open ele28 - resize by 65% - sharpen - c/p as new layer
Click inside frame w magic wand - expand by 10 - new layer
Open paper3 - c/p into selection - deselect
Move under frame layer
Add light drop shadow of your choice to frame
Open ele46 - resize by 65% - sharpen - c/p as new layer
Place under frame layer - change blend to overlay - opacity to 63
ON frame layer
Open ele22 - resize by 70% - sharpen - c/p as new layer
Open ele18 - resize by 50% - sharpen - c/p as new layer - place to left
Open ele52 - resize by 50% - sharpen - c/p as new layer - place to right
Open ele4 - c/p as new layer - place to right
Open ele36 - resize by 60% - sharpen - c/p as new layer - place to left
Rotate to the left a bit with your deform tool
Open ele21 - resize by 50% - sharpen - c/p as new layer - place to right
Open ele45 - resize by 50% - c/p as new layer - move to the right a little
Open tube - resize to fit your tag - c/p as new layer
Xero - porcelain - default - change blue channel to 0
Duplicate - change blend mode to soft light
Open ele38 - resize by 75% - sharpen - c/p as new layer - mirror - move down
open ele48 - resize by 70% - c/p as new layer
Open ele20 - c/p as new layer - place to the right
Open ele47 - resize by 50% 2x - sharpen - c/p as new layer - place to right
Delete background layer - merge visible - add credits and your name
Thanks for trying my tutorial :)

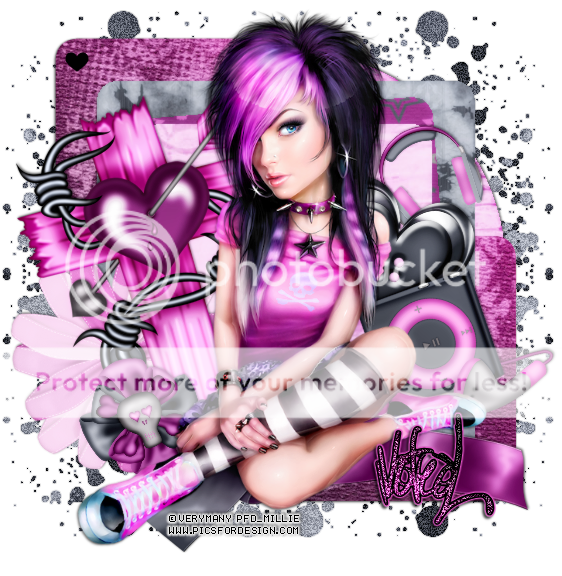
This tag was made with awesome work by Zlata M.
You can find it in Pics for Design.
I used PTU Sweet On Paris by Evol Angel Scrapz.
You can find this kit in Scrap Candy.
Made some snags.
*click on image to save full-size*


Thanks for stopping by :)
Saturday, February 23, 2013

From Tonya

From Rhonda
From Pamela

From Kelly Lynn

from Kelly Lynn
From Jill

From Ingrid
Thank you all so much for the beautiful tags that you continue to make using my stuff!
You call definitely make my days with all the awesome support!
*hugs*


*click on image to view full size*
PTU Spring is Blooming
This tutorial was written by me on February 23, 2013.
It was made out of my own creation and any similarity is purely coincidental.
I used pspx2 but any version should work without problems.
Let's get started!
Artist: Ismael Rac
Scrapkit: Spring Blooms by Bookworm Dezines
Exclusive at Scrap Candy
Mask: 36 by moonbeams and spiderwebs
Font: Chopin Script
*open your mask and minimize it in your workspace*
File - New - 700x700 - Fill with white
Open ele4 - resize by 75% - sharpen - c/p as new layer
Click inside frame w magic wand - expand by 5 - new layer
Open paper1 - c/p into selection - deselect - move under frame
Open ele5 - resize by 80% - c/p as new layer
Go to frame layer
Open ele29 - resize by 50% - sharpen - c/p as new layer - place to left
Open ele28 - resize by 50% - sharpen - c/p as new layer - place to left
Open ele30 - resize by 60% - sharpen - c/p as new layer - place to the right
Open ele33 - resize by 70% - sharpen - c/p as new layer - place to the right
Open ele32 - resize by 50% - sharpen - c/p as new layer - place to right
Open ele20 - resize by 50% - then by 65% - sharpen - c/p as new layer
Place to the left
Open half tube - resize by to fit tag - c/p as new layer - place to left
Open ele26 - resize by 50% 2x - sharpen - c/p as new layer - place to left
Open ele40 - resize by 80% - c/p as new layer - place down some
Open ele17 - resize by 70% - sharpen - c/p as new layer - place to the right
Duplicate - move one over to the left some
Go to background layer and click it w magic wand - new layer
Open paper 4 - c/p into selection - deselect
Layers - new mask layer - from image
Find your mask in source window - make mask from source luminance - hit ok
Merge group
Delete background layer - merge visible - duplicate - change blend to screen
Change opacity to 65 - merge visible
Add your credits and your name
Friday, February 22, 2013


Check out these gorgeous beauties now out from Ismael Rac!
They are a must have.
So head over the the Xeracx Store now :)


Check out the brand new releases from Tony Tzanoukakis.
They come with matching kits or as a pack.
Visit his store now!
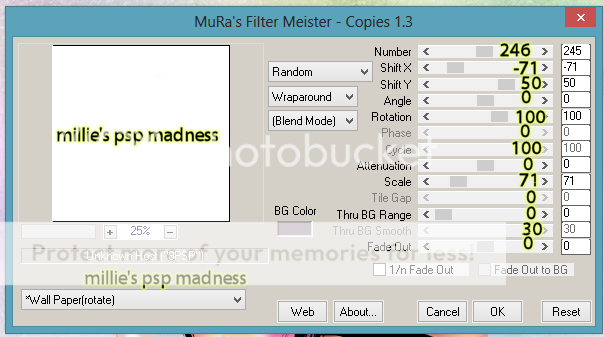
Thursday, February 21, 2013

*click on image to view full size*
PTU Sweet Lavender
This tutorial was written by me on February 21, 2013.
It was made out of my own creation and any similarity is purely coincidental.
I used pspx2 but any version should work without problems.
Let's get started!
Artist: Kiwifirestorm
Scrapkit: Dreams of Lavender by Stef's Scrapkits
Mask: Moonbeams and Spiderwebs Mask 23 HERE
Plugins: Mura Meister - copies, Xero - radiance
Font: Aphrodite Pro
*open your mask and minimize it in your workspace*
File - New - 700x700 - Fill with white
click inside white layer w magic wand - new layer
Open paper03 - c/p into selection - deselect
Duplicate paper - change blend to overlay - merge down
Open tube close up - resize by 50% - c/p as new layer
Apply Mura Meister - Copies with following settings
Apply - xero - radiance (default settings)
Adjust - blur - gaussian blur - 1.00 - hit ok
Merge tube to paper
Layers - new mask layer - from image
Find mask name in source window - make mask from source luminance
hit ok - merge group
Open ele27 - resize by 70% - c/p as new layer - place to right
Duplicate - mirror - merge down - duplicate - flip - merge down
Change opacity to 50
Open full tube - resize by 50% - c/p as new layer
Xero - radiance - default settings
Open ele01 - resize by 60% - sharpen - c/p as new layer
Open ele54 - c/p as new layer - place to the right
Open ele12 - resize by 80% - sharpen - c/p as new layer - place to right
Open ele26 - resize by 60% - sharpen - c/p as new layer - place to right
Open ele17 - resize by 65% - sharpen - c/p as new layer
Place down some
Open ele8 - resize by 50% - sharpen - c/p as new layer
Place to the left of the fence
Open ele15 - resize by 50% - sharpen - c/p as new layer - place to right
Delete background layer - merge visible - add credits and name


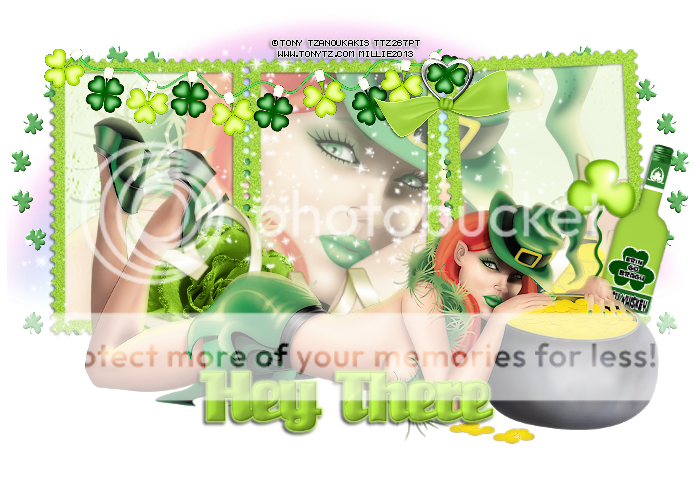
This tag was made with the fabulous work of Tony Tzanoukakis.
This tube is called One for Luck and she along with the matching scrapkit are coming to his store really soon.
So remember to check it out so you can see when. :)
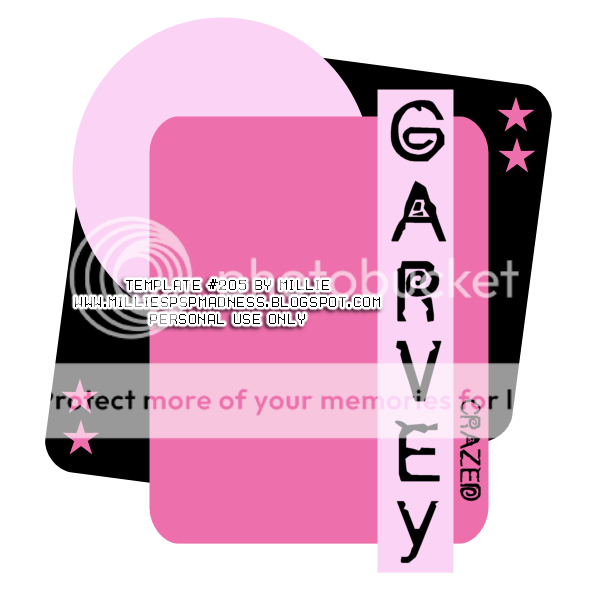
I made another template.

Template 203.
You can download it HERE
Thanks for stopping by :)

This amazing tube is called HOT BUBBLEGUM.
She and the matching kit will be available in the Xeracx Store soon!
Stay on it so you can get her right away :)
I made template 202

You can download it HERE
Thanks for stopping by.
Wednesday, February 20, 2013
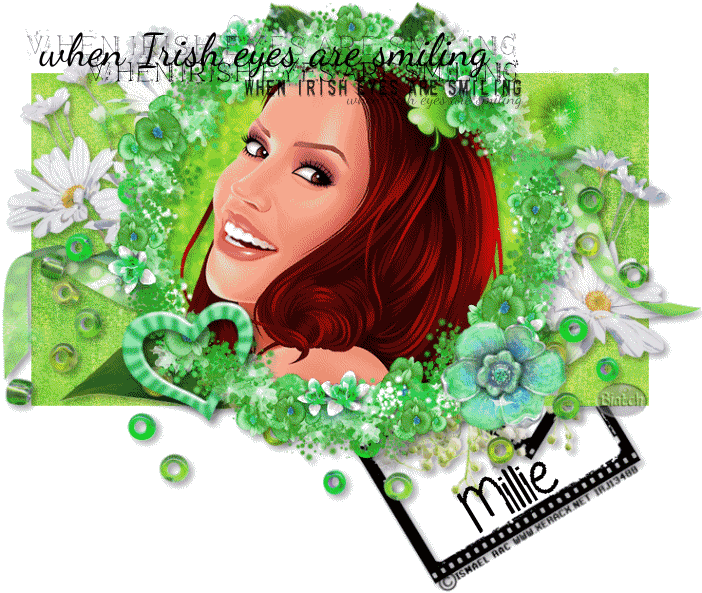
*click on image to view full size*
FTU Lovely Irish
This tutorial was written by me on February 20, 2013.
It was made out of my own creation and any similarity is purely coincidental.
I used pspx2 but any version should work without problems.
Let's get started!
Artist: Ismael Rac
Scrapkit: Get Me Irish On By Ella in Creative Misfits Blog
Mask: 56byCreativeSimone in Creative Misfits Blog
Plugins: xero - radiance
Font: Ironick-Normal
*open your mask and minimize it in your workspace*
File - New - 700x700 - Fill with white
Open frame 1 - resize by 50% - sharpen - c/p as new layer
Open netting 1 - resize by 75% - c/p as new layer - move under frame
Open bow2 - c/p as new layer - place to left
Open paper4 - c/p into selection - move under frame
Open tube close up - c/p as new layer - place face to fit inside frame
Click inside frame - expand by 5 - new layer
On tube layer - invert - delete - invert
On paper layer - invert - delete - deselect
On tube - xero - radiance - default settings - change opacity to 86
Open full tube - c/p as new layer - place to the right
Duplicate - xero - radiance - change opacity to 50
Open balloons - resize by 50% 2x - c/p as new layer - place to left
Open feather1 - resize by 50% - c/p as new layer - place to left
Open horse shoe - resize by 50% 2x - c/p as new layer - place to left
Open pot o gold - resize by 50% 2x - c/p as new layer - place to left
Open top hat - resize by 50% then by 75% - c/p as new layer - place to left
Go to background layer
Open paper 6 - c/p as new layer
Layers - new mask layer - from image
find your mask name in source window - mask from source luminance - hit ok
merge group - delete background - merge visible
Add your credits and your name
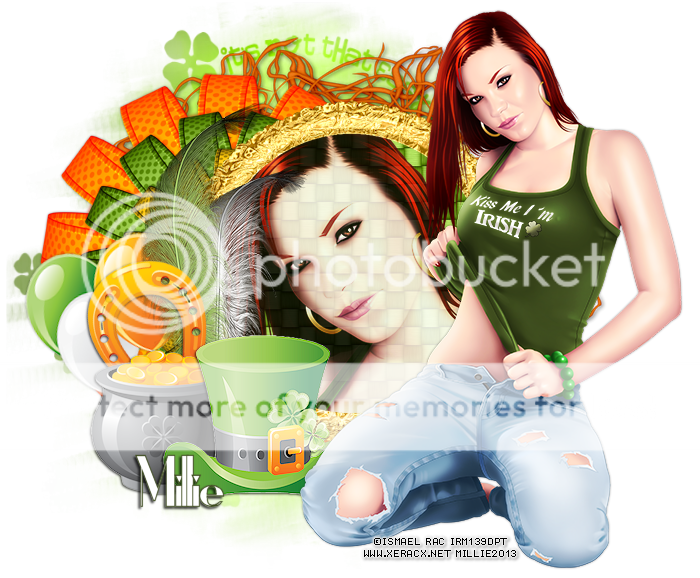
Tuesday, February 19, 2013

*click on image to view full size*
FTU Got A Bit Of Irish In Me
This tutorial was written by me on February 19, 2013.
It was made out of my own creation and any similarity is purely coincidental.
I used pspx2 but any version should work without problems.
Let's get started!
Artist: Ismael Rac
Scrapkit: Bit Of Irish by Manipulated by Magik
Mask: mask1pre by Chas
Plugins: porcelain
Font: OzzyII and Glider Girls
*open your mask and minimize it in your workspace*
File - New - 700x700 - Fill with white
Open frame 1 - resize by 85% - sharpen - c/p as new layer
Click inside frame layer w magic wand - expand by 5
Open paper 7 - c/p as new layer - invert - delete - deselect
Move paper under frame
Duplicate frame - change blend to overlay
On bottom frame add drop shadow of 2 -2 65 5 black
Open lucky glasses - resize by 50% - c/p as new layer - place to right
Open flower - c/p as new layer - place to left
Open vines - c/p as new layer - move down a bit
Open shamrock lolli - resize by 50% - c/p as new layer - place to right
rotate to the right some with deform tool
Open rose - resize by 50% - sharpen - c/p as new layer
Open tube - resize to fit your tag - c/p as new layer
Xero - porcelain - default - change blue channel to 0
Open sparkle 2 - c/p as new layer - place to your liking
Open film - resize by 75% - adjust - move down some
c/p your tube - move under frame - resize it by like 50%
place to the right - duplicate - mirror - merge down
Click inside film with your magic wand - expand by 2
On tube layer - invert - delete - invert
New layer - flood fill with gradient consisting of purple from frame and white
Move layer under tube layer
On tube layer change blend mode to luminance (L) - opacity to 45
Duplicate change blend mode to screen - opacity to 65
Add drop shadow to the film
Open hat - resize by 65% - c/p as new layer - place to left
Open mug of beer - resize by 60% - sharpen - c/p as new layer
Place to the bottom right
Open ribbon - c/p as new layer - place to bottom of tag
Open lace ribbon - resize by 85% - c/p as new layer - move to bottom of film
On background layer
Open glitter spatter - c/p as new layer - place to left
duplicate - mirror - flip - move down some
Open flower 3 - resize by 65% - c/p as new layer - place to left
Duplicate 3x and place them in a row to the left - merge them together
duplicate - mirror - move it around to your liking
Go to background layer - click inside it w magic wand - new layer
Open paper9 - c/p into selection - deselect
Layers - new mask layer - from image
Find your image in source window - mask made from source luminance - hit ok
Merge group - delete background - merge visible
Write "a bit of irish in me" with your text tool in yellow from tag
OzzyII font, 48pt, foreground null - convert to raster layer - add drop shadow
Change blend to screen and place over film - duplicate 2x - merge down
add credit and name

This tag was made with fabulous work of Tony Tzanoukakis.
This kit is called Lucky Me by Niqui's Designs and you can find it HERE
Here are some snags for you all.
I hope you like them and can use them :)
Click on image to save full-sized.


Subscribe to:
Posts
(Atom)


