


Tuesday, July 30, 2013

*click on image to view full size*
PTU Sweet and Beautiful
This tutorial was written by me on July 30, 2013.
It was made out of my own creation and any similarity is purely coincidental.
I used pspx5 but any version should work without problems.
If you're doing this tutorial you must have good psp knowledge and be familiar with the tools.
Let's get started!
Artist: Ellie Milk
Scrapkit: Anita by Amy Marie's Kits
Mask: Mask 9 by Melissaz Creationz
Font: Rage Italic
*Open your mask and minimize it in your workspace*
File - New - 700x700 - flood fill w white
Open 51 - resize by 50% - sharpen - c/p as new layer
Open 33 - c/p as new layer - place to the right
Open 1 - c/p as new layer - place to the right
duplicate - place to left - flip horizontal
Open 44 - c/p as new layer - place to the left
Open 34 - c/p as new layer - place to right
Open 32 - c/p as new layer - place to right
Open 7 - resize by 50% - sharpen - c/p as new layer
Place to the right - duplicate - place to the left
Open 45 - c/p as new layer - place to bottom
Open tube - resize to fit tag - place to left some
On background layer
Click on background with magic wand - new layer
Open paper19 - c/p into selection
Layers - New mask layer - From Image
Find your mask in source window - hit ok
Merge group - resize mask by 85%
Open 47 - c/p as new layer - place to left
Open 88 - place to the bottom
Delete background - merge visible - add credits and name


Awesome new releases now at the Xeracx STORE
Aren't they beautiful!?
Stop by www.xeracx.net/store

This tag was made with awesome COMING SOON Beautiful Dream tube and kit.
She will be available in Arthur's Store soon so make sure you keep your eyes on it.
I also made a template

You can download it HERE
Monday, July 29, 2013

This tag was made with fabulous Bellisima tube COMING SOON from Arthur Crowe
I used matching kit and you can find them both in Arthur Crowe's Factory SOON!
I made a template to use with it.

You can download it HERE


Sunday, July 28, 2013

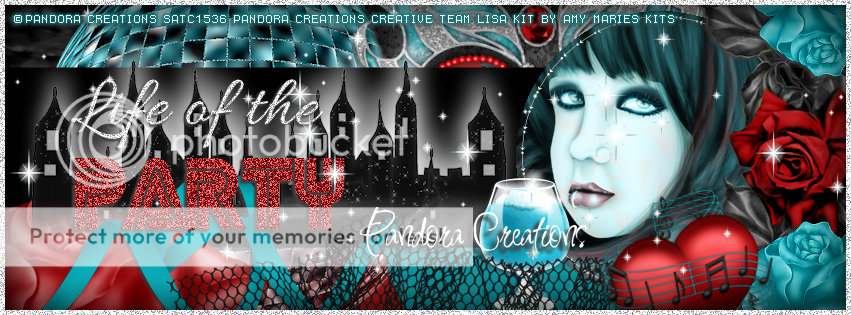
*click on image to view full size*
PTU Life Of The Party
This tutorial was written by me on July 28, 2013.
It was made out of my own creation and any similarity is purely coincidental.
I used pspx5 but any version should work without problems.
If you're doing this tutorial you must have good psp knowledge and be familiar with the tools.
Let's get started!
Artist: Big Bety by Pandora Creations
Scrapkit: Lisa by Amy Marie's Kits
Template: Timeline Template 37
Font: Inspiration
*Open your mask and minimize it in your workspace*
Open template - duplicate - close original
Delete cr layer
Click inside background layer w magic wand
Open paper26 - c/p into selection
Delete layer 1
ON layer 2
Open 74 - c/p as new layer - place to the left
Open 34 - c/p as new layer - place to right some
with your deform tool rotate it to left a little bit
Click on layer 3 w magic wand
Open pp24 - c/p into selection - deselect - move to bottom
On layer 4
Open 57 - c/p as new layer - place to the left
Open 39 - c/p as new layer - place to the bottom left
Open 84 - c/p as new layer - place to bottom some and left
Merge layer 6 down to layer 5
Adjust - add noise - uniform - 100 - add drop shadow 3x
On layer 7
Open half tube - c/p as new layer
Place to the right
Click in layer 7 circle w magic wand
On tube layer - invert - delete - invert
new layer - open pp7 - c/p into selection - deselect
Move paper under tube
On tube change blend to Luminance (L)
duplicate - change blend to screen - opacity to 79
Add drop shadow to layer 8
Open 23 - resize by 50% - sharpen - c/p as new layer
Place to right some and to the bottom
Open 56 - c/p as new layer - place to the right
Open 40 - resize by 50% - sharpen - c/p as new layer
Place to the bottom right - duplicate - place to top - flip vertical
Merge down
Open 5 c/p as new layer - place to bottom
Open 76 - resize by 50% - c/p as new layer
Place to the bottom right
Open 79 - c/p as new layer - place to left
duplicate - place to right - merge down - duplicate - merge down
Merge visible - add credits and name

Saturday, July 27, 2013

*click on image to view full size*
PTU Blue is Sexy and Elegant
This tutorial was written by me on July 27, 2013.
It was made out of my own creation and any similarity is purely coincidental.
I used pspx5 but any version should work without problems.
If you're doing this tutorial you must have good psp knowledge and be familiar with the tools.
Let's get started!
Artist: Bad Girl Valentine by Ismael Rac
Scrapkit: Blue Romance by Bookworm Dezines
You can find this kit for 50% at ScrapCandy since Bookworm is featured Designer of the month!
Mask: 14 by moonbeams and spiderwebs
Font: Allura
*Open your mask and minimize it in your workspace*
File - New - 700x700 - flood fill w white
Open 31 - resize by 65% - sharpen - c/p as new layer
Click inside frame on both rectangles w magic wand
Expand by 5 - open paper7 - c/p as new layer
Invert - delete - deselect - move under your frame
Duplicate your paper - change blend mode to screen - merge down
Open your tube close up - c/p as new layer - place to your liking
Click inside frame w magic wand again - expand by 5
invert - delete on tube layer - deselect
Xero - radiance - default settings - hit ok
Change blend mode to overlay
On frame layer
Open 40 - c/p as new layer - place to the bottom
Open half tube - c/p as new layer - place to right
flip horizontal
Open 30 - resize by 50% - c/p as new layer - place to right
Open 22 - resize by 50% 2x - c/p as new layer - place to bottom right
Open 19 - resize by 50% - c/p as new layer - place to bottom right
duplicate - flip horizontal - place to right
On background layer
Click on background with magic wand - new layer
Open paper15 - c/p into selection
Layers - New mask layer - From Image
Find your mask in source window - hit ok
Merge group
Open 38 - c/p as new layer - place to the top right
duplicate - move to the left a little
Open 39 - resize by 85% - sharpen - place to the right
Delete background - merge visible - duplicate - change blend to soft light
Add credits and name
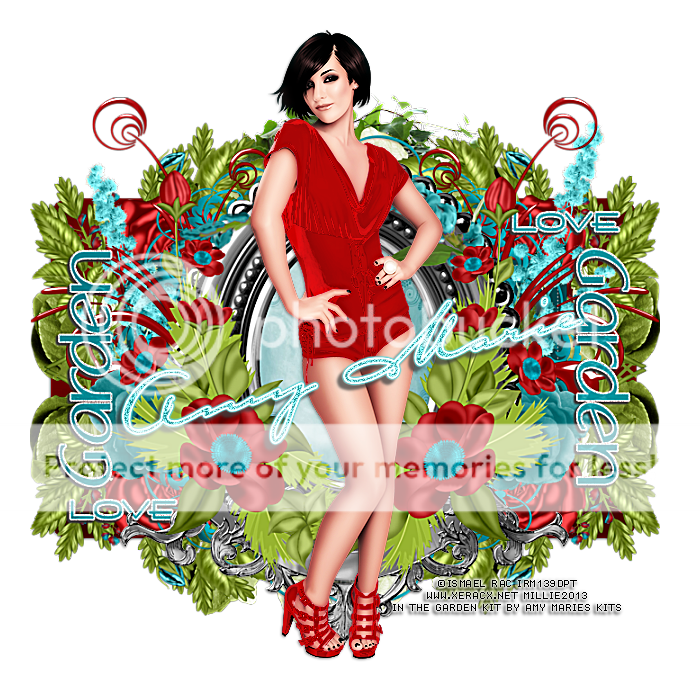
*click on image to view full size*
PTU Love Garden
This tutorial was written by me on July 27, 2013.
It was made out of my own creation and any similarity is purely coincidental.
I used pspx5 but any version should work without problems.
If you're doing this tutorial you must have good psp knowledge and be familiar with the tools.
Let's get started!
Artist: Check Me Out by Ismael Rac
Scrapkit: In the Garden by Amy Marie's Kits
**Exclusive to AmyMarie's Store**
On sale for $1.00 all weekend!
Template: 291 by me HERE
Font: Carlotta
Open template - duplicate - close original
Make background visible - delete cr layer
Image - canvas size 700x700 - fill background w white
Click on layer 1 with magic wand
Selections - modify - smooth selection
Smooth amount 10 Anti-Atlas checked - hit ok
Open paper11 - c/p into selelction - deselect - add drop shadow
Open 3 - c/p as new layer - place to top left
duplicate - move to the bottom - flip vertical - merge down
duplicate - place to the right - flip horizontal - merge down
On layer 2
Open 42 - c/p as new layer - place to bottom right
duplicate - move to the top - flip vertical - merge down
duplicate - place to the left - flip horizontal - merge down
On layer 3
Open 31 - c/p as new layer
Open 49 - c/p as new layer - place to the right
duplicate - place to left - flip horizontal
Open 24 - c/p as new layer - place to the left
duplicate - place to the right - flip horizontal
Open 9 - resize by 50% - c/p as new layer
Place to the left - duplicate - place to the right
Delete layer 4
Merge layers 5 thru 8 together
Selections all - float - defloat - new layer
Open paper19 - c/p into selection
Expand by 2 - new layer - fill with white
Adjust - add noise - uniform - 100 - hit ok - deselect
Move new layer under words and add drop shadow
On layer 9
click inside it with magic wand
Open paper5 - c/p into selection - deselect
On layer 10
Open 47 - c/p as new layer - place to the top
flip vertical - add drop shadow
Open 44 - c/p as new layer - place to left
duplicate - place to the right
Open 54 - c/p as new layer - add drop shadow
Open full tube - recolor to match your tag if you want
c/p as new layer - place to middle
Xero - porcelain - change blue channel to 0 - hit ok
duplicate - change blend mode to overlay
change opacity to 73 - merge down
On background layer
Open 64 - c/p as new layer - place to the top
delete background layer - make tube layer invisible
merge visible - resize by 90% - sharpen more
Make your tube visible - merge visible - add credits and your name


This tag was made w artwork by Michael Landenfeld
You can find his art in CDO
I used PTU IB-JessicaDougherty 39-3 kit by Abstract Creations
You can find it HERE


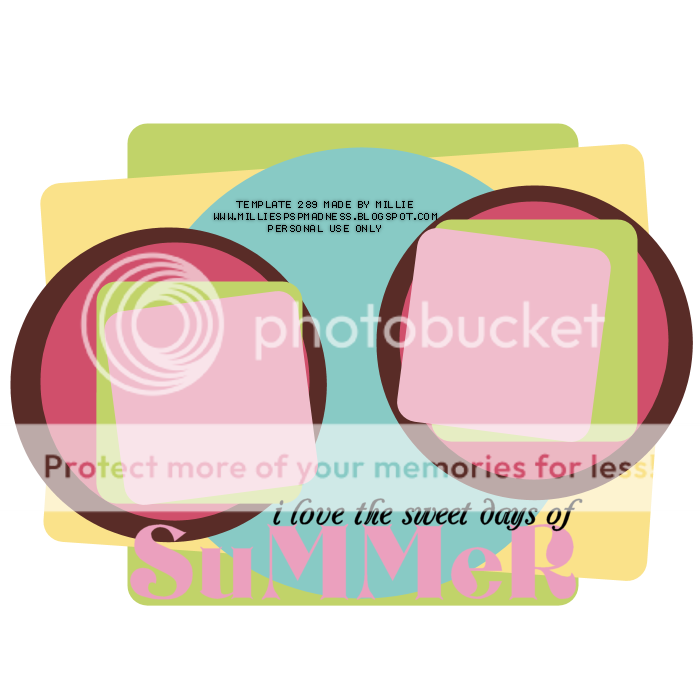
Rissa from Rissa's Designs and me got together and made some templates!
We were inspired by Rac's Bad Student since is getting close to the time kids are going back to school!
You can find the tube in Xeracx Store
I hope you like them and can use them!
You can download them HERE
or you can download them from Rissa's Blog HERE
Stop by her blog anyway cuz she has lots of freebies!

*click on image to view full size*
PTU Flowery Candie Land
This tutorial was written by me on July 26, 2013.
It was made out of my own creation and any similarity is purely coincidental.
I used pspx5 but any version should work without problems.
If you're doing this tutorial you must have good psp knowledge and be familiar with the tools.
Let's get started!
Artist: Keith Garvey
Scrapkit: Candie Land by Amy Marie's Kits
Mask: 44 by moonbeams and spiderwebs
Font: Big Surprise
*Open your mask and minimize it in your workspace*
File - New - 700x700 - flood fill w white
Open 95 - resize by 75% - c/p as new layer
Click your frame w magic wand - expand by 5 - new layer
Open paper4 - c/p into selection - deselect
Move paper under frame
Open 22 - c/p as new layer - place to left some
Open 13 - c/p as new layer - move left a little bit
Open full tube - c/p as new layer - place to middle some
duplicate tube - change blend to soft light
Add drop shadow to your frame
Open 29 - resize by 50% - c/p as new layer - place to top right
Open 24 - c/p as new layer - place to bottom
Open 26 - c/p as new layer - place to the left
Open 63 - resize by 75% - c/p as new layer
Place to the left
Open 23 - c/p as new layer - place to liking
Open 71 - resize by 50% - sharpen - c/p as new layer
Place to bottom
Open 58 - resize by 50% - c/p as new layer
Place to the bottom left
Open 70 - resize by 50% - sharpen - c/p as new layer
Place to bottom right
Open 67 - resize by 50% 2x - sharpen - c/p as new layer
Place to the right
On background layer
Click on background with magic wand - new layer
Open paper6 - c/p into selection
Layers - New mask layer - From Image
Find your mask in source window - hit ok
Merge group - move mask to left
duplicate - move mask to the right
On the mask on the left flip horizontal - merge masks together
Open 68 - c/p as new layer - place to top right
duplicate - place to top left - merge down
Duplicate - resize by 75% - move up some
Open 48 - resize by 75% - c/p as new layer - place to top some
duplicate - place to bottom some - flip horizontal - flip vertical
Merge down
Delete background layer - merge visible - duplicate
change blend mode to soft light - opacity to 75
Add credits and name
Friday, July 26, 2013

*click on image to view full size*
FTU Pretty In Purple
This tutorial was written by me on July 26, 2013.
It was made out of my own creation and any similarity is purely coincidental.
I used pspx5 but any version should work without problems.
If you're doing this tutorial you must have good psp knowledge and be familiar with the tools.
Let's get started!
Artist: Keith Garvey
Scrapkit: Pretty Purple by Bookworm Dezines
Font: Rage Italic
*Open your mask and minimize it in your workspace*
File - New - 700x700 - flood fill w white
Open 10 - resize by 50% - sharpen - c/p as new layer
Open tube close up - c/p as new layer - place under frame
Click in frame w magic wand - expand by 5 - new layer
Open paper12 - c/p into selection
On tube layer - invert - delete - deselect
Xero - radiance - default settings
Change blend mode to Luminance (L) - change opacity to 44
Duplicate tube - change blend to screen - opacity to 100
Add drop shadow to your frame - close background layer - merge visible
Open background layer again
Move merged layer to the left
Open ele19 - resize by 50% - sharpen - c/p as new layer - move to the right some
duplicate - change blend mode to overlay - merge down
duplicate - move down some
Open full tube - c/p as new layer
xero - porcelain - change blue channel to 0 - hit ok
duplicate tube - change blend mode to soft light
On background layer
Open 25 - c/p as new layer - lace to the top
Open ele16 - c/p as new layer - place to left
Open 21 - resize by 80% - c/p as new layer - place to left and bottom some
Open 20 - c/p as new layer - place down some - duplicate - merge down
Delete background layer - merge visible
duplicate - change blend to overlay - opacity to 44 - merge down
Add credits and your name

*click on image to view full size*
FTU The Favorite Rose
This tutorial was written by me on July 26, 2013.
It was made out of my own creation and any similarity is purely coincidental.
I used pspx5 but any version should work without problems.
If you're doing this tutorial you must have good psp knowledge and be familiar with the tools.
Let's get started!
Artist: Elke by Roman Zaric
Scrapkit: La Vie En Rose by A Space Between
Mask: 84 by WSL
Font: Clarissa
*Open your mask and minimize it in your workspace*
File - New - 700x700 - flood fill w white
Click on background with magic wand - new layer
Open paper5 - c/p into selection
Layers - New mask layer - From Image
Find your mask in source window - hit ok
Merge group
Open ele56 - c/p as new layer - place to the top right
duplicate - move to the top left - merge down - duplicate
Place to the bottom
Open 32 - c/p as new layer - place to right - duplicate - place to left
Open ele49 - resize by 80% - sharpen - c/p as new layer
Click your frame w magic wand - expand by 5 - new layer
Open paper5 - c/p into selection - deselect
Move paper under frame
Add drop shadow to your frame
Open ele18 - c/p as new layer - move to left and top a bit
Open 13 - resize by 50% - sharpen - c/p as new layer - place to left
duplicate - move down some - merge down - duplicate
move to the right - flip horizontal - place to liking
Open ele25 - c/p as new layer - place to right - flip horizontal
Open ele36 - c/p as new layer - place to the right
Open 31 - resize by 50% - sharpen - c/p as new layer
Open ele39 - resize by 60% - c/p as new layer - place to bottom
Open ele40 - c/p as new layer - place to the bottom right
duplicate - place to the bottom left
Open ele26 - resize by 80% - c/p as new layer - place to the bottom
Open ele45 - resize by 50% - sharpen - c/p as new layer - place to left
Open tube - resize to fit your tag - c/p as new layer
Place where it looks best to you
Delete background - merge visible - add credits and name

*click on image to view full size*
PTU Such A Hot Tamale
This tutorial was written by me on July 26, 2013.
It was made out of my own creation and any similarity is purely coincidental.
I used pspx5 but any version should work without problems.
If you're doing this tutorial you must have good psp knowledge and be familiar with the tools.
Let's get started!
Artist: Hot Tamale by Arthur Crowe
Scrapkit: Chilipepper by Amy Marie's Kits
Font: Janda - Happy Days
File - New - 700x700 - flood fill w white
Merge layer 2 down to 1
Click on layer 1 with magic wand
Selections - modify - smooth selection
Smooth amount 10 Anti-Atlas checked - hit ok
Open paper21 - c/p into selelction - new layer
Selections - Modify - Select Selections Borders
Both sides checked - width 3 - hit ok - fill w green from tube
Adjust - add noise - uniform - 100
Open 42 - c/p as new layer - place to the top right
Click on layer 3 with magic wand
Selections - modify - smooth selection
Smooth amount 10 Anti-Atlas checked - hit ok
Open paper20 - c/p into selelction - deselect - add drop shadow
Open 56 - c/p as new layer - place to bottom
Go to layer 4
Open tube close up - c/p as new layer - place on top of layer 4
click inside layer 4 w magic wand - on tube - invert - delete
Xero - radiance - default settings
Change blend mode to luminance (L) duplicate
change blend mode to screen and opacity to 81
Merge tubes down to layer 4
Selections - Modify - Select Selections Borders
Both sides checked - width 3 - hit ok - fill w green from tube
Adjust - add noise - uniform - 100
Merge border to layer 4
Delete layer 5
On layer 6
Open 36 - c/p as new layer - place to the left
Duplicate - move a bit down and to the right
duplicate and move to the right
Open 59 - c/p as new layer - add drop shadow
Open 100 - c/p as new layer - place to the right
duplicate and place to the left - move down some
Open 39 - resize by 50% - sharpen - c/p as new layer
Place to the top right
Merge layer 8 down to 7
click on both squares w magic wand
Open paper7 - c/p as new layer - invert - delete - deselect
Open 78 - c/p as new layer - place to the left
Open 74 - c/p as new layer - place to the right
Open 64 - c/p as new layer - place to the right
Open 44 - resize by 70% - c/p as new layer
Open 57 - c/p as new layer - place to the bottom
Open 10 - c/p as new layer - place to the left
rotate with your deform tool to the left a little bit
Add drop shadow
Open 16 - resize by 50% 2x - sharpen - c/p as new layer
Place to the bottom left
Open 33 - resize by 50% 2x - sharpen - c/p as new layer
Place to the bottom left
On layer 9 and 10
Eye candy - gradient glow w these settings:
(Basic) glow width 3 - soft corners 25 - overall opacity 100
draw only outside selection checked
(Color) medium - black hit ok
Add drop shadow to both
Delete background - merge visible - add credits and name


New Releases are now available for Roman Zaric
Geisha tube and kit
Magnoly tube and kit
Marina tube and kit
You can buy these individually, with a matching kit, or in a bundle pack!
Visit the Roman Store HERE
Thursday, July 25, 2013

This tag was made with the fabulous artwork by Roman Zaric!
Her name is Magnoly and she will be available in his store really soon!
I also used matching scrapkit by Desirena Designs.
The kit will also be available with the tube soon!
Visit the Roman Store HERE
I made a template
You can download the template HERE
Wednesday, July 24, 2013

*click on image to view full size*
PTU Flores Rosadas
This tutorial was written by me on July 24, 2013.
It was made out of my own creation and any similarity is purely coincidental.
I used pspx5 but any version should work without problems.
If you're doing this tutorial you must have good psp knowledge and be familiar with the tools.
Let's get started!
Artist: Tatiana by Roman Zaric
Scrapkit: Rosa by Amy Marie's Kits
Mask: mask of choice
Font: MA Sexy
*Open your mask and minimize it in your workspace*
File - New - 700x700 - flood fill w white
Open 40 - c/p as new layer - place to bottom
Open tube - resize to fit your tag - c/p as new layer
Xero - porcelain - change blue channel to 0 - hit ok
Duplicate tube - change blend to screen - merge down
Open 64 - c/p as new layer - place down some
Open 92 - c/p as new layer - place to the right
Open 95 - resize by 50% - place to the right
Open 45 - c/p as new layer - place to the left
Open 44 - resize by 50% - place to the right
Open 78 - resize by 50% - sharpen - place to the bottom
Open 101 - resize by 50% 2x - sharpen - c/p as new layer
Place to the bottom right
Open 73 - resize by 50% - sharpen - c/p as new layer - place to bottom left
Open 75 - resize by 50% - sharpen - c/p as new layer
Place to the top left
On background layer
Click on background with magic wand - new layer
Open paper15 - c/p into selection
Layers - New mask layer - From Image
Find your mask in source window - hit ok
Merge group
Open 48 - c/p as new layer - place to bottom - duplicate
Move to the top - flip horizontal then flip vertical
Open 86 - c/p as new layer - free rotate to the left by 90 degrees
Place to the left - duplicate - flip horizontal - place to right
Delete background - merge visible - add credits and name

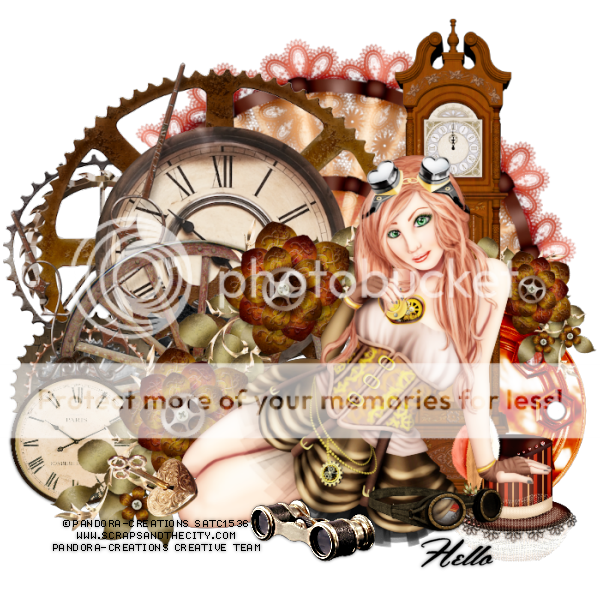
This tag was made with awesome Jane tube by Pandora Creations
You can find this tube in SATC
I used PTU Steampunk Girl by Irish Princess Designs
You can find this kit in Scrap Candy.

Here are some snags!


Subscribe to:
Posts
(Atom)


