


Wednesday, October 31, 2012


*click on image to view full-sized*
PTU Vintage Days Timeline
This tutorial was written by Millie on October 31, 2012.
It was made out of my own imagination and any similarities is just a coincidence.
I used pspx2 but any version should work fine with it.
Artist: Roman Zaric
Scrapkit: Vintage Days by Across The Pond Designs HERE
Font: I used Jellyka Western Princess
Plugins: xero - porcelain
File - new - 851x315
flood fill with white
Open paper3, resize by50%
c/p as new layer
Open element 20, resize by 50% 2x
c/p as new layer
Move some to the right of the tag
Open tube closeup, c/p as new layer
Move under the frame
Place face inside of frame
Effects - xero - radiance - change blue channel to 0
With your freehand selection tool (lasso) draw around rectangle of frame
On tube layer - invert - delete
Selections - none
Go to paper layer
Open element 17, resize by 50%, and then by 75%, sharpen
c/p as new layer and move to the bottom of the tag
place to your liking
Open element40, resize by 50% 2x, sharpen, c/p as new layer
Move so its layer right above paper, move down some on the tag
Open layer 31, c/p as new layer, move so that is right under the frame
Move it to the top of tag or to your liking
Duplicate this layer and move it to the left of the tag some
Open element 30, resize by 50%, sharpen
c/p as a new layer, move to middle of the tag, duplicate
Move duplicate above frame and to the right of the tag
Add or remove whatever elements you want if you like
When you're happy with your tag, merge - all (flatten)
If you want to make an avatar to go with this open a new canvas 180x180
Copy your merged layer and paste it as a new layer on avatar canvas
Place to your liking when you are done merge all - flatten
Back on your timeline tag - select all - selections - modify - contract by 10
new layer, invert, flood fill with a light color from your tag
change blend mode to overlay
Add a drop shadow of 0 0 50 3 if you like
*do the same thing to your avatar* except you only contract by 5
Add copyright credits and your name to both
REMEMBER TO FOLLOW TOU GUIDELINES FOR FB TIMELINES
Thanks for trying my tutorial :)

Awesome new PTU tutorial written by Rhonda using my template 107.
If you want to give this tutorial a try you can visit her blog A Creative Beat HERE
Thanks so much Rhonda for using my template :)
Tuesday, October 30, 2012
You can download it HERE

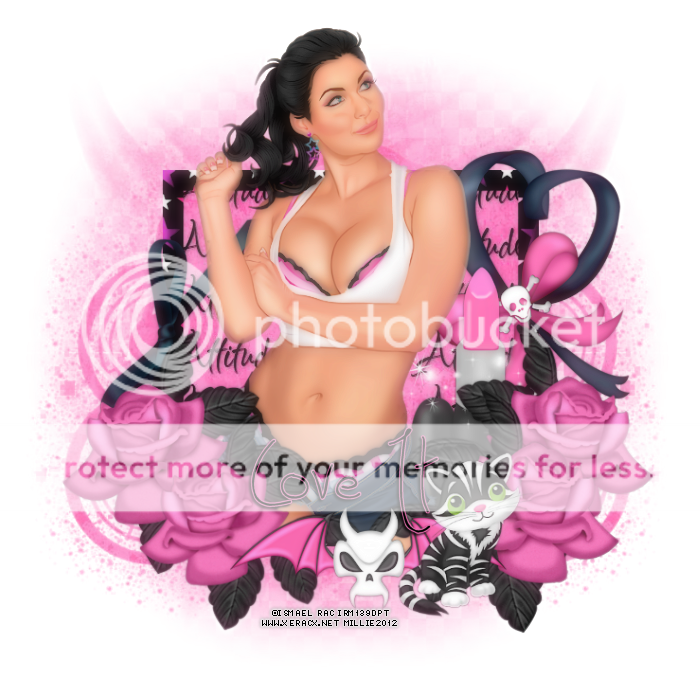
This tag was made with awesome work of Ismael Rac.
This tube was just released to his store.
It is called Teasing Attitude along with the matching kit.
You can find them all HERE
Also made some snags for you all.
Please click on image to save full size.
Thanks for stopping by :)


Domestic Violence Template I made for a challenge in Pimpin' Pspers Forum.
You can download this template on their blog HERE

Got attitude? Well so do the new rac girls. There is a 31% off Halloween Bash sale till November 1st. Come grab some bargins and remember the Witches of XeracX fly away halloween night. If you spend 10$ in one reciept after discounts and sales then send in for your bonus tube and kit.

Another tag with the soon to be released Hot Goth Tube!
I made this tag using her matching kit made by the awesome KIT Team.
Don't forget to visit Arthur Crowe's Factory so you know when awesomeness hits the store!
I also made some snags!
Remember to click on the image to save it full-sized!
Thanks for stopping by!


Pamela from Redefined Designs made this cute tutorial using my Template 97
If you want to give this tutorial a try you can find it on her blog HERE
Thanks for using my template Pamela :)

*click image to view full-size*
This tutorial was written by Millie on October 30, 2012.
I made this tag out of my own creativity and any similarity to another is purely coincidental.
I used PSPX2 to make this tag but any other version should be ok.
If you're doing this tutorial then I assume you have psp knowledge.
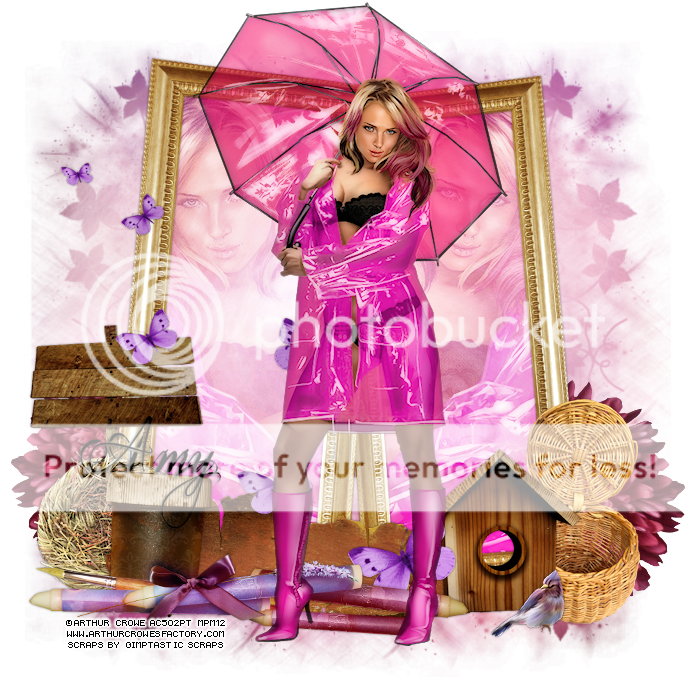
FTU I Flurish In The Fall
Artist: Arthur Crowe HERE
Scrapkit: Flourishing Fall by Gimptastic Scraps HERE
Mask: Melissaz Creationz Mask 9 HERE
Plugins: xero porcelain
Font: I used Eutemia I Italic
File - new - 700x700 - transparent - raster
Flood fill with white
Open frame 5, c/p as new layer
With your magic wand click inside the frame
Selections - modify - expand by 5
Open paper7, c/p as new layer, move under frame layer
Selections - invert - delete
Selections - none
Open your tube closeup, c/p as a new layer
Move tube so the face is inside of the right frame
Effects - xero - porcelain default - change blue channel to 0
Back to frame layer with magic wand click inside right side of frame
Selections - modify - expand by 5
Go to tube layer, selections - invert - delete - selections - none
Grab your tube close up again, c/p as a new layer
Image - mirror
Move tube so the face is inside of the left frame
Effects - xero - porcelain default - change blue channel to 0
Back to frame layer with magic wand click inside right side of frame
Selections - modify - expand by 5
Go to tube layer, selections - invert - delete - selections - none
Merge tubes together then change blend mode to overlay
Back to frame layer
Open sign, resize by 50%, adjust - sharpen, c/p as a new layer
Move to the right of the frame
Open butterflies, resizey by 80%, c/p as a new layer
Place to your liking
Open bark, c/p as new layer, move to bottom right of frame
Open birdnest, resize to 50%, adjust - sharpen, c/p as new layer
Move to the left of the frame
Open basket, resize by 50%, adjust - sharpen, c/p as new layer
Move to the right of the frame
Open full-size tube, resize by 80%, c/p as new layer
Effects - xero - porcelain - settings same as before
Open Artstuff, c/p as a new layer, image - mirror
Move to the left of the frame
Open birdhouse, resize by 50%, c/p as a new layer, move to right of frame
Open bird, resize by 50% 2x, adjust - sharpen, c/p as new layer
Move bird to the right of the bird house
Open flower3, c/p as a new layer, move to the left of the tag
Move flower down so that is on the layer right above background
Duplicate flower, image - mirror, place to your liking
Go to background layer, with your magic wand click inside of it
New layer, open paper7, c/p into selection
Selections - none
Apply your mask
Layers - New mask layer - from image
Find your mask in the source window, create mask from source luminance, hit ok
Merge group
I used my deform tool to resize mask some
Delete background layer, merge visible
Add credits and your name
Monday, October 29, 2012

*Click on image to view full-sized*
This tutorial was written by Millie on October 29, 2012.
I used pspx2 and any version should work just fine.
If you are trying this tutorial I assume you have psp knowledge.
Any resemblance to any other is pure coincidence and definitely not intended.
PTU My Sexy Scarf Keeps Me Warm
Artist: Tony Tzanokakis
Scrapkit: Autumn Scarf Kit HERE
*Scrapkit is sold with tube*
Mask: Horseplay's Pasture Mask 9 HERE
Plugins: Mura Meister - Copies, Xero - Porcelain
Font: I used Ekaterina Velikaya Two
*open your mask and tube and minimize them on your workspace*
File - new - 700x700, transparent - raster
Flood fill with white
Open element19 (frame), resize by 80%, adjust - sharpen
c/p as new layer
Open element20, c/p as new layer
Move the flowers under the frame layer
Open paper8, c/p as new layer and move right above background layer
Open your tube, c/p as a new layer
Place face of tube inside of your frame
With your magic wand, go to frame layer and click inside frame
Selections - modify - extract by 5
On paper layer, selections - invert, delete, invert
On tube layer, selections - invert, delete, invert
Change blend mode to Screen and change opacity to 75
On flowers layer, invert - delete
Change blend mode to overlay and add drop shadow of 2, -2, 75, 3, black
Back on frame layer
Open element10, c/p as new layer, move to the right of the frame
Open element1, c/p as a new layer, move to right of the frame
Duplicate, resize by 80%, and move to middle bottom of frame
Open element25, c/p as a new layer, image - mirror, move to right of frame
Go to background layer, open element14, c/p as a new layer
Effects Mura Meister - Copies

Resize by 90%, adjust - sharpen
Open element5, c/p as a new layer
Go to top layer
Open element4, c/p as a new layer, image - mirror, move to bottom of frame
Open your tube, resize to fit tag, c/p as a new layer
Move to the right of the tag, effects - xero - porcelain - default settings
Duplicate tube, change blend mode to soft light
Using your text tool and Ekaterina Velikaya font 36pt anti-atlas smooth
foreground null, background black
(or any script font) write the following:
"My sexy scarf keeps me warm" or write whatever you want
I added medium gradient glow, in blue and then drop shadow of 2 2 70 3
Its not necessary though you can just add drop shadow
Go to background layer, open paper 5, c/p as a new layer
Layers - new mask layer - from image
Find your mask in your source window, create mask from source luminance, hit ok
Merge group
Delete background layer, merge visible
Add your credits and your name

You can download it HERE
Sunday, October 28, 2012

*click on image to view full-size*
FTU Fabulous
This tutorial was written and created by Millie on October 28, 2012.
I am assuming if you're doing this tutorial that you have PSP knowledge.
I use PSPX2 but any version should be okay.
Any resemblence to any other is coincidence and not intended.
Artist: Tony Tzanoukakis HERE
Template: 106 by me HERE
Mask: any of your choice
Font: I used Impact and Carlotta for the name
Plugins: xero - porcelain, penta - color dot, dragonfly - retrodots, vm extravaganza - transmission
Sparkles of choice
c/p = copy and paste
Open template 106, ctrl + d, close original
Delete cr layer and make background layer visible
Go to layer 2, merge down to layer 1
Effects - Dragonfly - RetroDots with settings below:

Go to layer 3, effects - penta - color dot(default settings)
Change value to 255 and distance to 5, hit ok
Open tube close up, c/p as a new layer, move tube so the fact shows at top of layer 3
Back to layer 3, selections - all, float, defloat, invert, back to tube, delete
Selections - none
On tube xero - porcelain - default, change blue channel to 0
Change blend to luminance (L), opacity to 90
Go to layer 4, open your tube close-up, c/p as a new layer
Move to the left of the oval, duplicate, image - mirror
Merge tubes together
Click inside layer 4 with your magic wand, then go back to tubes you just placed
selections - invert - delete, invert
Back on layer 4, new layer, flood fill with gradient (use 2 colors from tube)
Foreground/background gradient, sunburst, angle 36, repeat 3
Back on tubes - xero - porcelain same setting as above 2x
Change blend mode to luminance (L), and change opacity to 80
New layer, selections - select selections borders,
both sides, 1
new layer, flood fill with white, adjust - add noise - uniform, 100
Selections none
Go to layer 5, c/p tube close up, place in center of circle
back to layer 5, click inside of it with magic wand
effects, vm extravaganza, transmission, default settings
go to tube layer, selections - invert - delete
selections - none, change blend mode to screen
Go to layer 7 and merge down to layer 6
Go to layer 6, c/p tube close up as a new layer
Move the face so its inside the top circle on layer 6\
Back on layer 6 with your magic wand click inside the top circle
Back on tube, selections - invert, delete, selections - none
Duplicate tube, move the duplicate so its on top of the bottom circle in layer 6
Merge these two together, duplicate, image - mirror, merge down
Effects - porcelain, change blend mode to screen
Back on layer 6, selections - all, float - defloat, new layer
Flood fill with gradient same as before, go to tube layer again and add new layer
Selections - select selections borders,
both sides, 1
new layer, flood fill with white, adjust - add noise - uniform, 100
Selections none
Go to layer 9, open your full tube, c/p as a new layer
Place tube on top of circles that belong to layer 9
Duplicate tube, and merge down
Merge layer 9 down to 8
With your magic wand click inside all of the circles of this layer
Click on tube layer, selections, invert, delete, invert
Selections - Modify - Select selections borders
both sides, 1
new layer, flood fill with white, adjust - add noise - uniform, 100
Selections none
Back to tube layer, xero - porcelain, same settings
Change blend mode to overlay
Close your background layer and merge visible
Add sparkles of your choice
Merge down
Open your full tube, resize to fit your tag to your liking
c/p as a new layer, place in center of tag or where you like i moved mine to the right some
Add effects - xero - porcelain same as before
Using Impact font write "FABULOUS" or another word of your liking
I used gradient on my background and null on foreground
Effects - penta - color dot - same setting as before on it
Selections - all, float, defloat, selections - modify - extract by 1
New layer, flood fill with white, adjust add noise same as before
Move this layer under gradient layer
Add a drop shadow
Go to background layer, new layer, flood fill with gradient
apply your mask
merge group
delete background layer, merge visible
Add your credits and your name
We're done!
Thanks for trying my tutorial!
Saturday, October 27, 2012


*click on image to view full-size*
PTU I Love Autumn Time
This tutorial was written by Millie on October 27, 2012.
Any resemblence is just coincidence and not intentional.
I used pspx2 but any version should work just fine.
Artist: Arthur Crowe
*this is an exclusive tube for ACDivas Forum*
You can earn it HERE
Scrapkit: Fabulous Autumn by Wilma4Ever HERE
Mask: Moonbeams and Spiderwebs Mask 36 HERE
Plugins: xero - radiance
Font: I used Ballerino ITC
Drop shadow throughout the tutorial has been 1 1 50 3
c/p = copy and paste
File - New - 700x700 - Transparent - Raster
Flood fill with white
Open element11 (frame), resize by 85%, the resize it by 80%
Adjust - sharpen, c/p as a new layer
Open pp5, c/p as a new layer, move under the frame layer
Open tube close-up, c/p as a new layer
Go back to frame layer
With your magic wand (make sure your mode is on add) click inside all circles
(even the ones that dont fully show)
Selections - modify - expand by 5
Go to paper layer, selections - invert - delete
Go to tube close-up layer, delete
Selections - none
Effects - xero - radiance - default settings
Change blend mode to overlay
Add drop shadow to your frame, close background layer, merge visible
Rename this layer frame
Open Element28, resize by 60%, adjust - sharpen
c/p as a new layer, image - mirror, add drop shadow
Place the top flower on the top left corner of the top frame
Open element15, c/p as a new layer, move to right of frame
Open wordart05, resize by 80%, c/p as a new layer
Place on bottom of frame or where you like it best
Go to background layer, open element 66, resize by 75%, c/p as new layer
Image - free rotate - direction Right and degrees 90, add drop shadow
open element65, c/p as a new layer
open element 23, resize by 70%, c/p as new layer
open element16, c/p as a new layer
Move to the left of the frame, duplicate, image mirror
add drop shadow to both ele16
Open full-tube, resize by 85%, c/p as a new layer
Move to the right of frame, duplicate tube change to tube blend mode to soft light
Add drop shadow to the bottom tube, make sure background is closed and merge visible
Open paper12, resize it to 700x700, c/p as a new layer
Move above background layer and apply your mask
Layers - new mask layer - from image
find your mask in your souce window, create mask from source luminance, hit ok
Merge group
Delete your background layer, crop the tag to your liking
add your credits and your name
We're done!
Thanks for trying my tutorial :)

Friday, October 26, 2012

*click on image to view full-size*
This tutorial was written by Millie on October 26, 2012.
Any similarity to another is just coincidence.
I used PSPX2.
PTU Otoño
Artist: Arthur Crowe HERE
Scrapkit: Otoño by Scrap Rebellion HERE
*The kit is sold with tube not separately*
Mask: Horseplay's Pasture Mask 7 HERE
Font: I used altered regular
Plugins: xero-porcelain
*add drop shadow of 0 0 45 3 throughout unless noted*
File - New - 700x700 - transparent - raster
Flood fill with white, rename background
Open paper1, c/p as a new layer, apply your mask
Layer - new mask layer - from image
Find your mask in the source window drop down
Mask from source luminance and hit ok
Merge - group
Open your full tube, resize to fit tag, c/p as a new layer
Effects - xero - porcelain, change blue channel to 0
Open element4, resize by 80%, adjust - sharpen, c/p as a new layer
Place so that the bottom of fence aligns with tube's legs
Add drop shadow
Open element12, resize by 50%, adjust - sharpen, c/p as new layer
Place under the fence and to the left of tube, add drop shadow
Duplicate, image - mirror, place to your liking on the right of the fence
Duplicate a few more times and move the flowers around your tag to your liking
Go to mask layer, open element 18, c/p as a new layer, move to right of tube
Add drop shadow
Open element one, c/p as a new layer, place to the left of tag
Duplicate layer, image - mirror, duplicate again and move to another location
Open element 10, c/p as a new layer, move to the left of the tag by the fence
Open element 5, c/p as a new layer, move down so its right above the mask layer
Open element9, resize by 50% 2x, adjust - sharpen, c/p as a new layer
Move it so its above the fence layer and move it so feet are at bottom of the fence
add drop shadow
Open element 13, resize by 50%, adjust - sharpen, c/p as a new layer
move it so its above wheel, duplicate - image mirror place to your liking
add drop shadow
Open element 15, c/p as a new layer, move it so its right under the tube
There are a bunch of fabulous elements in this kit, you could play with them all
When you are done delete your background layer and merge visible
Add your copyright and your name and you are done :)
This tag was made with the fabulous work of Arthur Crowe.
You can find this tube Otoño and the matching scrapkit in his store HERE
I made some snags out of this tag for you all.
I hope you like them and use them.
Please click on image to save full-size.
Thanks for stopping by ;)


You can download it HERE
Thursday, October 25, 2012

Awesome NEW RELEASES from Tony Tzanoukakis!!
Check out this lovely pack #19 and also the matching kits that will help you in making a fabulous tag.
But that is not all. He also has some amazing wall papers available for purchase!
So go check out his store now.
What you waiting on? Go HERE

So I was playing with a kit called funky music earlier and couldnt get this out of my head.
LOL.
You can download it HERE

*click on image to view full-size*
This tutorial was written by Millie on October 25, 2012
Any resemblance to any other is simply coincidence and not intentional.
I used PSPX2 and I assume that if you're doing this tutorial you know your way around PSP.
Artist: KiwiFireStorm HERE
Scrapkit: PTU Playing Doctor by Gimptastic Scraps HERE
Mask: Designs By Vaybs mask #107 HERE
Template: #104 by me HERE
Font: I used VTKS Sunny Days
Plugins: xero - porcelain, clarify, vm extravaganza - transmission, eyecandy - gradient glow
Open template 104 by me, ctrl + d, close the original
Delete c/r layer and make background layer visible
Go to layer 1, selections - all, float, defloat, new layer
Open paper3, c/p INTO selection
Selections - none
Go to layer 2, vm extravaganza - trasmission
line width 6, offset 0, contrast 40, hit ok
Go to layer 3, open frame1, resize by 90%, c/p as a new layer
With your deform tool move the frame around so that its same direction as layer 3
Open your tube, c/p as a new layer
Move tube under frame and place it so that face is peeking out of frame
Effects, xero - porcelain same as above, change blend to luminance (L)
Go on frame and add drop shadow of choice
I used a light one
Go to layer 5 and merge it down to 4
With magic wand click inside of the circles
Open paper10, c/p as a new layer, selections - invert, delete
Selections - none
Open frame 3, c/p as a new layer, with deform tool resize it so its size of circle on right
Duplicate frame, move frame on top of bottom circle, see mine for reference
Add drop shadow to frames if you like
Go to layer 6, click inside of it w/ magic wand
Open paper5, c/p as a new layer, selections - invert, delete, invert
New layer, selections - modify - select selections borders, both sides, 3, anti-atlas
flood fill with white, adjust - add noise - uniform 100
Selections - none
Go to layer 7, delete
Time for a couple of elements, place these to your liking
Open nurse, c/p as a new layer, move to the left of the tag
Open medical tape, c/p as a new layer, move to the left of tag
Open laptop, c/p as a new layer, move to left of the tag
Open medicine, c/p as a new layer, move to the left of the tag
Open medicine dropper, c/p as a new layer, image - free rotate - 90 degrees right
Open patient chart, c/p as a new layer, deform tool, rotate it some and move to middle
Open ribbon c/p as new layer and move it to the right some
Open stand, c/p as a new layer and move it to the right some
Go to layer 8, c/p tube as a new layer, image - mirror, place face above circle
Click inside circle (layer 8) with magic wand, go to tube, selections - invert - delete - invert
change blend mode to luminance (L), add porcelain same as before
New layer, selections - modify - select selections borders, both sides, 3, anti-atlas
flood fill with white, adjust - add noise - uniform 100
Selections - none, change blend mode to luminance (L), add porcelain same as before
Open your tube, resize by 80%, c/p as a new layer
Effects - xero - porcelain, make blue channel 0
Effects - xero - clarify - default settings
Duplicate your tube, and change opacity to soft light
On the bottom copy of tube, add drop shadow of 0 0 50 3
Go to layer 9, effects - plugins - eyecandy - gradient glow
basic: glow 3, soft corners 25, opacity 100
color: fat, opacity 100
Add drop shadow
Go to layer 10 and do the same as layer 9
Open RX, resize by 50%, c/p as a new layer
Move it below the tube layer and place to your liking
There are more elements to play with so just have at it
When done placing everything close background layer and merge visible
Open background back up, new layer, flood fill w black
Layers - new mask layer - from image
Find your mask in your source window, create mask from source luminance, hit ok
Merge - group
Delete background layer, merge visible, add credit and your name
Were done
Thanks for trying my tutorial

You can download it HERE

This tag was made with the artwork of Keith Garvey.
I also used awesome PTU Funky Music Scrapkit by Abstract Creations.
Also used my template #103 which you can download below.

Download HERE
Subscribe to:
Posts
(Atom)


