


Tuesday, December 31, 2013

*click on image to view full size*
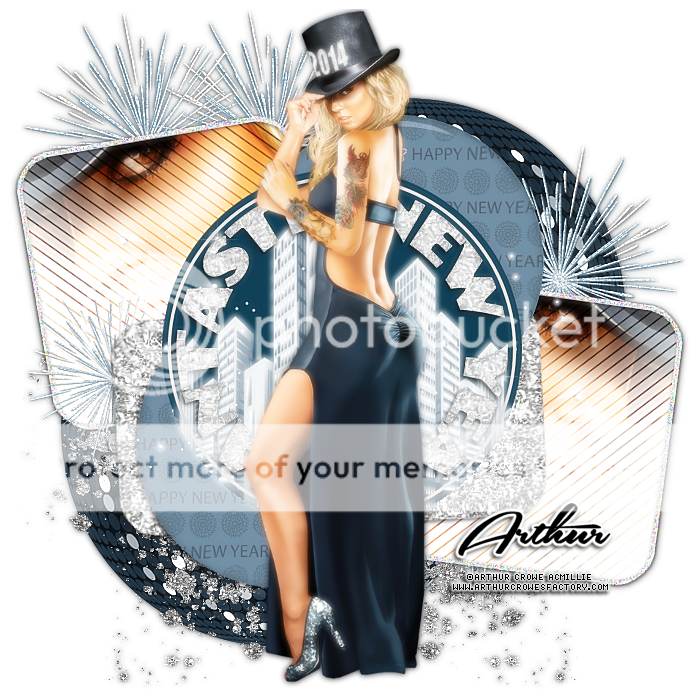
PTU New Year's Blast
This tutorial was written by me on December 31, 2013.
It was made out of my own creation and any similarity is purely coincidental.
I used pspx5 but any version should work without problems.
If you're doing this tutorial you must have good psp knowledge and be familiar with the tools.
Let's get started!
Artist: Ismael Rac
Scrapkit: Bright New Year by Gimptastic Scraps
Font: any of choice
*open your mask and minimize in your workspace*
File - New - 700x700 - flood fill w white
Open background - c/p as new layer
Open fireworks - place to top right - duplicate and mirror - move to bottom
Open scatter - c/p to your liking - drop shadow
Open ribbon - place to the left
Open frame 6 - resize by 75%
Open tube - c/p - mirror place so its inside left side of frame
Click inside frame w magic wand - expand by 5
Open pp of choice as new layer - invert - delete
Move paper under tube
Duplicate tube - adjust - blur - gaussian blur - 3
Change blend mode to screen - opacity to 75
Add dropshadow to frame
Open ornaments - place to right - drop shadow
Open tapes and place to bottom - drop shadow
Open party sign - place to bottom left - drop shadow
Open WA1 - resize by 75% - place to bottom left
Eye candy - gradient glow w these settings:
(Basic) glow width 3 - soft corners 25 - overall opacity 100
draw only outside selection checked
(Color) Fat - hit ok
Add drop shadow
Delete background - merge visible
Crop your tag
Add credits and name


*click on image to view full size*
PTU Angelic Bliss
This tutorial was written by me on December 31, 2013.
It was made out of my own creation and any similarity is purely coincidental.
I used pspx5 but any version should work without problems.
If you're doing this tutorial you must have good psp knowledge and be familiar with the tools.
Let's get started!
Artist: Verymany
Scrapkit: White Flora by Amy Marie's Kits
Mask: 21 from moonbeams and spiderwebs
Plugins: Xero - Porcelain
Font: Southern Arie
*open your mask and minimize in your workspace*
File - New - 700x700 - flood fill w white
Click on background with magic wand - new layer
Open paper14 - c/p into selection - deselect
Layers - New mask layer - From Image
Find your mask in source window - hit ok
Merge group
Open 19 - resize by 85% - sharpen
Click inside frame - expand by 5 - new layer
Open pp12 - c/p into selection - deselect
Add drop shadow to your frame
Open flower of choice
Apply meura meister filter w settings below

Open 106 - c/p to your liking
Open 98 - place to left - drop shadow
Open 72 - place to the bottom - add drop shadow
Open 62 - move to bottom - drop shadow
Open 76 - mirror - place to right - drop shadow
Open 108 - move to bottom - drop shadow
Open 75 - place to bottom - drop shadow
Open 74 - resize by 50% - sharpen - place to the right
Open 105 - place to right
Open tube - resize by 50% - place to your liking
Xero - porcelain - hit ok
add drop shadow to your tube
Delete background - merge visible - sharpen more
Add credits and name
Monday, December 30, 2013

*click on image to view full size*
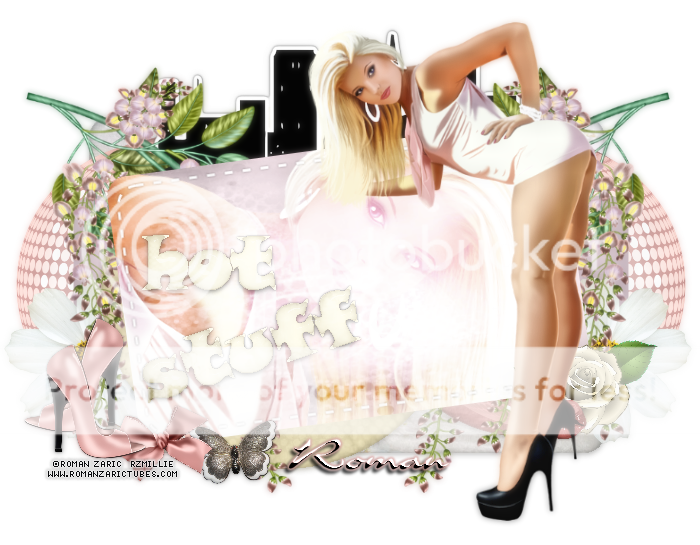
PTU Sweetest Thing
This tutorial was written by me on December 30, 2013.
It was made out of my own creation and any similarity is purely coincidental.
I used pspx5 but any version should work without problems.
If you're doing this tutorial you must have good psp knowledge and be familiar with the tools.
Let's get started!
Artist: Ana by Roman Zaric
Scrapkit: Flora by Bookworm Dezines
Plugin: Xero - Porcelain
Font: Vladimir Script
*open your mask and minimize in your workspace*
File - New - 700x700 - flood fill w white
Open 49 - resize by 50% - sharpen - c/p as new layer
Click inside the frame w magic wand - expand by 5 - new layer
Open pp9 - c/p into selection - deselect
Move paper under frame - duplicate - change blend to screen - merge down
Add drop shadow to frame and merge down to paper
Open 62 - resize by 50% 2x - place to the left - drop shadow
Open 59 - resize by 50% - sharpen - place to top right - drop shadow
Open 50 - place to the right
Open tube - resize to liking - place to left some
Xero - porcelain - change blue channel to 0 - hit ok
Open 6 - place to the right - add drop shadow
Open 64 - resize by 50% - place to the bottom right - drop shadow
Delete background - merge visible
Add credits and name
Sunday, December 29, 2013

*click on image to view full size*
PTU Need My Coffee
This tutorial was written by me on December 29, 2013.
It was made out of my own creation and any similarity is purely coincidental.
I used pspx5 but any version should work without problems.
If you're doing this tutorial you must have good psp knowledge and be familiar with the tools.
Let's get started!
Artist: Tea Pink Girl by Arthur Crowe
Scrapkit: Cappuccino Dreams by Amy Marie's Kits
Mask: DBV mask 157
Plugin: Xero - porcelain
Font: Mr Leopolde
*open your mask and minimize in your workspace*
File - New - 700x700 - flood fill w white
Click on background with magic wand - new layer
Open paper12 - c/p into selection - deselect
Layers - New mask layer - From Image
Find your mask in source window - hit ok
Merge group
Open 37 - resize by 70% - sharpen - rotate to left w deform tool - drop shadow
Open 64 - place to right - duplicate - mirror - merge down - drop shadow
Open 50 - place to bottom left - drop shadow
Open 65 - resize by 50% - sharpen - place to right - drop shadow
Open 38 - resize by 50% - sharpen - place to top right - drop shadow
Open 24 - resize by 50% - sharpen - place to bottom right - drop shadow
Open tube - resize to liking - place to left some
Xero - porcelain - change blue channel to 0 - hit ok
Drop shadow on tube
Delete background - merge visible
Add credits and name
Saturday, December 28, 2013

*click on image to view full size*
FTU New Year Coming
This tutorial was written by me on December 28, 2013.
It was made out of my own creation and any similarity is purely coincidental.
I used pspx5 but any version should work without problems.
If you're doing this tutorial you must have good psp knowledge and be familiar with the tools.
Let's get started!
Artist: Happy Sexy New Year by Arthur Crowe
Scrapkit: Happy New Year by Gimptastic Scraps
Mask: 21 by moonbeams and spiderwebs
Plugin: Xero - Porcelain
Font: AL Patriott
*open your mask and minimize in your workspace*
File - New - 700x700 - flood fill w white
Open frame 4 - image - free rotate - left by 90 degrees - hit ok
Rotate your frame to the right w your deform tool
Click inside frame w magic wand - expand by 5 - new layer
Open pp5 - c/p into selection - deselect - place under frame
Open tube close up - resize by 50%
Place so that is inside frame
Xero - porcelain - change blue channel to 0 - hit ok
Change blend mode to luminance (L)
Add drop shadow to your frame
Open champagne bucket - resize by 50% - place to bottom - mirror
Add drop shadow
Open mask - place to the right - drop shadow
Open feather 2 - place to bottom right - drop shadow
Oepn stars - place to the right - drops shadow
Open full tube - resize by 75% - place to right
Xero - porcelain - same settings as above
Add drop shadow to your tube
On background layer
Click on background with magic wand - new layer
Open paper4 - c/p into selection - deselect
Layers - New mask layer - From Image
Find your mask in source window - hit ok
Merge group
Open swirl - place to the top - drop shadow
Open leaf - place to right - duplicate - mirror - merge down
Drop shadow
Open glitter ball - bottom right - duplicate - mirror - drop shadow
Delete background layer - merge visible
Adjust - sharpen - sharpen more
Add credits and name


*click on image to view full size*
PTU Happy New Year To You
This tutorial was written by me on December 28, 2013.
It was made out of my own creation and any similarity is purely coincidental.
I used pspx5 but any version should work without problems.
If you're doing this tutorial you must have good psp knowledge and be familiar with the tools.
Let's get started!
Artist: Sheila by Di Halim
Scrapkit: 321 New Year by Scrappin Krazy Designs
Mask: Halftone 8 by Dangerously Deliciously Designs
Plugins: Xero radiance and porcelain
Font: Plaster of Paris
*open your mask and minimize in your workspace*
File - New - 700x700 - flood fill w white
Open frame (ele 15) resize by 80%
Open tube close up - c/p as new layer - place so face is inside frame
Click inside frame w magic wand - expand by 5 - new layer
Open pp12 - c/p into selection - move paper under tube close up
On tube layer - selections - invert - delete - deselect
Xero - Radiance - hit ok
Change blend mode to screen - opacity to 57 - duplicate tube
On duplicate - adjust - blur - gaussian blur - 3 hit ok
Change layer opacity to 100
Add drop shadow to your frame
Open 36 - resize by 50% - place to bottom right
Open 38 - place to left - duplicate - place to right - merge down - drop shadow
Open 54 - resize by 50% - place to bottom right - rotate to right w deform tool
Add drop shadow
Open 33 - place to bottom left
Open full tube - resize by 50% - place to the bottom
Xero - porcelain - change blue channel to 0 - hit ok
Add drop shadow to your tube
On background layer
Click on background with magic wand - new layer
Open paper of choice - c/p into selection - deselect
Layers - New mask layer - From Image
Find your mask in source window - hit ok
Merge group
Open 32 - move to left some
Open 30 - place to the bottom
Delete background layer - merge visible
I cropped my tag some
Add credits and name
Friday, December 27, 2013

*click on image to view full size*
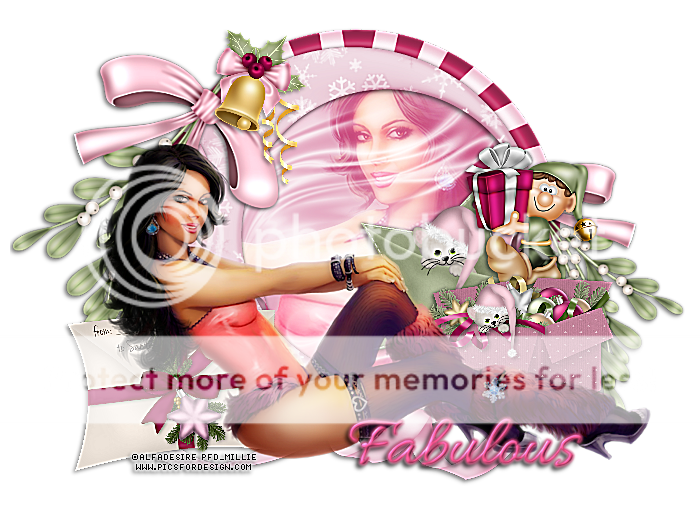
PTU So Beautiful
This tutorial was written by me on December 27, 2013.
It was made out of my own creation and any similarity is purely coincidental.
I used pspx5 but any version should work without problems.
If you're doing this tutorial you must have good psp knowledge and be familiar with the tools.
Let's get started!
Artist: Keith Garvey
Scrapkit: Crazy Beautiful by Amy Marie
Mask: 20 by moonbeams and spiderwebs
Font: Ariston
*open your mask and minimize in your workspace*
File - New - 700x700 - flood fill w white
Click on background with magic wand - new layer
Open paper of choice - c/p into selection - deselect
Layers - New mask layer - From Image
Find your mask in source window - hit ok
Merge group
Open 36 - resize by 80% - c/p as new layer
Click inside frame - new layer
Open pp of choice - c/p into selection - deselect
Move paper under frame - add drop shadow to your frame
Open 24 - place to the right - duplicate - mirror - merge down
Add drop shadow
Open tube - resize to liking - place to right some
Xero - porcelain - change blue channel to 0 - hit ok
Open 1 - place to bottom - drop shadow
Open 64 - place to the bottom - drop shadow
Open 26 - place to bottom - drop shadow
Open 37 - resize by 50% - place to bottom right - drop shadow
Delete background - merge visible
Add credits and name


Thursday, December 26, 2013


Saturday, December 21, 2013

*click on image to view full size*
FTU Merry Merry
This tutorial was written by me on December 21, 2013.
It was made out of my own creation and any similarity is purely coincidental.
I used pspx5 but any version should work without problems.
If you're doing this tutorial you must have good psp knowledge and be familiar with the tools.
Let's get started!
Artist: Claudia by verymany HERE
Scrapkit: Candy Cane Christmas by Gimptastic Scraps HERE
Template: 460 by me HERE
Plugins: Eyecandy - glass and Xero - Porcelain
Mask: any of choice
Font: satisfaction
*open your mask and minimize in your workspace*
Open template 460 - duplicate - delete original
Delete your cr layer - make your background visible
Image - canvas size 800x800 - fill background layer with white
Click on background with magic wand - new layer
Open paper of choice - c/p into selection - deselect
Layers - New mask layer - From Image
Find your mask in source window - hit ok
Merge group
Click on layer 1 with magic wand - new layer
Selections - modify - smooth selection
Smooth amount 10 Anti-Atlas checked - hit ok
Open paper8 - c/p into selection - deselect
Effects - Eye Candy 5 - Glass (play around w the settings until you're happy)
Hit ok - add drop shadow
Merge down to layer 1
Add paper of choice and use same glass settings on each layer
Work from bottom to top until you are done
Open bow - resize by 50% - place top right
Open tricicle - place to right
Open snow man - place to right some
Open label - place to the bottom
Open gift 1 - place to bottom and left some
Open gift 2 - place to bottom left
Open tube - resize by 50% - c/p as new layer
Xero - porcelain - change blue channel to 0 - hit ok
Open house - resize by 50% 2x - c/p - place to bottom and right some
Delete background - merge visible - crop your tag
Add credits and name
Friday, December 20, 2013

I made this tag with awesome Lionele tube by Roman Zaric
and I used the matching kit.
But I used a cluster frame from Raspberry Designs for a forum challenge :)
You can find tube and kit HERE
I made some snags for you all.
Please do not add names or alter them in any way.
Do not claim as your own.


*click on image to view full size*
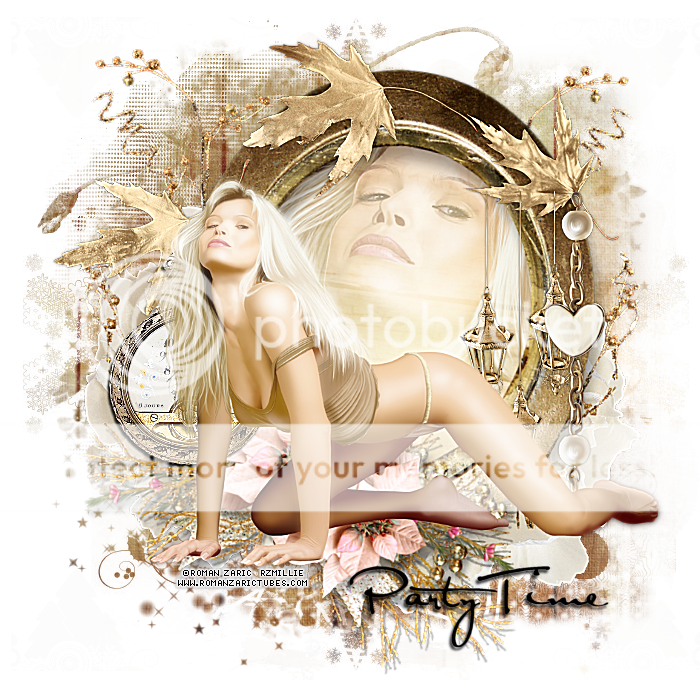
PTU Elegant at Midnite
This tutorial was written by me on December 20, 2013.
It was made out of my own creation and any similarity is purely coincidental.
I used pspx5 but any version should work without problems.
If you're doing this tutorial you must have good psp knowledge and be familiar with the tools.
Let's get started!
Artist: verymany
Scrapkit: Moonlight2 by Amy Marie
Mask: 106 by DBV HERE
Plugin: Xero - porcelain
Font: Echino Parks
*open your mask and minimize in your workspace*
File - New - 700x700 - flood fill w white
Click on background with magic wand - new layer
Open paper of choice - c/p into selection - deselect
Layers - New mask layer - From Image
Find your mask in source window - hit ok
Merge group
Open 115 - resize by 85% - c/p as new layer - drop shadow
Open 117 - place to the left - duplicate and mirror - drop shadow
Open 54 - place to right - duplicate - mirror - drop shadow
Open 27 - resize by 85% - place to the left - duplicate - mirror - drop shadow
Open 90 - resize by 75% - c/p as new layer - drop shadow
Click inside frame w magic wand - expand by 5
Open pp10 - c/p into selection - deselect - move paper under frame
Drop shadow frame
Open 7 - place to the right - drop shadow
Open 26 - resize by 50% - place to bottom left - duplicate - mirror - drop shadow
Open tube - resize to liking - c/p as new layer
Xero - porcelain - change blue channel to 0
Open 20 - resize by 50% - place to bottom
Open 65 - resize by 60% - place to bottom left - duplicate - mirror - drop shadow
Delete background - merge visible
Adjust - sharpen - sharpen more
Add credits and name
Thursday, December 19, 2013


Wednesday, December 18, 2013

*click on image to view full size*
PTU Hey There Santa
This tutorial was written by me on December 18, 2013.
It was made out of my own creation and any similarity is purely coincidental.
I used pspx5 but any version should work without problems.
If you're doing this tutorial you must have good psp knowledge and be familiar with the tools.
Let's get started!
Artist: Natasha by Roman Zaric
Scrapkit: Oh Santa by Scrappin' Krazy Designs
Mask: dvb mask 111 HERE
Plugin: Xero - porcelain
Font: Rage Italic
*open your mask and minimize in your workspace*
File - New - 700x700 - flood fill w white
Open 70 - c/p as new layer - move to bottom and left some
Click inside your frame w magic wand - expand by 5 - new layer
Open paper1 - c/p into selection - deselect
Move paper under frame
Add drop shadow to your frame
Open 50 - resize by 50% - place to top left - add drop shadow
Open 06 - resize by 50% - place to left - rotate to right some w deform tool
add drop shadow
Open 01 - resize by 50% - place to bottom left - add drop shadow
Open 65 - resize by 50% - place to bottom left - add drop shadow
Open 68 - place to right - add drop shadow
Open 56 - place to bottom right - add drop shadow
Open 24 - resize by 50% 2x - place to bottom right - add drop shadow
Open tube - resize to your liking
Xero - porcelain - change blue channel to 0 - hit ok
Click on background with magic wand - new layer
Open paper16 - c/p into selection - deselect
Layers - New mask layer - From Image
Find your mask in source window - hit ok
Merge group - resize your mask to fit your tag
Delete background - merge visible
Add credits and name

This tag was made with awesome "Courage" tube by Arthur Crowe
and I used PTU Winter Love by Kizzed by Kelz


Template 457

You can download it HERE
Template 457FS

You can download it HERE
Subscribe to:
Posts
(Atom)


