

Showing posts with label Stef's Scrapkits. Show all posts
Showing posts with label Stef's Scrapkits. Show all posts
Saturday, December 7, 2013


Monday, May 6, 2013

*click on image to view full size*
PTU Hot Days
This tutorial was written by me on May 6, 2013.
It was made out of my own creation and any similarity is purely coincidental.
I used pspx2 but any version should work without problems.
Let's get started!
Artist: Roman Zaric
Scrapkit: Summer Treats 1 by Stefs-Scrapkits
Template: FB Timeline Template #30 by me HERE
Plugins: Penta - Jeans
Font: Pea Aime
*open your mask and minimize it in your workspace*
Open timeline template - duplicate - close original
Delete copyright layer
Click in background layer w magic wand - new layer
Open paper6 - c/p into selection - deselect
Click inside layer 1 w magic wand
Open paper9 - c/p as new layer - invert - delete - deselect
Open ele51 - c/p as new layer - place to the bottom
Open ele21 - c/p as new layer - place to top left
duplicate - mirror - merge down
Click on layer 3 w magic wand
open paper 3 - c/p into selection - deselect - mirror
Open ele15 - c/p as new layer
On layer 5
Open ele21 - c/p as new layer - place to top left
On layer 7
Open ele48 - resize by 50% - c/p as new layer - place to left - duplicate - mirror
Open ele33 - resize by 70% - c/p as new layer - place to left - duplicate - mirror
Open ele 14 - c/p as new layer - place to bottom left - duplicate - mirror
Open tube - resize to your liking - c/p as new layer - place to right
Open ele37 - c/p as new layer - move down and to the left some
Merge layer 9 down to 8 and add a drop shadow of 3 -2 65 5 black
On layer 10 - effects - penta - jeans
amount: 62 - border width 4
While on layer 10 click in the middle of the tag with magic wand
Effects - 3d effects - cutout w these settings
V -2 H 2 Opacity 50 Blur 10 Black Fill interior NOT checked - hit ok
Merge visible - add credits and your name
*remember the rules for timeline copyrights*
If you're not sure what they are please visit store of tube you use to verify.
Thank you for trying my tutorial!

Monday, April 29, 2013

*click on image to view full size*
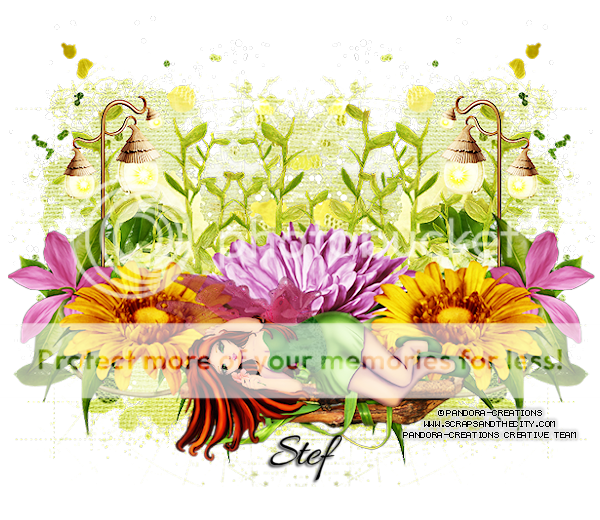
PTU Beautiful Spring
This tutorial was written by me on April 29, 2013.
It was made out of my own creation and any similarity is purely coincidental.
I used pspx2 but any version should work without problems.
Let's get started!
Artist: Lilly by Pandora's Creations
Scrapkit: Spring Beauty by Stefs-Scrapkits
Mask: MB and SW mask 33
Plugins: Xero - Porcelain
Font: Allure
*open your mask and minimize it in your workspace*
File - New - 700x700 - fill with white - rename background
Open ele49 - c/p as new layer - place to left - duplicate - mirror
Open ele48 - c/p as new layer - place down some
duplicate - move to the left - duplicate mirror
close background - merge visible - open background
Open ele46 - resize by 65% - c/p as new layer
Place to the right - duplicate - mirror - merge down
duplicate - change blend mode to screen
Open ele34 - c/p as new layer - place to bottom left - duplicate and mirror
Open ele53 - resize by 50% - sharpen - c/p as new layer
Place to the right - duplicate - mirror
Open ele41 - c/p as new layer - place to the bottom
Open ele20 - resize by 70% - sharpen - c/p as new layer - move down some
Open ele52 - resize by 65% - sharpen - c/p as new layer
Place to the bottom left - duplicate - mirror - merge down
Duplicate - resize by 50% - move down some
Open ele27 - c/p as new layer - place to the bottom
Open tube - resize to fit your tag - c/p as new layer
Place to the bottom some
Xero - porcelain - blue channel to 0 - hit ok - sharpen
On background layer - click inside it w magic wand - new layer
Open paper17 - c/p into selection - deselect
Layers - new mask layer - from image
Find mask in source window - make mask from source luminance - hit ok
Merge group - resize mask by 80% - place to left of tag - duplicate - mirror
Delete background layer - merge visible
Crop tag to your liking - add credits and your name
Thanks for trying my tutorial
Monday, April 8, 2013
*click on image to view full size*
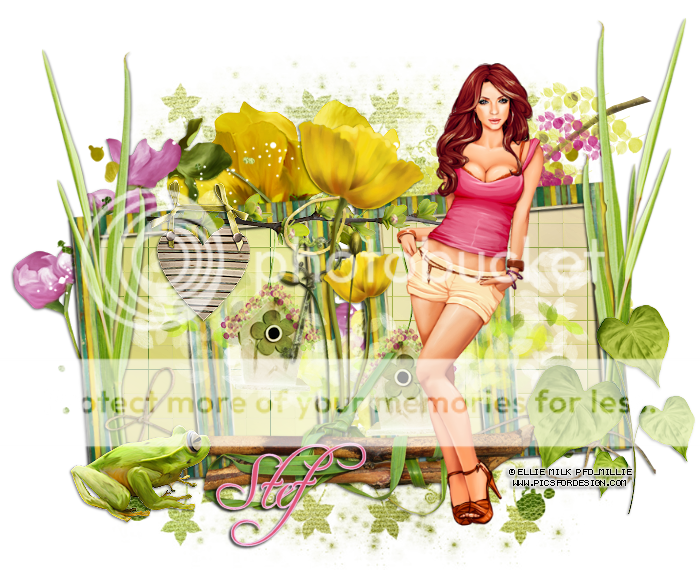
PTU Spring Beauty
This tutorial was written by me on April 8, 2013.
It was made out of my own creation and any similarity is purely coincidental.
I used pspx2 but any version should work without problems.
Let's get started!
Artist: Ellie Milk
Scrapkit: Spring Beauty by Stef's Scrapkits
Mask: Melissaz Creationz - Mask 19
Plugins: xero - porcelain
Font: freebooter script
*open your mask and minimize it in your workspace*
File - New - 700x700 - fill with white - rename background
Open ele44 - c/p as new layer - place to left and down some
Duplicate - place to the right and up some - merge down
Click inside all frames w magic wand - expand by 7
Open paper3 - c/p as new layer - invert - delete - deselect
Move paper under the frame layer
Add drop shadow to your frame
Open ele41 - c/p as new layer
Open ele01 - resize by 60% - sharpen - c/p as new layer
Open ele10 - resize by 50% 2x - sharpen - c/p as new layer
Place to the left of the frame
Open ele47 - c/p as new layer - place to left line up w frame
duplicate - mirror - line up w right side of frame
Open ele36 - c/p as new layer
Open ele23 - resize by 60% - sharpen - c/p as new layer - place to bottom right
Open ele27 - c/p as new layer - place to the bottom some
Open ele17 - resize by 50% - sharpen - c/p as new layer - place to bottom left
On background layer
Open ele21 - resize by 80% - c/p as new layer - place to the left
Open ele49 - c/p as new layer - place to left - duplicate - mirror
Open ele02 - c/p as new layer - place to the top right
Open ele13 - resize by 60% - sharpen - c/p as new layer - place to top left
Close background - merge visible - open background
Open tube - resize to fit your tag - c/p as new layer - place to the right
Xero - porcelain - blue channel at 0 - hit ok
Click in background layer w magic wand - new layer
Open paper12 - c/p into selection - deselect
Apply your mask - hit ok - merge group
Resize mask by 75%
Delete background layer - crop your tag to your liking - merge visible
add credits and your name
Monday, March 18, 2013


Friday, March 15, 2013

*click on image to view full size*
PTU Easter is Here
This tutorial was written by me on March 15, 2013.
It was made out of my own creation and any similarity is purely coincidental.
I used pspx2 but any version should work without problems.
Let's get started!
Artist: Keith Garvey
Scrapkit: Hoppy Easter by Stef's Scrapkits
Mask: Melissaz Creationz - Mask 9
Plugins: Xero - radiance, FM Tools - Blend Emboss
Font: Jellybaby ITC
*open your mask and minimize it in your workspace*
File - New - 700x700 - fill with white - rename background
Open ele25 - resize by 80% - sharpen - c/p as new layer
Open your tube close up - c/p as new layer - place under your frame
Click inside frame with your magic wand - expand by 10
On tube layer - invert - delete - deselect - duplicate tube and mirror
Move the mirrored one so that it fits inside the other side of the frame - merge down
Xero - radiance - change blend mode to screen
On frame layer again click inside both frames w magic wand - expand by 10
new layer - open paper4 - c/p into selection - deselect - move under tube layer
Add drop shadow to your frame
Open ele13 - resize by 75% - c/p as new layer - place to left
Open ele49 - resize by 65% - c/p as new layer - place to right
Open ele52 - resize by 80% - c/p as new layer - place to the bottom
Open ele15 - resize by 50% - c/p as new layer - place to left
Open ele59 - resize by 75% - sharpen - c/p as new layer - place to top
Open ele97 - resize by 60% - c/p as new layer - place to bottom left
Open ele09 - resize by 50% - then by 65% - sharpen - c/p as new layer - place to left
Open ele73 - resize by 50% - c/p as new layer - place to bottom
Go to background layer - click inside it with your magic wand - new layer
Open paper5 - c/p into selection - deselect
Layers - new mask layer - from image
Find your mask in your source window - make mask from source luminance - hit ok
Merge group - apply FM Tools - Blend Emboss to your mask
Open ele66 - c/p as new layer - crop your tag to your liking
Delete background layer - merge visible - add credits and your name
Thanks for trying my tutorial :)
Monday, March 11, 2013

*click on image to view full size*
PTU Hunting For Eggs
This tutorial was written by me on March 11, 2013.
It was made out of my own creation and any similarity is purely coincidental.
I used pspx2 but any version should work without problems.
Let's get started!
Artist: Keith Garvey
Scrapkit: Black Easter by Stef's Scrapkits
Plugins: Xero - Radiance
Font: Riot Squad
File - New - 700x700 - fill with white - rename background
Open ele03 - resize by 60% - sharpen - c/p as new layer
Open tube close up - c/p as new layer - place under frame
Open paper08 - c/p as new layer - place under tube
Click inside the frame w magic wand - expand by 5
On tube layer - invert - delete - invert
On paper layer - invert - delete - deselect
Add drop shadow to your frame
On tube layer - xero - radiance - change blend mode to luminance (L)
Change opacity to 68
Duplicate your tube - change blend mode to screen - opacity to 86
Duplicate tube again and change opacity to 100
On the tube layer that has luminance setting add drop shadow 2x
On frame layer
Open ele36 - resize by 65% - sharpen - c/p as new layer - place to left of frame
With your selection tool draw a rectangle around your frame
On ele36 layer - invert - delete - deselect
Duplicate ribbon - change blend mode of top ribbon to screen - merge down
Open ele46 - resize by 50% 2x - sharpen - c/p as new layer
Place to the top left of frame
Open ele25 - resize by 65% - sharpen - c/p as new layer - place to left
Open ele16 - resize by 50% - sharpen - c/p as new layer - place to bottom right
Open full tube - c/p as new layer
Xero - radiance - place tube to the left a little
Open ele28 - resize by 60% - sharpen - c/p as new layer - place to bottom
On background layer
Open ele37 - c/p as new layer - place to right
Duplicate - place to the left
Open ele10 - c/p as new layer - place to top right - duplicate
Move to the right - merge down - duplicate - flip - merge down
Duplicate - mirror - merge down
Open ele19 - resize by 85% - sharpen - c/p as new layer - move to right
Duplicate - mirror - merge down
Delete background layer - merge visible - crop tag to your liking
add credits and your name
Sunday, March 3, 2013

*click on image to view full size*
PTU Cherry Love
This tutorial was written by me on March 3, 2013.
It was made out of my own creation and any similarity is purely coincidental.
I used pspx2 but any version should work without problems.
Let's get started!
Artist: Elias Chatzoudis
Scrapkit: Berry Cherry by Stef's Scrapkits
Mask: any of choice
Plugins: xero - porcelain
Font: Mahogany Script
*open your mask and minimize it in your workspace*
File - new - 700x700 - fill with white
Open ele05 - resize by 60% - c/p as new layer
Open ele28 - resize by 50% - c/p as new layer
Open ele06 - resize by 50% 2x - sharpen - c/p as new layer
Open ele4 - resize by 50% 2x - sharpen - c/p as new layer
Open ele59 - resize by 60% - c/p as new layer - place to right
Open ele23 - resize by 75% - sharpen - c/p as new layer
Open ele62 - resize by 80% - sharpen - c/p as new layer - place to left
Open ele55 - resize by 50% 2x - sharpen - c/p as new layer - place to left
Open ele29 - resize by 50% - sharpen - c/p as new layer - place to right
Open full tube - resize by 85% - c/p as new layer - mirror - place to right
Xero - porcelain - change blue channel to 0
Duplicate tube - change blend mode to soft light - merge down - add drop shadow
Go to background layer
Click inside background w magic wand - new layer
Open paper 3 - c/p into selection - deselect
Layers - new mask - from image
Find mask name in source window - mask from source luminance - hit ok
Merge group
Delete background - merge visible - add credits and your name
Thursday, February 21, 2013

*click on image to view full size*
PTU Sweet Lavender
This tutorial was written by me on February 21, 2013.
It was made out of my own creation and any similarity is purely coincidental.
I used pspx2 but any version should work without problems.
Let's get started!
Artist: Kiwifirestorm
Scrapkit: Dreams of Lavender by Stef's Scrapkits
Mask: Moonbeams and Spiderwebs Mask 23 HERE
Plugins: Mura Meister - copies, Xero - radiance
Font: Aphrodite Pro
*open your mask and minimize it in your workspace*
File - New - 700x700 - Fill with white
click inside white layer w magic wand - new layer
Open paper03 - c/p into selection - deselect
Duplicate paper - change blend to overlay - merge down
Open tube close up - resize by 50% - c/p as new layer
Apply Mura Meister - Copies with following settings
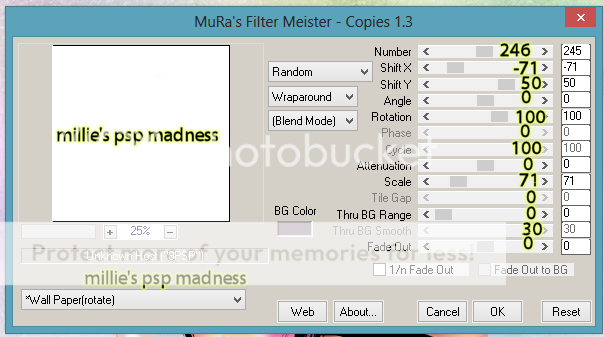
Apply - xero - radiance (default settings)
Adjust - blur - gaussian blur - 1.00 - hit ok
Merge tube to paper
Layers - new mask layer - from image
Find mask name in source window - make mask from source luminance
hit ok - merge group
Open ele27 - resize by 70% - c/p as new layer - place to right
Duplicate - mirror - merge down - duplicate - flip - merge down
Change opacity to 50
Open full tube - resize by 50% - c/p as new layer
Xero - radiance - default settings
Open ele01 - resize by 60% - sharpen - c/p as new layer
Open ele54 - c/p as new layer - place to the right
Open ele12 - resize by 80% - sharpen - c/p as new layer - place to right
Open ele26 - resize by 60% - sharpen - c/p as new layer - place to right
Open ele17 - resize by 65% - sharpen - c/p as new layer
Place down some
Open ele8 - resize by 50% - sharpen - c/p as new layer
Place to the left of the fence
Open ele15 - resize by 50% - sharpen - c/p as new layer - place to right
Delete background layer - merge visible - add credits and name
Saturday, February 16, 2013

*click on image to view full size*
PTU Dance For You
This tutorial was written by me on February 16, 2013.
It was made out of my own creation and any similarity is purely coincidental.
I used pspx2 but any version should work without problems.
Let's get started!
Artist: Roman Zaric
Scrapkit: Ballerina Girl by Stef's Scrapkits
Right now Stef is having a fantastic sale!
She's closing up her store.
Everything is 60% at the store that is linked up.
You can grab her whole store for $10.
Hurry while its still open.
This is valid until March 15th.
Mask: DBV mask 143
Plugins: xero - porcelain
Font: Halo Handletter
*open your mask and minimize it in your workspace*
File - new - 700x700 - fill with white
Open ele42 - resize by 85% - sharpen
c/p as new layer - click inside frame with magic wand - expand by 5
Go to background layer - new layer
Open paper 1 - c/p into selection - deselect
Add light drop shadow to your frame
Open ele35 - resize by 50% - c/p as new layer - place to right
Open ele18 - resize by 70% - c/p as new layer - place to right
Duplicate - mirror - place to the right
Open ele19 - resize by 50% - c/p as new layer - place to right
Open ele21 - resize by 50% 2x - sharpen - c/p as new layer - place to right
Duplicate - mirror - place to right
Open ele33 - resize by 50% - sharpen - c/p as new layer - place to right
Open ele23 - c/p as new layer - free rotate to left by 90 degrees - move to right
Open ele26 - resize by 60% - c/p as new layer - place to top left
Duplicate and move down
Open ele36 - resize by 50% 2x - c/p as new layer - place to right
Open ele32 - resize by 50% - c/p as new layer - place to bottom
Open tube - resize by 50% so it fits your tag
c/p as new layer - mirror
Xero - porcelain - default but change blue channel to 0
Duplicate - change blend of top tube to soft light
Add drop shadow to bottom tube - merge top one to bottom one
Go to background layer - click inside it with your magic wand - new layer
Open paper14 - c/p into selection - deselect
Layers - new mask layer - from image
Find mask name in source window - create mask from source luminance
Hit ok - merge group
Delete background layer - merge visible - add credits and your name
Thursday, February 14, 2013

Stef's Scrapkits and Tubes is having a REAL BIG Store Off Sale!
We are closing the Doors, so you get on everything a 60% off Sale
Monday, February 4, 2013
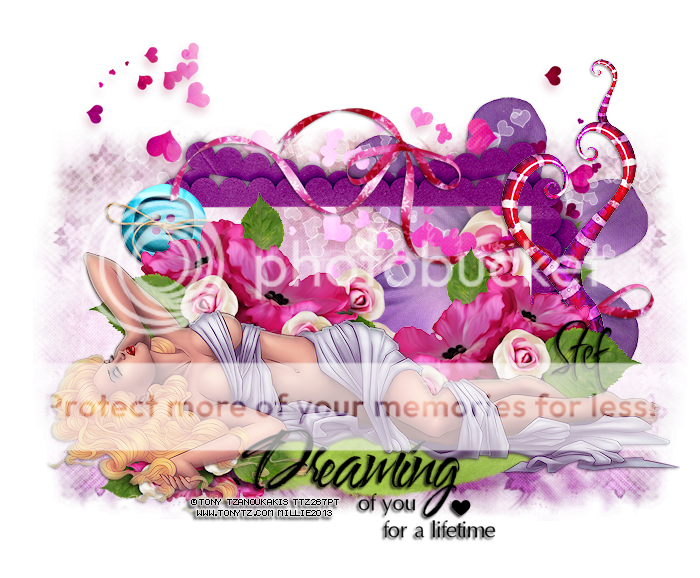
*click on image to view full size*
PTU Dreaming
This tutorial was written by me on February 4, 2013.
It was made out of my own creation and any similarity is purely coincidental.
I used pspx2 but any version should work without problems.
Let's get started!
Artist: Tony Tzanoukakis
Scrapkit: One Moment in Time by Stef's Scrapkits
Mask: any rectangular mask of choice
Wordart: #6 by me - HERE
Plugins: xero porcelain
Font: Inspiration
*open your mask and minimize it in your workspace*
*add a light dropshadow to your elements throughout*
File - new - 700x700 - flood fill with white
Open ele45, c/p as new layer, place up some
Open ele48, resize by 50% 2x, sharpen, c/p as new layer, place to top left
Open ele16, resize by 60%, sharpen, c/p as new layer, place down some
Open ele46, resize by 50%, sharpen, c/p as new layer, place to the right
Open ele26, resize by 50%, sharpen, c/p as new layer, place to left
Duplicate, mirror, move up some
Open tube, resize by 70%, c/p as new layer
Xero - porcelain, change blue channel to 0
Move your tube down
On background layer, Open ele01, resize by 65%, sharpen, c/p as new layer
Place to the right some
Open ele23, resize by 70%, sharpen, c/p as new layer, move down some
open ele37, c/p as new layer, move up some
On background layer again, open paper of choice, c/p as new layer, apply mask
merge group, delete background, merge visible
Copy and paste wordart, place at bottom or where you like, ds of 2 -2 75 5 black
add credits and name
Crop tag to your liking.
Sunday, February 3, 2013

Thursday, January 31, 2013
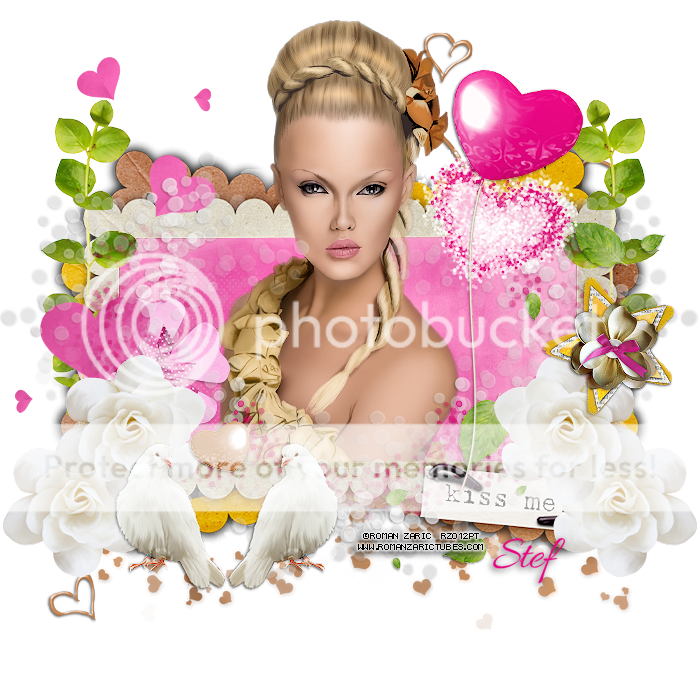
*click on image to view full size*
PTU Kiss Me
This tutorial was written by me on January 31, 2013.
It was made out of my own creation and any similarity is purely coincidental.
I used pspx2 but any version should work without problems.
Let's get started!
Artist: Roman Zaric
Scrapkit: Wanna Be My Valentine by Stef's Scrapkits
40% off on all Valentine's Day Kits until Valentine's Day
Plugins: Porcelain
Font: Allura
File - new - 700x700 - flood fill w white - rename background
Open ele11, resize by 80%, sharpen, c/p as new layer
Open paper4, c/p as new layer, move under frame
With selection tool draw a rectangle bigger than the inside of your frame
On paper layer, invert, delete, deselect
Open your tube, resize it to your liking to fit your tag, c/p as new layer
Place on top of frame layer, duplicate your frame and place dup above your tube
With your eraser erase the top of the frame that is covering the tube
Back on tube apply xero - porcelain with blue channel at 0, hit ok, then sharpen
Close background, merge visible, open background
Open ele31, resize by 50%, sharpen, c/p as new layer, place to the right
Open ele47, resize by 60%, c/p as new layer, place to the right, duplicate, mirror
Open ele18, c/p as new layer, place to the left
Open ele43, resize by 65%, c/p as new layer, place to right, duplicate, mirror
Open ele38, resize by 50% 2x, sharpen, c/p as new layer, place to the right
Duplicate, mirror
Duplicate, move down some, then duplicate and mirror again
Open ele48, resize by 50%, sharpen, c/p as new layer, place to the left
Open ele44, resize by 50% 2x, sharpen, c/p as new layer, place to right
Open ele22, resize by 50% 2x, sharpen, c/p as new layer, place to right
Open ele45, resize by 70%, sharpen, c/p as new layer, place to right
Open ele20, c/p as new layer, place to the bottom and move under frame layer
Open ele50, c/p as new layer
Delete background, merge visible, add your credits and name
Friday, January 25, 2013

*click on image to view full size*
PTU Forever In My Heart
This tutorial was written by me on January 25, 2013.
It was made out of my own creation and any similarity is purely coincidental.
I used pspx2 but any version should work without problems.
Let's get started!
Artist: Ismael Rac
Scrapkit: Power of Love by Stef's Scrapkits
40% off from now
till Valentine's Day on Kits in
Valentine's Day Theme!
Mask: Horseplay's Pastures - Mask 11
Plugins: Xero - porcelain
Font: I used From Me to You
*open your mask and minimize it in your workspace*
File - new - 700x700 flood fill w white
Open paper 3, c/p as new layer
Apply your mask - layers - new mask layer - from image
find name of your mask in your source window and hit ok - merge group
Open ele44, c/p as new layer, place to right, duplicate, mirror
Open ele36, resize by 80%, c/p as new layer
Open ele79, resize by 75%, sharpen, c/p as new layer
Open tube close up, c/p as new layer, move under frame
Xero - porcelain default settings
With your selection tool draw a rectangle around frame
On tube layer, invert, delete, deselect
On frame add drop shadow of 2 -3 65 7 black
Open ele73, c/p as new layer, place to top left
Place under tube layer, add ds of 1 -1 50 3, duplicate move up some
Open ele40, c/p as new layer, place above frame and move down
Open ele38, resize by 50%, sharpen, c/p as new layer, place to right
duplicate, move up some, merge down, duplicate resize by 70%
mirror, move to the right, merge down
Duplicate and change blend mode to screen
Open ele45, resize by 70%, sharpen, c/p as new layer, place to right
Open ele80, resize by 50%, sharpen, c/p as new layer
Move to the bottom right and rotate it to the left some w deform tool
Open ele62, resize by 50%, sharpen, c/p as new layer
Place to top left corner, duplicate, move up some
Open ele20, resize by 80%, sharpen, c/p as new layer, place to bottom left
Delete background layer and merge visible, add your credits and your name
Tuesday, January 8, 2013

PTU Love Forever
This tutorial was written by me on January 8, 2013.
It was made out of my own creation and any similarity is purely coincidental.
I used pspx2 but any version should work without problems.
Let's get started!
Artist: Roman Zaric
Scrapkit: Simply Elegant by Stef's Scrapkits
Font: Cherish
File - New - 700x700 flood fill w white
Open ele37, c/p as new layer, place to left, duplicate, mirror
Open ele51, c/p as new layer
Open paper11, c/p as new layer, move under frame
click inside frame w magic wand, expand by 3
On paper layer, invert, delete, deselect
Open ele41, resize by 50%, sharpen, c/p as new layer, place to right
Open your tube, resize it to fit your tag, c/p as new layer
Move up as far as you can w/o cutting off tube
Duplicate tube, change blend mode to soft light
Open ele22, resize by 60%, sharpen, c/p as new layer, place to left
Duplicate, mirror
Open ele32, c/p as new layer, place it down some
Open ele07, resize by 85%, sharpen, c/p as new layer, move down
Open ele50, c/p as new layer, place it down some to your liking
Open ele12, resize by 50%, sharpen, c/p as new layer, mirror, place at bottom
Open ele45, resize by 50%, sharpen, c/p as new layer
ON background layer, open ele15, c/p as new layer, place up, duplicate, flip
delete background layer, merge visible, write forever in pink from tag under love
convert to raster, eyecandy - gradient glow - width3, color fat
merge visible, add credits, add your name
Thanks for trying my tutorial :)
Saturday, December 22, 2012
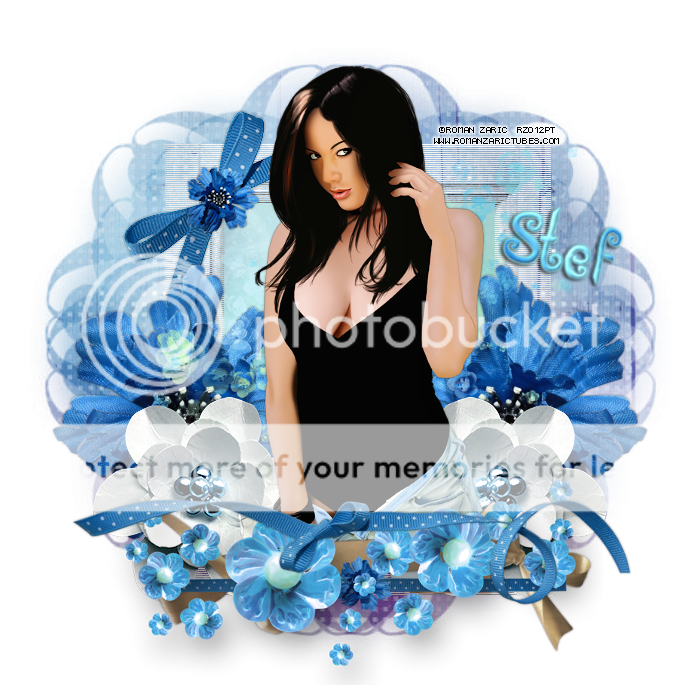
*click on image to view full size*
PTU Blue For U
This tutorial was written by me on Dec 22, 2012
It was made out of my own creation and any similarity is purely coincidental.
I used pspx2 but any version should work without problems.
Let's get started!
Artist: Roman Zaric
Scrapkit: Blue In Blue by Stef's Scrapkits
Mask: WSL mask 17 HERE
Plugins: Flaming Pear - Trans Line
Font: Angelova
File - new - 700x700 - flood fill w white
Open ele43, resize by 75%, sharpen, c/p as new layer
Click inside frame w magic wand, expand by 5
Open paper 5, c/p as new layer, move under frame, invert, delete, deselect
On Frame layer - effects - flaming pear, trans line
Open ele09, resize by 50%, sharpen, c/p as new layer, place at top right
Open ele05, c/p as new layer
Open ele03, c/p as new layer, place to the left, duplicate, mirror
Open ele57, resize by 75%, sharpen, c/p as new layer
Place to the left of frame, duplicate, mirror
Open your tube, resize it to fit your tag, c/p as new layer
Duplicate, change blend to soft light, merge down
Open ele54, c/p as new layer, place so it covers tube's legs
Open ele21, c/p as new layer, place to the bottom
Open ele06, c/p as new layer, place on the bottom
Go to background layer, click inside it w magic wand, new layer
Open paper2, c/p into selection, deselect
Apply your mask - layers - new mask layer - from image
Find your mask in source window, hit ok, merge group
Duplicate your mask and change opacity to 60
Delete background and merge visible
Add your credits and then your name
Thanks for trying my tutorial :)
Thursday, December 20, 2012

*click on image to view full size*
PTU Sweet N Blue
This tutorial was written by me on
It was made out of my own creation and any similarity is purely coincidental.
I used pspx2 but any version should work without problems.
Let's get started!
Artist: Tony Tzanoukakis
Scrapkit: Something Blue by Stef's Creations
Mask: DBV Masks 133
Plugins: xero - porcelain
Font: Hurricane
File - new - 700x700 - flood fill w black
Open ele23, c/p as new layer
Open pap05, c/p as new layer, place under frame
Click inside frame w magic wand
On paper - invert - delete - deselect
Add drop shadow to frame, merge down to paper
Open ele74, c/p as new layer
Place under frame layer
Open ele32, c/p as new layer, move to right, duplicate, mirror, merge down
Open ele57, resize by 50%, then 70%, sharpen, c/p as new layer, place to right
Back on frame layer
Open ele54, c/p as new layer, place to the right
Open ele24, c/p as new layer
Open ele19, resize by 70%, sharpen, c/p as new layer, place to left bottom of frame
Duplicate 3x and move the flowers so that they are connected in a row, merge flowers together
Open full tube, resize by 75%, c/p as new layer
xero - porcelain - change blue channel to 0, sharpen
Place so its near bottom of frame
Open ele50 - resize by 70%, sharpen, c/p as new layer, place to bottom and rotate w your deform tool
Place under tube layer
Open ele59, resize by 50%, sharpen, c/p as new layer place to the right
Open ele69, place to the right and move so its right above background layer
Close background layer, merge visible, open background
Open paper11, c/p as new layer, move under merged layer, apply your mask, merge group
Delete background, merge visible, add credits and your name.
Thanks for trying my tutorial.

*click on image to view full size*
PTU Orange Winter
This tutorial was written by me on December 20, 2012
It was made out of my own creation and any similarity is purely coincidental.
I used pspx2 but any version should work without problems.
Let's get started!
Artist: Arthur Crowe
Scrapkit: Winter In Orange by Stef's Scrapkits
Mask: Any of choice
Plugins: xero - porcelain
Font: Cherish
File - new - 700x700 - flood fill w white
Open ele61 - c/p as new layer - move down some and to the left
Open mid-size tube - c/p as new layer, place so face is inside left heart
Click inside left heart w magic wand, on tube - invert - delete - deselect
Duplicate and move to middle heart, merge down
Effects - xero - porcelain - change blue channel to 0
change blend to luminance (L) - opacity to 50, duplicate
Change blend to overlay - opacity to 100
click inside all hearts in frame with magic wand - go to paper layer
invert - delete - deselect, close background - merge visible - open background layer
Open ele30, resize 50%, sharpen, c/p as new layer - place to the right
Open ele41, c/p as new layer, move under frame layer, move to bottom
OPen ele38, c/p as new layer, move to the right
Open your full tube - resize to 600px on longest side, c/p as new layer
Place to the right of the tag - I resized it some more w my deform tool but is not necessary - just resize to your liking
On tube - xero - porcelain - change blue channel to 0 - sharpen
Open ele31, resize by 50%, sharpen, c/p as new layer, place on bottom of frame
Duplicate 2x and place to your liking
Open ele32, resize 50%, sharpen, c/p as new layer
Open ele44, resize 50%, sharpen, c/p as new layer, place in top middle some
Close background - merge visible - open background
Open paper of choice, c/p as new layer, move under merged layer
Apply your mask, merge group, delete background layer
Add credits and your name
Tuesday, December 11, 2012

*click on image to view full size*
FTU One Last Gift
This tutorial was written by me on December 11, 2012
It was made out of my own creation and any similarity is purely coincidental.
I used pspx2 but any version should work without problems.
Let's get started!
Artist: Tony Tzanoukakis
Scrapkit: Christmas 2012 Freebie by Stef's Scrapkits
Mask: Mask 14 from Moonbeams and Spiderwebs
Plugins: xero - porcelain
Font: any of your choice
*open your mask and minimize it on your workspace*
File - new - 700x700, flood fill w white
Open paper 2, resize to 700 on longest side, c/p as new layer
Apply your mask - Layers - new mask layer, from image
find your mask in source window, make mask from source luminance, hit ok
Merge group, resize your mask by 80%
Open ele13, c/p as new layer
Open your tube and resize it to fit in your tag, c/p as new layer
effects - xero porcelain, change blue channel to 0, sharpen
Move your tube to the right some
Open ele12, resize by 60%, sharpen, c/p as new layer
Move under tree layer and to the left of tree
Open ele01, resize by 50%, sharpen, c/p as new layer
move to the right on top of gift
Open ele07, c/p as new layer, place right above mask layer and move to right
Open ele05, c/p as new layer, right above mask layer and to the right some
Open ele02, c/p as new layer, place so its layer right below the tube layer
Move to the bottom of the tag
Delete backbround layer, merge visible
crop tag to your liking, add your credits and your name
Subscribe to:
Posts
(Atom)