


Showing posts with label The PSP Project. Show all posts
Showing posts with label The PSP Project. Show all posts
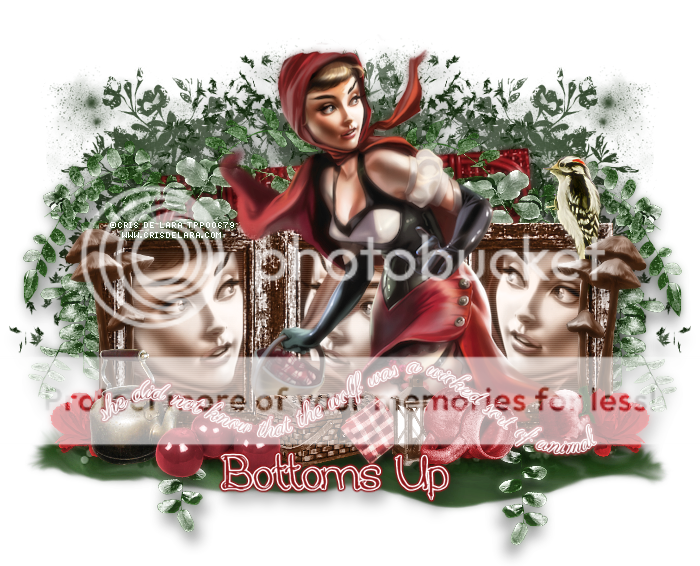
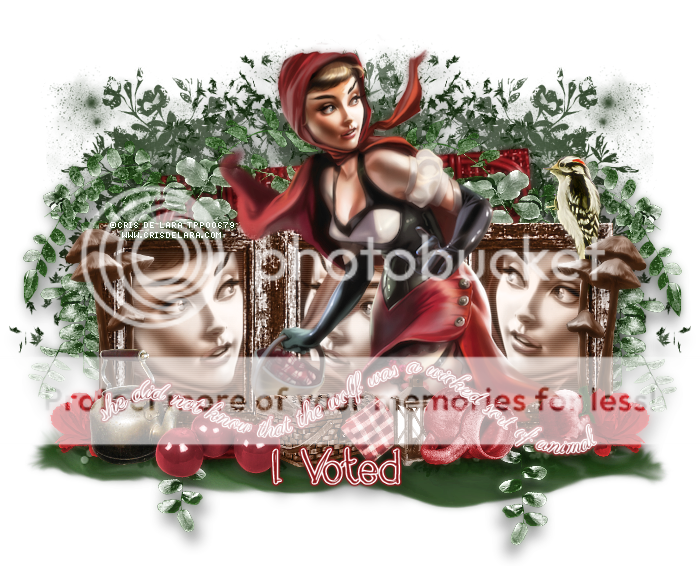
Saturday, September 5, 2015

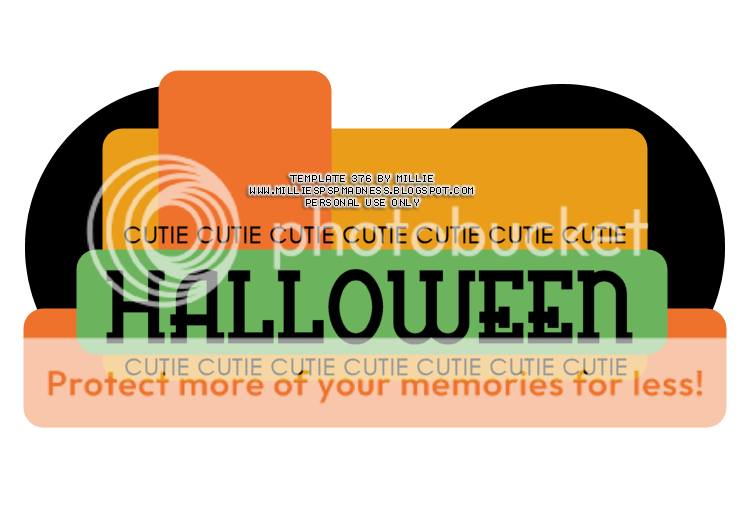
CT FOR GIMPTASTIC SCRAPS
I used Lil Red tube by Cris De Lara
I combined it with matching kit Lil Red by Gimptastic Scraps
Find them both in The Psp Project HERE
I made some snags for you all.
Click each image to save in full-size!
Do not claim as your own.
Do not alter in any way!

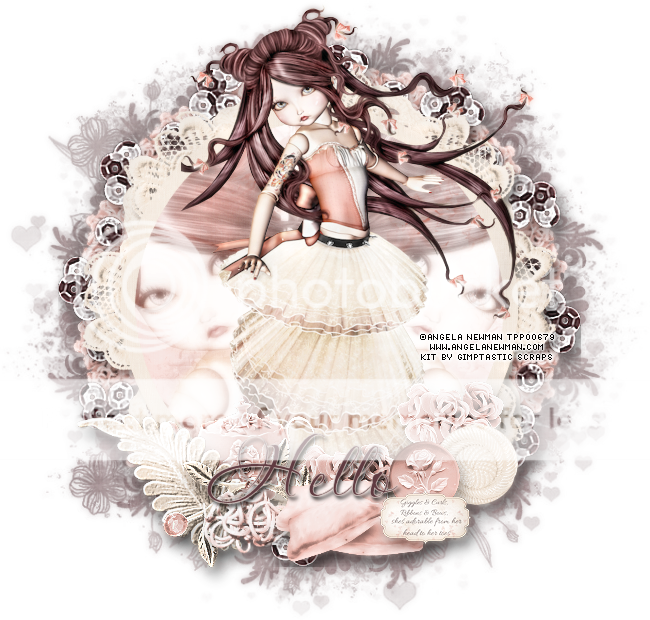
Friday, August 7, 2015

CT FOR GIMPTASTIC SCRAPS
This tag was made using artwork of Angela Newman
I used matching kit called "Ribbons" by Gimptastic Scraps
Got some snags you all may like.
Click each image to save in full-size.
You know the deal by now...
Please do not alter in any way and do not claim as your own.
Thank you very much for stopping by :)


Tuesday, July 7, 2015

Monday, August 11, 2014
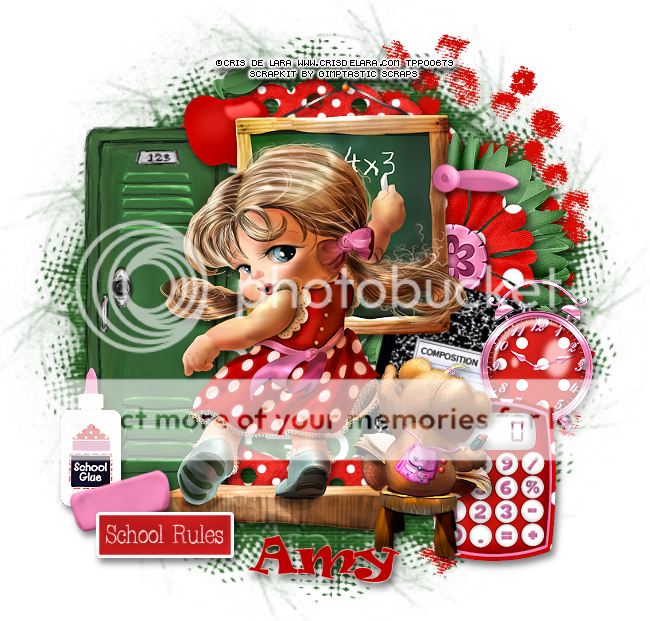
*click on image to view full size*
PTU School Rules
This tutorial was written by me on August 11, 2014.
It was made out of my own creation and any similarity is purely coincidental.
I used pspx6 but any version should work without problems.
If you're doing this tutorial you must have good psp knowledge and be familiar with the tools.
Let's get started!
Artist: Young Teacher by Cris De Lara
Scrapkit: Young Teacher by Gimptastic Scraps
Mask: 78 by me HERE
Font: Ravie
*open your mask and minimize in your workspace*
c/p = copy and paste, ds = drop shadow
File - New - 700x700 - flood fill w white
Open frame 6 - resize it by 75% - c/p as new layer
Click inside your frame w magic wand - expand by 5 - new layer
Open paper7 - c/p into selection - deselect
Move paper under frame
Add drop shadow to your frame
Open locker - place to the left - ds
Open apple - resize by 50% - place to top left - ds
Open glue - resize by 50% - place to bottom left - ds
Open flower 1 - place to the right - ds
Open comp book - resize by 75% - place to right - rotate to right - ds
Open alarm clock - resize by 50% - place to the right - ds
Open calculator - resize by 50% - place to the right - ds
Open tube w chalkboard - resize to fit your tag - c/p as new layer
Drop shadow to your tube
Open eraser - resize by 50% - rotate to left - place bottom left - ds
Open sign - resize by 50% - place to bottom left - ds
Open clip2 - resize by 50% - place to top right - ds
On background layer
Click on background with magic wand - new layer
Open paper1 - c/p into selection - deselect
Layers - New mask layer - From Image
Find your mask in source window - hit ok
Merge group
Open mess - place to the right
Delete background - merge visible
Adjust - Brightness and Contrast
Local Tone Mapping - strength 4.0 - Block Size 35 - hit ok
Add credits and name
Wednesday, August 6, 2014

*click on image to view full size*
PTU Resilience
This tutorial was written by me on August 6, 2014.
It was made out of my own creation and any similarity is purely coincidental.
I used pspx6 but any version should work without problems.
If you're doing this tutorial you must have good psp knowledge and be familiar with the tools.
Let's get started!
Artist: Resilience by Katherine Barber
Scrapkit: Resilience by Gimptastic Scraps
Mask: WSL mask 363
Font: AL Patriot
*open your mask and minimize in your workspace*
c/p = copy and paste, ds = drop shadow
File - New - 700x700 - flood fill w white
Open frame 2 - resize by 80% - c/p as new layer
Click inside frame w magic wand - expand by 5 - new layer
Open pp2 - c/p into selection - deselect
Place paper under frame
Add drop shadow to your frame
Open swirl - c/p as new layer
Open ladder - resize by 50% - place to left - rotate some - ds
Open mushroom - resize by 50% - place to right - ds
Open sticks - place to right - ds
Open moss1 - c/p as new layer - mirror - move down - ds
Open grass - place to left - ds
Open nut - resize by 50% - place to left - ds
Open log - resize by 50% - place to bottom - ds
Open tube (c) layer and resize to your liking - c/p as new layer
Place her so she's on top of the log or where you think she looks best
Add drop shadow to your tube 2x
On background layer
Click on background with magic wand - new layer
Open paper1 - c/p into selection - deselect
Layers - New mask layer - From Image
Find your mask in source window - hit ok
Merge group
Open moonfairy - c/p to top left - ds
Delete background layer - merge visible
Add credits and name
Saturday, July 12, 2014

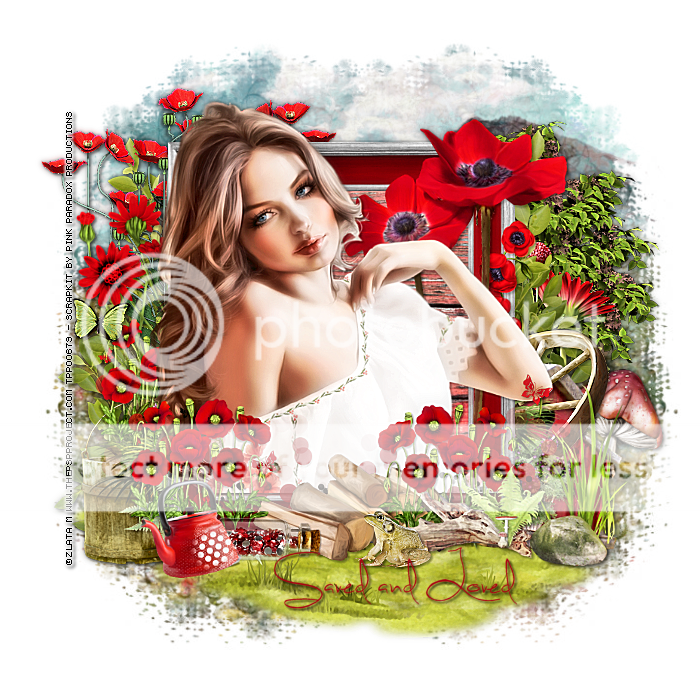
This tag was made with Poppy tube by Zlata M
I used PTU Poppy Fields Kit by Pink Paradox Productions

I made some snags for you all.
You can save them by clicking on each image.


Wednesday, June 11, 2014
*click on image to view full size*
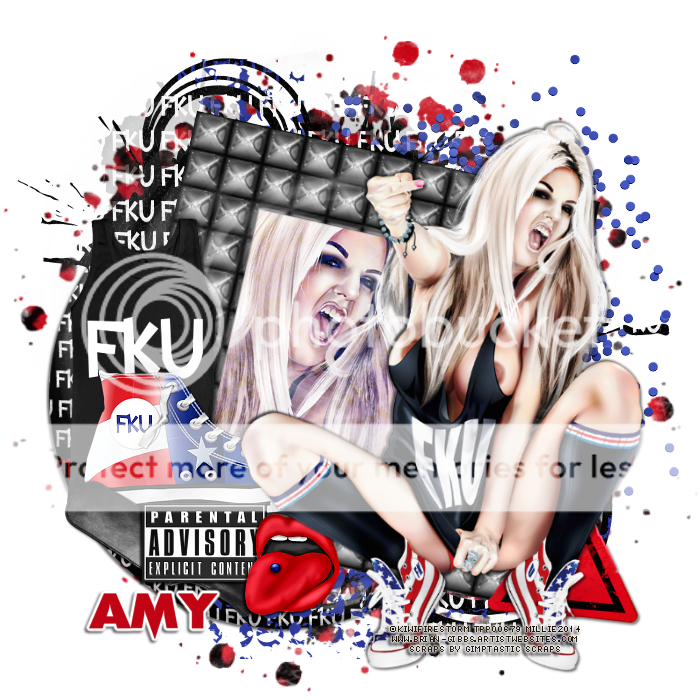
PTU Fk Off
This tutorial was written by me on June 11, 2014.
It was made out of my own creation and any similarity is purely coincidental.
I used pspx6 but any version should work without problems.
If you're doing this tutorial you must have good psp knowledge and be familiar with the tools.
Let's get started!
Artist: FKU by Kiwifirestorm
Scrapkit: FKU kit by Gimptastic Scraps
Mask: 113 by DBV
Font: Scream Real
*open your mask and minimize in your workspace*
c/p = copy and paste, ds = drop shadow
File - New - 700x700 - flood fill w white
Click on background with magic wand - new layer
Open paper of choice - c/p into selection - deselect
Layers - New mask layer - From Image
Find your mask in source window - hit ok
Merge group
Open frame 4 - resize by 85% - place to bottom and left - ds
Open scatter - place to top right
Open mask - place to bottom right
Open grunge dots - c/p as new layer
Open mask again and place to top left
Oepn frame 6 - resize by 75% - rotate to the right some
Open tube - place under frame so face is inside frame
Click inside your frame w magic wand - expand by 5 - new layer
Open paper1 - c/p into selection
Move paper under frame
On tube layer - invert - delete - deselect
Change blend mode to screen
Add drop shadow to the frame
Open whirl - c/p as new layer
Open caution sign - resize by 75% - place to bottom right - ds
Open tanktop - resize by 75% - place to left - ds
Open shoe - place to left - ds
Open paddle - place to the bottom right - ds
Open parental advisory - resize by 50% - place to the bottom right - ds
Open pierced tongue - resize by 50% - place to bottom - ds
Open tube - resize to your liking - place to right
Xero - radiance - hit ok
Add drop shadow to your tube
Delete background - merge visible
Adjust - Brightness and Contrast
Local Tone Mapping - strength 4.0 - Block Size 35 - hit ok
Add credits and name
Sunday, May 18, 2014

*click on image to view full size*
PTU Emerald
This tutorial was written by me on May 18, 2014.
It was made out of my own creation and any similarity is purely coincidental.
I used pspx5 but any version should work without problems.
If you're doing this tutorial you must have good psp knowledge and be familiar with the tools.
Let's get started!
Artist: PMO by Kiwifirestorm
Scrapkit: Birthstone Series: Emerald by Gimptastic Scraps
Mask: 44 by me HERE
Font: Some Weatz
*open your mask and minimize in your workspace*
c/p = copy and paste, ds = drop shadow
File - New - 700x700 - flood fill w white
Open frame 2 - resize by 75% - c/p as new layer
Click inside frame w magic wand - expand by 5 - new layer
Open pp4 - c/p into selection - move under frame - deselect
On frame 2 add Lokas 3D shadow w following settings:
Blur: 25 Transparency: 70
Angle X: 0 Angle Y: 0 Angle Z: 0
Zoom: 100 Offset X: 5 Offset Y: 5
Perspective: 40 Color: Black
Hit Okay
Open frame 4 - resize by 75% - sharpen - c/p as new layer
Apply Lokas 3D Shadow w same settings as above
Open frame 3 - resize by 70% - shapen - c/p as new layer
Rotate to the right some - apply Lokas 3 D shadow w same settings
Open leaf 2 - place to the bottom and left some - ds
Open seed 2 - place to left - ds
Duplicate seed 2 - mirror - move down some
Open leaf1 - place to the left - ds
Open jar - resize by 50% - place to left - ds
Oepn fairy - resize by 50% 2x - sharpen - place to the left - ds
Open Petals2 - resize by 50% - place to bottom left -ds
Open ring resize by 50% 2x - sharpen - place to bottom left - ds
Open flower 1 - resize by 50% 2x - sharpen - place to right - ds
Open rose - resize by 50% 2x - sharpen - place to bottom left - ds
On background layer
Open Swirl - c/p as new layer - place to top right
Duplicate swirl - mirror - merge down - ds
Close background - merge visible - make background visible
Duplicate merged layer - mirror merged layer
Merge copy of merged layer down to merged
Open tube - resize to liking - c/p as new layer and place where you like
Xero - radiance - change beauty to 82 - hit ok
On background layer
Click on background with magic wand - new layer
Open paper4 - c/p into selection - deselect
Layers - New mask layer - From Image
Find your mask in source window - hit ok
Merge group
Tuesday, April 22, 2014

*click on image to view full size*
PTU Party In The Garden
This tutorial was written by me on April 22, 2014.
It was made out of my own creation and any similarity is purely coincidental.
I used pspx5 but any version should work without problems.
If you're doing this tutorial you must have good psp knowledge and be familiar with the tools.
Let's get started!
Artist: Garden Party by Eos Sparks
Scrapkit: Garden Party by Gimptastic Scraps
Mask: MB and SW mask 19
Plugin: Lokas 3D Shadow
Font: Housegrind
*open your mask and minimize in your workspace*
File - New - 700x700 - flood fill w white
Click on background with magic wand - new layer
Open paper of choice - c/p into selection - deselect
Layers - New mask layer - From Image
Find your mask in source window - hit ok
Merge group
Open frame 6 - c/p as new layer
Click inside your frame w magic wand - expand by 5 - new layer
Open paper1 - c/p into selection - deselect
Move paper under frame
Apply Lokas 3D Shadow to frame w these settings
Blur: 25 Transparency: 70
Angle X: 0 Angle Y: 0 Angle Z: 0
Zoom: 100 Offset X: 5 Offset Y: 5
Perspective: 40 Color: Black
Hit Okay
Merge frame down to paper
Open frame 5 - apply Lokas 3D Shadow with same settings as above
Merge frame down to merged layer
Open flower 1 - place to the right - drop shadow
Open bow - resize by 50% - sharpen - place to top and move left some
Add drop shadow to your bow
Open bulrushes - place to the right - drop shadow
Open branch 3 - place to the left - drop shadow
Open flower 2 - resize by 50% 2x - sharpen - place to bottom right - drop shadow
Duplicate flower2 - mirror
Open WA - resize by 50% - place to the bottom - drop shadow
Open rope - resize by 50% 2x - sharpen - place to bottom right - drop shadow
Open orchid - resize by 50% - place to the bottom right - drop shadow
Duplicate orchid - mirror
Open tube - resize to fit your tag - move down some - drop shadow
Open berries 1 - resize by 50% - place to the bottom - drop shadow
Open snail 3 - resize by 50% 2x - sharpen - place to bottom left - drop shadow
Open orchid - resize by 50% 2x - sharpen - place to bottom left - drop shadow
duplicate orchid - mirror
Open frog - resize by 50% 2x - sharpen - place to bottom - drop shadow
Open waterlily - resize by 50% 2x - sharpen - place to bottom right - drop shadow
Delete background - merge visible
Crop your tag to your liking
Add credits and name
Friday, March 7, 2014

*click on image to view full size*
PTU Checking My List
This tutorial was written by me on March 7, 2014.
It was made out of my own creation and any similarity is purely coincidental.
I used pspx5 but any version should work without problems.
If you're doing this tutorial you must have good psp knowledge and be familiar with the tools.
Let's get started!
Artist: Kiwifirestorm
Scrapkit: Birthstone Series: Aquamarine by Gimptastic Scraps
Mask: WSL 363
Font: Angilla Tattoo
*open your mask and minimize in your workspace*
File - New - 700x700 - flood fill w white
Open frame3 - resize by 80% - sharpen - place to bottom
Click inside your frame w magic wand - expand by 5 - new layer
Open paper4 - c/p into selection - deselect
Move paper under frame
Drop shadow on your frame
Open clip - resize by 50% - sharpen - place to left - drop shadow
Open ribbon - place to bottom left - rotate to left w deform tool
Open leaf2 - resize by 50% - place to bottom right
Duplicate - mirror
Open tube - resize to liking- add drop shadow to your tube
PLace in the middle where you like best
Oopne crumbled paper - resize by 70% - place to bottom - drop shadow
Open leaf1 - resize by 50% - place to bottom right
Open heart - resize by 50% - 2x - bottom right - drop shadow
Crop tag and then go to background layer
Click on background with magic wand - new layer
Open paper1 - c/p into selection - deselect
Layers - New mask layer - From Image
Find your mask in source window - hit ok
Merge group
Delete background - merge visible
Add credits and name
Friday, February 28, 2014

*click on image to view full size*
PTU Envious
This tutorial was written by me on February 28, 2014.
It was made out of my own creation and any similarity is purely coincidental.
I used pspx5 but any version should work without problems.
If you're doing this tutorial you must have good psp knowledge and be familiar with the tools.
Let's get started!
Artist: Envy by Lidia Misfit
Scrapkit: Envy by Gimptastic Scrap
Mask: DVB mask 126
Font: Hiccups
*open your mask and minimize in your workspace*
File - New - 700x700 - flood fill w white
Open frame 5 - resize by 65% - c/p as new layer
Open tube - resize to liking - move under frame
Click inside frame w magic wand - new layer
Open pp6 - c/p into selection - move under tube
On tube - invert - delete - deselect
Add drop shadow to your frame
Close background layer - merge visible - open background layer
Rotate merged to the right a little bit
Open mushroom - place to left - drop shadow
Open goggles - bottom right - drop shadow
Open pills - resize by 50% - place to bottom left - drop shadow
Open snake - resize by 80% - place to bottom - drop shadow
Open zipped flower - resize by 50% - sharpen - bottom left - drop shadow
On background layer
Click on background with magic wand - new layer
Open paper4 - c/p into selection - deselect
Layers - New mask layer - From Image
Find your mask in source window - hit ok
Merge group
Open stamp - resize by 80% - place to the right
Duplicate - mirror - merge down
Open mesh - resize by 80% - place to bottom - mirror - place to left
Add drop shadow to your mesh
Open toxic drum - resize by 50% - sharpen - place to left
Drop shadow to your toxic drum
Delete background - merge visible
Crop your tag to your liking (optional)
Add Credits and name
Thursday, February 13, 2014

*click on image to view full size*
PTU Love my Martini
This tutorial was written by me on February 13, 2014.
It was made out of my own creation and any similarity is purely coincidental.
I used pspx5 but any version should work without problems.
If you're doing this tutorial you must have good psp knowledge and be familiar with the tools.
Let's get started!
Artist: Isobel Von Finklestein
Scrapkit: Martini Love by Gimptastic Scraps
Mask: any of choice
Font: Carpenter Script
*open your mask and minimize in your workspace*
File - New - 700x700 - flood fill w white
Click on background with magic wand - new layer
Open paper6 - c/p into selection - deselect
Layers - New mask layer - From Image
Find your mask in source window - hit ok
Merge group
Open swirl - c/p as new layer - drop shadow
Open glitter - c/p as new layer - place down some
Open mesh star - drop shadow
Open wire hearts - place to the right some
Open disco ball - place to the bottom - drop shadow
Open sweet - place to the bottom - drop shadow
Open skull - resize by 50% - sharpen - place to bottom right
Open tube - resize to fit your tag - place where u like
Open WA - place to bottom right - drop shadow
Delete background - merge visible
Thursday, February 6, 2014
*click on image to view full size*
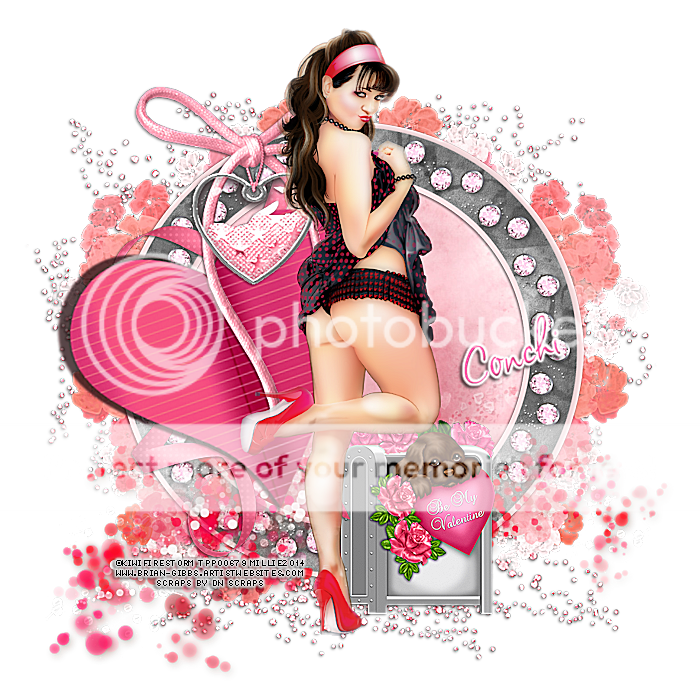
PTU Be My Valentine
This tutorial was written by me on February 6, 2014.
It was made out of my own creation and any similarity is purely coincidental.
I used pspx5 but any version should work without problems.
If you're doing this tutorial you must have good psp knowledge and be familiar with the tools.
Let's get started!
Artist: Kiwifirestorm
Scrapkit: Petals Pink Love by DN Scraps
Plugins: Xero - Porcelain
Font: Clarissa
*open your mask and minimize in your workspace*
File - New - 700x700 - flood fill w white
Open diamond frame - resize by 65% - sharpen
Click inside frame - expand by 5 - new layer
Open pp7 - c/p into selection - deselect
Place paper under frame - add drop shadow to the frame
Open circles - resize by 80% - place to the bottom
Open puppy mailbox - resize by 50% - place to right some and bottom
Add drop shadow
Open ribbon - resize by 50% - place to left - drop shadow
Open heart - resize by 50% - place to left - drop shadow
Open rope heart - resize by 50% - place to left - drop shadow
Open tube - resize to liking
Xero - porcelain - change blue channel to 0
On background layer
Open glitters - c/p as new layer
Open flowers - resize to 70% - place to the right
Duplicate - mirror - merge down - add drop shadow
Delete background - merge visible
Adjust - sharpen more (if you want)
Add credits and name
Thursday, January 9, 2014

*click on image to view full size*
PTU You Should Rotate This
This tutorial was written by me on January 9, 2014.
It was made out of my own creation and any similarity is purely coincidental.
I used pspx5 but any version should work without problems.
If you're doing this tutorial you must have good psp knowledge and be familiar with the tools.
Let's get started!
Artist: Rotate by Kiwifirestorm
Scrapkit: Rotate by Gimptastic Scraps
Mask: DVB 113
Font: Qwigly
*open your mask and minimize in your workspace*
File - New - 700x700 - flood fill w white
Click on background with magic wand - new layer
Open paper2 - c/p into selection - deselect
Layers - New mask layer - From Image
Find your mask in source window - hit ok
Merge group
Open grunge - place to the bottom
Open WA and resize it by 75% - place to the left - add drop shadow
Open star - place to the right - add drop shadow
Open skull scatter - place to bottom left some - drop shadow
Open cage - resize by 75% - sharpen - rotate to the right some and move to the right
Add drop shadow
Oepn sucker - place to the right - rotate to the right some w deform tool
Add drop shadow
Open frame1 - resize by 65% - sharpen - place to left
Open tube - mirror - place to left and move it so its under the frame
Click inside frame w magic wand - expand by 5 - new layer
Open paper2 - c/p into selection - move under tube layer
On tube - invert - delete - deselect
Change tube blend to luminance (L) - duplicate your tube
Change blend mode to screen - adjust blur - gaussian blur 3 - hit ok
Add drop shadow to your bottom tube
Add drop shadow to your frame
Open city scape - place down some - add drop shadow
Open bullet - resize by 50% - place to the right - rotate to right some
Add drop shadow
Open your tube - resize by 75% - place down some
Xero - porcelain - change blue channel to 0 - hit ok
Open rotate - place to the bottom right - add drop shadow
Delete background layer - merge visible
Add credits and name
Tuesday, January 7, 2014

*click on image to view full size*
PTU Sweet Girl
This tutorial was written by me on January 7, 2014.
It was made out of my own creation and any similarity is purely coincidental.
I used pspx5 but any version should work without problems.
If you're doing this tutorial you must have good psp knowledge and be familiar with the tools.
Let's get started!
Artist: Candygirl by Chris Pastel
Scrapkit: Candygirl Collab by Gimptastic Scraps
Mask: WSL mask 241
Plugins: Xero - porcelain
Font: Prestige Elite
*open your mask and minimize in your workspace*
File - New - 700x700 - flood fill w white
Open frame 5 - resize by 85%
Click inside frame w magic wand - expand by 5 - new layer
Open pp9 - c/p into selection - deselect
Place to bottom of frame
Add heavy drop shadow to your frame
Open candy stick - place to left - drop shadow
Open flower 4 - place to left - drop shadow
Open sweet cookie - place to right - drop shadow
Open candy ring - resize by 50% - sharpen - place to bottom right
Add drop shadow
Open lollipop2 - place to right - drop shadow
Open tube - resize by 75% - c/p to your liking
Xero - porcelain - change blue channel to 0
Add drop shadow to your tube
Open ribbon - place to bottom - add drop shadow
Open flower1 - place to the bottom - add drop shadow
Open wa2 - place to bottom - add drop shadow
Open label - place to bottom left - add drop shadow
On background layer
Click on background with magic wand - new layer
Open paper of choice - c/p into selection - deselect
Layers - New mask layer - From Image
Find your mask in source window - hit ok
Merge group
Open splatter - place to right - duplicate - mirror - merge down
Open scatter - place to right - duplicate - mirror - merge down
Open deco - place to left - rotate to left some w deform tool
Delete background - merge visible - add credits and name
Thursday, December 5, 2013

*click on image to view full size*
PTU Santa Stops Here
This tutorial was written by me on December 5, 2013.
It was made out of my own creation and any similarity is purely coincidental.
I used pspx5 but any version should work without problems.
If you're doing this tutorial you must have good psp knowledge and be familiar with the tools.
Let's get started!
Artist: Chris Pastel
Scrapkit: Santa Baby by Gimptastic Scraps
Font: Christmas on Crack
*open your mask and minimize in your workspace*
-add light drop shadow to all your elements when done
I used shadow w these settings 1 1 65 5 black
Use any settings you like
File - New - 700x700 - flood fill w white
Open mask - c/p as new layer - move down some
Open garland - place to bottom
Open frame 6 - resize by 75% - move down some
Open present1 - place to the right
Open present 2 - place to right - free rotate to some
Open poinsettia - place to right
Open swirl - resize by 85% - place to left
Open snowy ground - place to the bottom
Open sign - place to left - free rotate to left w deform tool
Open tube - resize to liking - c/p as new layer
Xero - porcelain - change blue channel to 0 - hit ok
Open train - place to bottom
Delete background - merge visible
Add credits and name

Friday, November 1, 2013
FTU Hear My Body Sing
This tutorial was written by me on November 1, 2013.
It was made out of my own creation and any similarity is purely coincidental.
I used pspx5 but any version should work without problems.
If you're doing this tutorial you must have good psp knowledge and be familiar with the tools.
Let's get started!
Artist: kiwifirestorm
Scrapkit: Let's Try by Gimptastic Scraps
Mask: 109 by DBV
Font: Sick Capital Vice
*open your mask and minimize in your workspace*
File - New - 700x700 - flood fill w white
Open frame 3 - resize by 65% - place to the right
Open tube - c/p and place to the right
Move tube under frame
Click inside both rectangles of frame - expand by 2 - new layer
Open pp4 - c/p into selection - deselect
Move paper under tube layer
Change blend mode of tube to Luminance L
Add drop shadow to frame
Make your background invisible - merge visible
Make background visible again
Duplicate merged layer - mirror - move down some
Open star2 - resize by 50% - place to left some
Open music notes - place to the right - duplicate - mirror
Open tube - resize to fit your tag - place to bottom some
Open heart - resize by 50% - place to the right
Open sparkles - c/p as new layer
On background layer
Click on background with magic wand - new layer
Open paper2 - c/p into selection
Layers - New mask layer - From Image
Find your mask in source window - hit ok
Merge group
Change mask opacity to 50
Open city scape - resize by 50% - place to the left
duplicate - place to the right
Delete background - merge visible - add credits and name
Thursday, October 17, 2013

This tag was made with art by Cute Loo
I used kit made by Abstract Creations
I also made a template
You can download it HERE
Monday, October 14, 2013

*click on image to view full size*
PTU Blue in Your Dream
This tutorial was written by me on October 14, 2013.
It was made out of my own creation and any similarity is purely coincidental.
I used pspx5 but any version should work without problems.
If you're doing this tutorial you must have good psp knowledge and be familiar with the tools.
Let's get started!
Artist: Kiwifirestorm
Scrapkit: Blue Dreams by Amy Marie's Kits
Mask: 84 by WSL
Font: Beautiful
*open your mask and minimize in your workspace*
File - New - 700x700 - flood fill w white
Open 24 - resize by 50% - sharpen - c/p as new layer
Click inside frame w magic wand - new layer
Open pp13 - c/p into selection - deselect
Place paper under frame - add drop shadow to frame
Open tube - size it to fit your tag
Open 104 - resize by 50% - place to bottom of tube
Open 7 - resize by 50% - place to bottom left
Open 8 - resize by 50% - place to the right
Open 2 - resize by 50% - place to bottom left
duplicate - mirror - merge down
Open 39 - resize by 50% 2x - sharpen
Place to bottom right - duplicate - mirror
On background layer
Click on background with magic wand - new layer
Open paper1 - c/p into selection
Layers - New mask layer - From Image
Find your mask in source window - hit ok
Merge group
Open 10 - place to top right
Open 62 - resize by 80% - place to the right
Open 13 - place to the left
Open 25 - place to the left
Open 6 - place to right - duplicate - mirror - merge down
Delete background - merge visible
Crop your tag to your liking - add credits and name
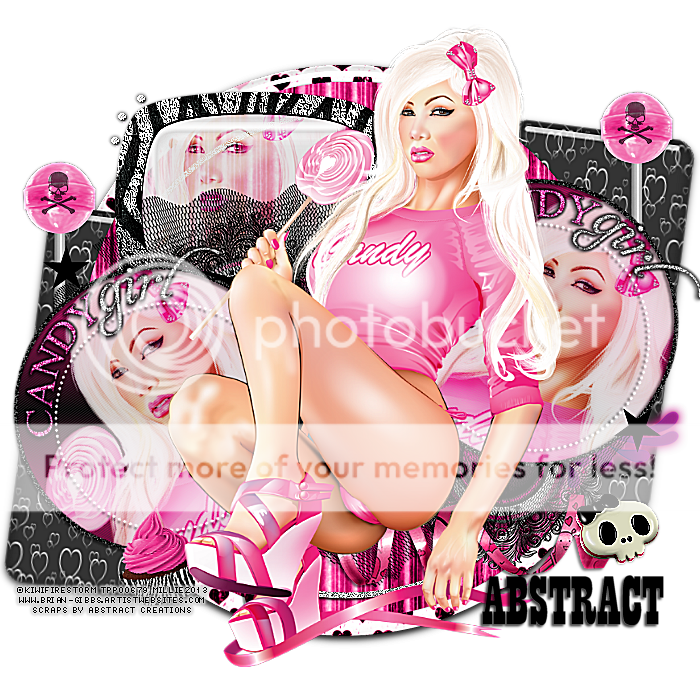
This tag was made with awesome work by Kiwifirestorm
I used PTU Pink is the new Black by Abstract Creations
I also made a template

You can grab the template HERE
Subscribe to:
Posts
(Atom)


