


Showing posts with label Elias Chatzoudis. Show all posts
Showing posts with label Elias Chatzoudis. Show all posts
Friday, April 26, 2019


Tuesday, March 22, 2016

CT HAPPY PUMPKIN STUDIO
This tag was made with artwork by Elias Chatzoudis
I matched it up with awesome brand new kit PTU Hip Hop Spring by Happy Pumpkin Studio!
Grab this kit HERE
Tuesday, March 24, 2015
Saturday, November 22, 2014

This tag was made with awesome work of Elias Chatzoudis
I used lovely PTU Sadie by Hania's Designs
Template 719

You can download it HERE
Thursday, November 20, 2014

This tag was made with artwork from Elias Chatzoudis
I used PTU Dear Santa kit by Scrappin With Lil Ole Me

This tag was made with artwork by Keith Garvey
I also made some snags for you all.
You can grab them below by clicking each image for full-size.
Please do not alter in anyway or claim as you own.


Sunday, October 19, 2014
Thursday, October 16, 2014

Sunday, March 30, 2014

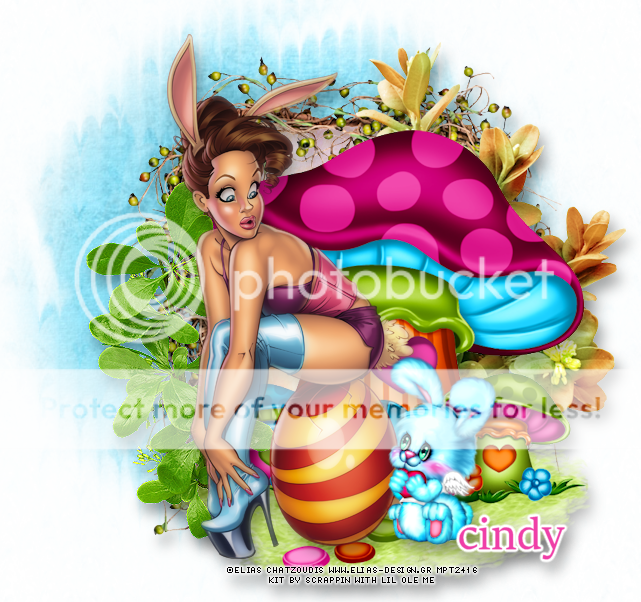
*click on image to view full size*
PTU So Easterific
This tutorial was written by me on March 30, 2014.
It was made out of my own creation and any similarity is purely coincidental.
I used pspx5 but any version should work without problems.
If you're doing this tutorial you must have good psp knowledge and be familiar with the tools.
Let's get started!
Artist: Elias Chatzoudis
Scrapkit: Easterific by Gimptastic Scraps
Mask: 84 by WSL
Font: the NautiGal
*open your mask and minimize in your workspace*
File - New - 800x800 - flood fill w white
Open frame 6 - resize by 80% - c/p as new layer
Click inside your frame w magic wand - expand by 5 - new layer
Open paper1 - c/p into selection - deselect
Move paper under frame
Add drop shadow to the frame
Open tube - place to your liking - add drop shadow
Open leaf1 - resize by 50% - place to the right
Duplicate - mirror - merge down - drop shadow
Open grass - place to bottom - drop shadow
Open chocolate egg - resize by 50% - place to bottom right
Add drop shadow
Open chick - resize by 50% - place to bottom right
Rotate to the right some - add drop shadow
Open EggPlant - resize by 50% - place to left - rotate to left some
Add drop shadow
Open wordart - place to bottom and add drop shadow
On background
Click on background with magic wand - new layer
Open paper4 - c/p into selection - deselect
Layers - New mask layer - From Image
Find your mask in source window - hit ok
Merge group
Open scatter - bottom right
Open sign - resize by 50% - place to the top right
drop shadow
Open fence - resize by 85% - place to the right
duplicate - mirror - merge down - drop shadow
Open butterfly - resize by 50% - rotate to the right - place to left
Add drop shadow
Delete background - merge visible
Crop and resize your tag to liking
Add credits and name
Wednesday, January 1, 2014
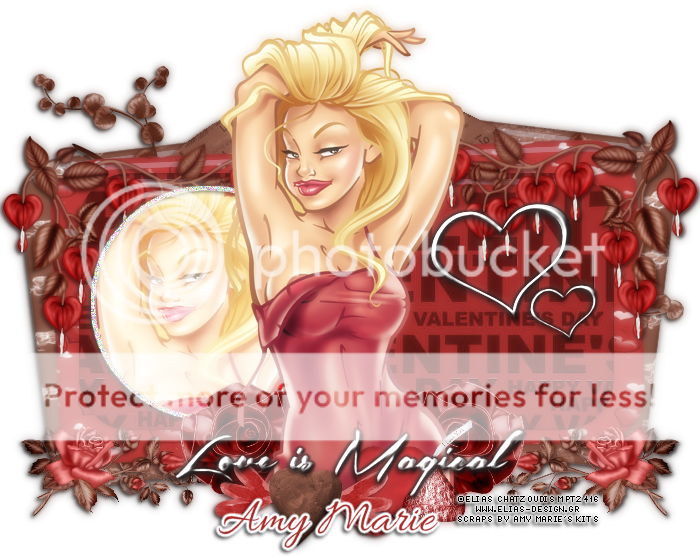
This tag was made with artwork from Elias Chatzoudis
I used PTU Love N Fairyland by Amy Marie's Kits

Used another tube from Elias C and same kit :)
Template 465
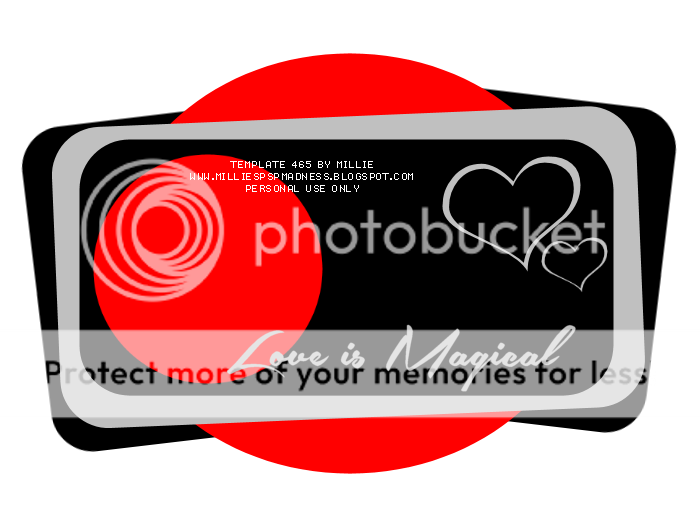
You can download it HERE

Monday, November 18, 2013

*click on image to view full size*
PTU Love the Snow
This tutorial was written by me on November 18, 2013.
It was made out of my own creation and any similarity is purely coincidental.
I used pspx5 but any version should work without problems.
If you're doing this tutorial you must have good psp knowledge and be familiar with the tools.
Let's get started!
Artist: Elias Chatzoudis
Scrapkit: Crystal Snowflakes by Amy Marie's Kits
Mask: Winter Mask 2 by Dangerously Delicious Designz
Plugins: Xero - porcelain
Font: KG Love You Through It
*open your mask and minimize in your workspace*
*add light drop shadow of 1 -1 40 3 to all elements unless noted*
File - New - 700x700 - flood fill w white
Click on background layer w magic wand - new layer
Open paper of choice - c/p into selection - deselect
Layers - New mask layer - From Image
Find your mask in source window - hit ok
Merge group
Open glitter flakes - place to the top and right
Open word backing - place to top
Open trees1 - place to left - duplicate - mirror
Open trees2 - place to left - duplicate - mirror
Open window - move down some
Open flake1 - place to the right - duplicate - place bottom middle
Open rose2 - resize by 50% 2x - place to bottom left
Duplicate - mirror - move up some
Open tube - resize to liking - place to left
Xero - porcelain - change blue channel to 0
duplicate tube - adjust - blur - gaussian blur 3
Change blend mode to screen - opacity to 75
Open snow word 1 - resize by 60% - place to bottom
Delete background - merge visible
Add credits and name

Friday, November 1, 2013
*click on image to view full size*
PTU I Am Feeling The Music
This tutorial was written by me on November 1, 2013.
It was made out of my own creation and any similarity is purely coincidental.
I used pspx5 but any version should work without problems.
If you're doing this tutorial you must have good psp knowledge and be familiar with the tools.
Let's get started!
Artist: Elias Chatzoudis
Scrapkit: Music To My Heart by Rissa's Designs
Mask: any of choice
Font: Susie's Hand
*open your mask and minimize in your workspace*
File - New - 700x700 - flood fill w white
Open frame 2 - c/p as new layer
Open tube close up - c/p and place under frame - face closer to left
Click inside frame w magic wand - expand by 15 - new layer
Open pp2 - c/p into selection - move paper under tube close up
On tube close up - invert - delete - deselect
Change blend of tube to Screen and opacity to 51
Back to frame layer
Open piano keys 01 - resize by 85% - c/p as new layer
Open violin - place on top of keys and right some
Open musical stand and place to the right
Open music sheet - resize by 50% - place to right
Rotate to right some w deform tool
Open music heart - resize by 50% - place to bottom right
Open tube - resize to fit your tag - place to right some
Open scatter - resize by 75% - place to the bottom
On background
Click on background with magic wand - new layer
Open paper1 - c/p into selection
Layers - New mask layer - From Image
Find your mask in source window - hit ok
Merge group
Open music circle - place to the left some
Delete background - merge visible
Add credits and name
Friday, September 27, 2013
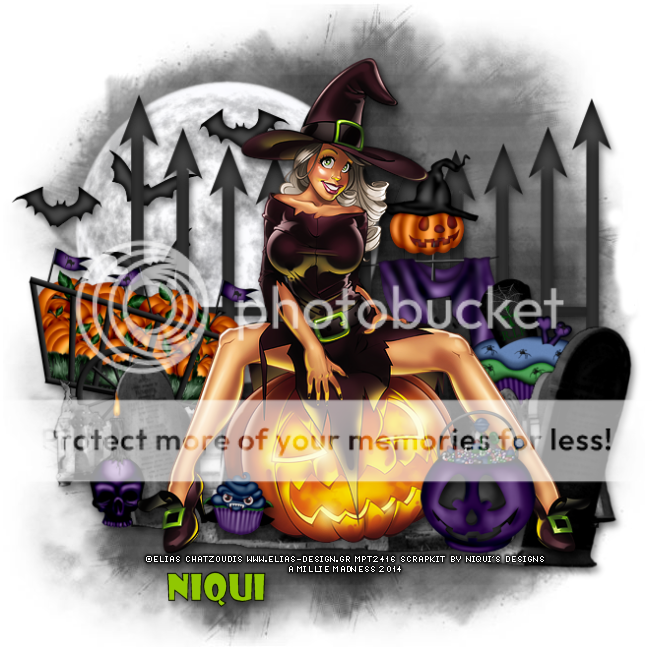
*click on image to view full size*
PTU Trick or Treat
This tutorial was written by me on September 27, 2013.
It was made out of my own creation and any similarity is purely coincidental.
I used pspx5 but any version should work without problems.
If you're doing this tutorial you must have good psp knowledge and be familiar with the tools.
Let's get started!
Artist: Elias Chatzoudis
Scrapkit: Peek-a-boo by Niqui's Designs
Font: Harry Potter
*open your mask and minimize in your workspace*
*c/p will be copy and paste as new layer unless noted*
File - new - 851x315 - fill w white
Click on background w magic wand - new layer
Open pp2 - c/p into selection - deselect
Open 36 - resize by 50% 2x - c/p - place to bottom left
Open 5 - resize by 50% - c/p - place to bottom left
Open 6 - c/p - place to right
Open 3 - resize by 50% 2x - sharpen - c/p - place to top
Open 11 - c/p - place to right
Open 4 - resize by 50% - c/p - place to bottom right
Open 12 - resize by 50% 2x - place to the right
Open tube - c/p as new layer - place to liking
duplicate tube - adjust - blur - gaussian blur 2
change blend mode to screen - opacity to 63
Merge visible
Image - add borders - 1 all around - black - hit ok
Add credits and name
Saturday, August 17, 2013

*click on image to view full size*
PTU I'm Your Princess
This tutorial was written by me on August 17, 2013.
It was made out of my own creation and any similarity is purely coincidental.
I used pspx5 but any version should work without problems.
If you're doing this tutorial you must have good psp knowledge and be familiar with the tools.
Let's get started!
Artist: Cinderella by Elias Chatzoudis
Scrapkit: Princesselle by Amy Marie's Kits
Font: Helinda Rook
File - New - 700x700 - flood fill w white
Open 49 - resize by 75% - c/p as new layer
Place to the right some
Duplicate frame - change blend mode to screen - merge down
Open 24 - resize by 50% - c/p as new layer - place to bottom right
Open 91 - c/p as new layer - place to the left
Open 79 - c/p as new layer - move to right a little bit
Open 100 - resize by 50% - sharpen - c/p as new layer
Place to the bottom right
Open 84 - resize by 50% - sharpen - c/p as new layer
Place to the bottom right
Open tube - c/p as new layer - place to bottom
Flip horizontal
On background layer
Open paper9 - c/p as new layer
Open 11 - c/p as new layer
Click inside frame w magic wand - expand by 5
On castle layer - invert - delete - invert
On paper layer - invert - delete - deselect
Change castle blend mode to luminance (L)
Duplicate - change blend mode to screen
On background layer again
Open 33 - c/p as new layer - place to bottom right
duplicate - move up some - merge down - duplicate
Place to the left - duplicate move to middle - merge down 2x so flowers are one layer
duplicate - change blend mode to screen - merge down
Delete background - merge visible - add credits and name
Crop your tag to your liking if you want
Monday, July 22, 2013

*click on image to view full size*
PTU Sweetest Angel
This tutorial was written by me on July 22, 2013.
It was made out of my own creation and any similarity is purely coincidental.
I used pspx5 but any version should work without problems.
If you're doing this tutorial you must have good psp knowledge and be familiar with the tools.
Let's get started!
Artist: Elias Chatzoudis
Scrapkit: Jean by Amy Marie's Kits
*Exclusive to amymarieskits.com*
Mask: 23 by moonbeams and spiderwebs
Font: Cherish
*open your mask and minimize it in your workspace*
Click on background with magic wand - new layer
Open paper9 - c/p into selection
Layers - New mask layer - From Image
Find your mask in source window - hit ok
Merge group
Open 48 - c/p as new layer - place to the right
Change blend mode to overlay and opacity to 36
merge down to mask
Open 79 - c/p as new layer - move to left some
Change blend mode to overlay and opacity to 65
merge down to mask
Duplicate mask and change blend mode to screen
Open 3 - resize by 75% - sharpen - c/p as new layer
Place to left - duplicate - place the right
Open 78 - c/p as new layer
Open 60 - resize by 50% - sharpen - c/p as new layer
Place to the bottom right - duplicate - place to left
merge down - duplicate - move up
Open 83 - resize by 85% - c/p as new layer
Open 88 - c/p as new layer - place to left
duplicate - place to right - flip horizontal
Open 75 - c/p as new layer - place under tube and move to left some
duplicate - place to the right
Open 69 - resize by 50% 2x - c/p as new layer - place to bottom left
Open tube - resize by 80% - c/p as new layer - place in middle
Effects - Xero - porcelain - change blue channel to 0 - hit ok
Duplicate - change blend mode to soft light - opacity to 50
Open 117 - resize by 50% - c/p as new layer - place to bottom right
Open 111 - resize by 50% 2x - sharpen - c/p as new layer
Place to the bottom right
Open 76 - resize by 50% - c/p as new layer - place to the left
duplicate - place somewhere else
Delete background - merge visible - add credits and name
Saturday, July 20, 2013

This tag was made with artwork by Elias C
I used InspiredByJessicaDougherty 39-1 by Abstract Creations
You can find it in CDO
Here are some snags for you all
*click on image to save full-sized*


Subscribe to:
Posts
(Atom)


