


Tuesday, October 30, 2012
*click image to view full-size*
This tutorial was written by Millie on October 30, 2012.
I made this tag out of my own creativity and any similarity to another is purely coincidental.
I used PSPX2 to make this tag but any other version should be ok.
If you're doing this tutorial then I assume you have psp knowledge.
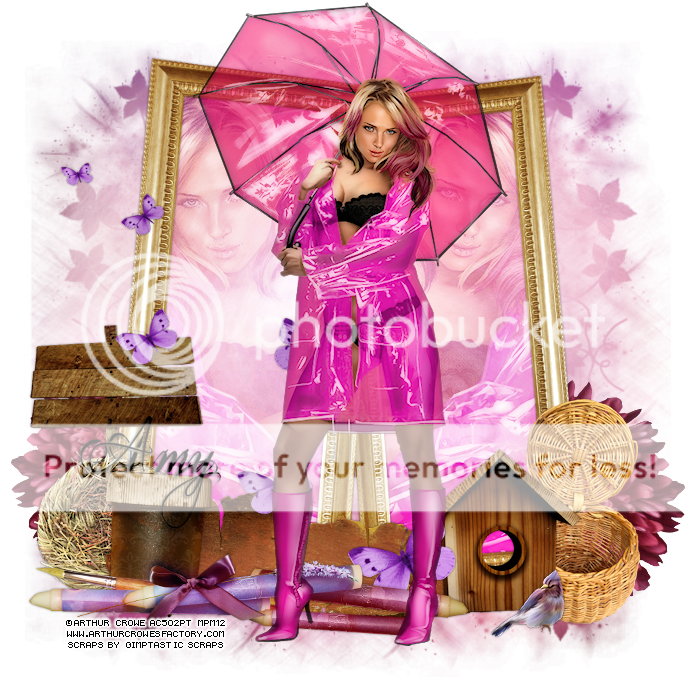
FTU I Flurish In The Fall
Artist: Arthur Crowe HERE
Scrapkit: Flourishing Fall by Gimptastic Scraps HERE
Mask: Melissaz Creationz Mask 9 HERE
Plugins: xero porcelain
Font: I used Eutemia I Italic
File - new - 700x700 - transparent - raster
Flood fill with white
Open frame 5, c/p as new layer
With your magic wand click inside the frame
Selections - modify - expand by 5
Open paper7, c/p as new layer, move under frame layer
Selections - invert - delete
Selections - none
Open your tube closeup, c/p as a new layer
Move tube so the face is inside of the right frame
Effects - xero - porcelain default - change blue channel to 0
Back to frame layer with magic wand click inside right side of frame
Selections - modify - expand by 5
Go to tube layer, selections - invert - delete - selections - none
Grab your tube close up again, c/p as a new layer
Image - mirror
Move tube so the face is inside of the left frame
Effects - xero - porcelain default - change blue channel to 0
Back to frame layer with magic wand click inside right side of frame
Selections - modify - expand by 5
Go to tube layer, selections - invert - delete - selections - none
Merge tubes together then change blend mode to overlay
Back to frame layer
Open sign, resize by 50%, adjust - sharpen, c/p as a new layer
Move to the right of the frame
Open butterflies, resizey by 80%, c/p as a new layer
Place to your liking
Open bark, c/p as new layer, move to bottom right of frame
Open birdnest, resize to 50%, adjust - sharpen, c/p as new layer
Move to the left of the frame
Open basket, resize by 50%, adjust - sharpen, c/p as new layer
Move to the right of the frame
Open full-size tube, resize by 80%, c/p as new layer
Effects - xero - porcelain - settings same as before
Open Artstuff, c/p as a new layer, image - mirror
Move to the left of the frame
Open birdhouse, resize by 50%, c/p as a new layer, move to right of frame
Open bird, resize by 50% 2x, adjust - sharpen, c/p as new layer
Move bird to the right of the bird house
Open flower3, c/p as a new layer, move to the left of the tag
Move flower down so that is on the layer right above background
Duplicate flower, image - mirror, place to your liking
Go to background layer, with your magic wand click inside of it
New layer, open paper7, c/p into selection
Selections - none
Apply your mask
Layers - New mask layer - from image
Find your mask in the source window, create mask from source luminance, hit ok
Merge group
I used my deform tool to resize mask some
Delete background layer, merge visible
Add credits and your name
Subscribe to:
Post Comments
(Atom)


0 comments:
Post a Comment