


Thursday, May 30, 2013

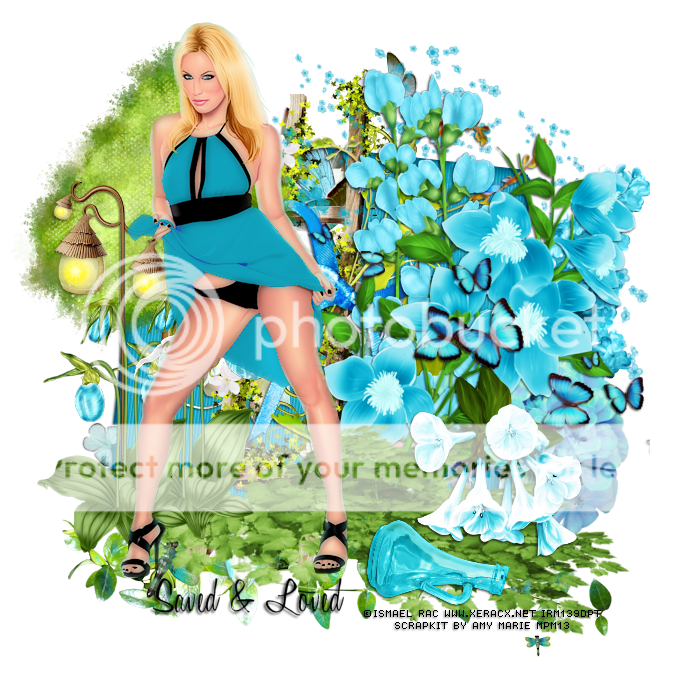
This tag was made with Cool Heels tube from Ismael Rac
You can find her in the Xeracx Store
I used PTU Aquamarine Butterfly kit by Amy Marie
You can find it in PFD
Here are some snags for you :)
Please click on snags to save full sized!
Thanks.


Kimmy made this awesome tag using one of my templates :)
You can check it out on her blog and get the snags!
Visit BOOKWORM DEZINES
Wednesday, May 29, 2013
*click on image to view full size*
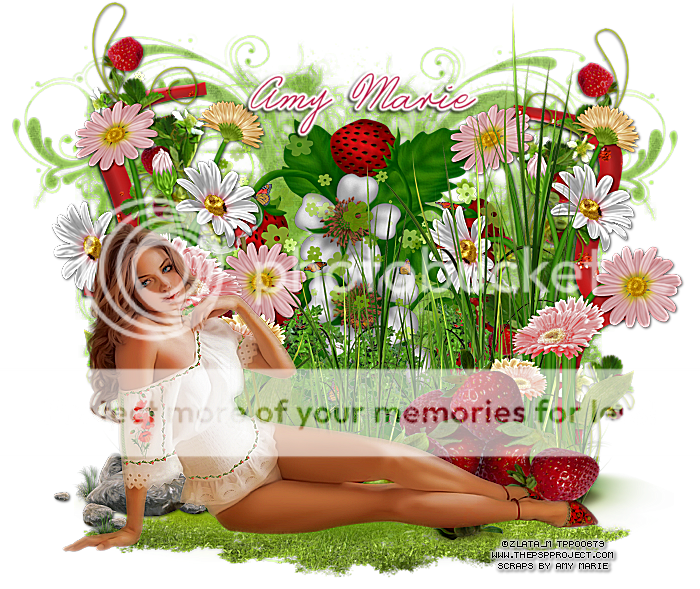
PTU Love Strawberries
This tutorial was written by me on May 29, 2013.
It was made out of my own creation and any similarity is purely coincidental.
I used pspx5 but any version should work without problems.
If you're doing this tutorial you must have good psp knowledge and be familiar with the tools.
Let's get started!
Artist: Zlata_M
Scrapkit: Strawberry Dreams by Amy Marie
Mask: 43 by moonbeams and spiderwebs
Plugins: xero - porcelain
Font: Castro Script
*open your mask and minimize it in your workspace*
File - New - 700x700 - fill with white - rename background
Open paper of choice - c/p as new layer
Apply your mask - merge group
Resize mask by 80% - move to left - duplicate - place to right
Open 1 - c/p as new layer - move down a bit
Open 62 - c/p as new layer
Open 72 - c/p as new layer
Open 103 - c/p as new layer - place to the bottom
Open 110 - c/p as new layer - place down a little
Open 88 - c/p as new layer - place to bottom
Open 56 - c/p as new layer - place to left
duplicate - flip horizontal - place to right
OPen 36 - c/p as new layer - place to right
duplicate - place to the left
Open 41 - c/p as new layer
Open 99 - resize by 50% - sharpen - c/p as new layer
Place to the bottom left
Open 43 - c/p as new layer - place to the bottom right
Open full tube - resize by 80% - c/p as new layer
xero - porcelain - change blue channel to 0
Delete background layer - merge visible - add credits and name
Tuesday, May 28, 2013
*click on image to view full size*
PTU Pretty Girl Named Sarah
This tutorial was written by me on May 28, 2013.
It was made out of my own creation and any similarity is purely coincidental.
I used pspx5 but any version should work without problems.
If you're doing this tutorial you must have good psp knowledge and be familiar with the tools.
Let's get started!
Artist: Sarah by Alex Prihodko
Scrapkit: Sarah by Amy Marie
Mask: DBV mask 106
Font: Carlotta
*open your mask and minimize it in your workspace*
File - New - 700x700 - fill with white - rename background
Open 101 - c/p as new layer
Click inside frame w magic wand - new layer
Open paper7 - c/p into selection - deselect
Move paper under frame layer
Add drop shadow to your frame
OPen 13 - c/p as new layer - move to right and up a little
Open 38 - resize by 80% - sharpen - c/p as new layer
Place to top right
Open 75 - c/p as new layer - place to left
Open 92 - c/p as new layer - place to bottom left
duplicate - image - flip horizontal - place to top right
Open 31 - resize by 50% - sharpen - c/p as new layer
place to bottom right
duplicate - place to the top left
Open 65 c/p as new layer - move down and left some
Open tube - resize to fit your tag - c/p as new layer
Place to the bottom some
On background layer
*click inside background w magic wand* new layer
open paper5 - c/p into selection
Layers - new mask layer - from image - find mask in source window
Hit ok - merge group
Open 76 - c/p s new layer - place to left
Open 82 - c/p as new layer - place to top and left some
Open 55 - c/p as new layer - place to the left
duplicate - place to the right - merge down - add drop shadow
Open 53 - c/p as new layer - place to bottom
Delete background - merge visible - add credits and name


New Releases at the Tony Tz STore!
Aren't these just beautiful! You can buy them in a pack, with kits, individually, or as a bundle!
www.tonytz.com/store

*click on image to view full size*
PTU Blue is Elegant
This tutorial was written by me on May 28, 2013.
It was made out of my own creation and any similarity is purely coincidental.
I used pspx5 but any version should work without problems.
If you're doing this tutorial you must have good psp knowledge and be familiar with the tools.
Let's get started!
Artist: Lady In Blue by Tony Tzanoukakis
Scrapkit: Elegance In Blue by Bookworm Dezines
Mask: MB and SW mask 14
Plugins: xero - porcelain
Font: any of choice
*open your mask and minimize it in your workspace*
File - New - 700x700 - fill with white - rename background
Open tube - c/p as new layer - place to the left
Open ele16 - resize by 85% - c/p as new layer - place to left
Open paper 9 - c/p as new layer
Click inside frame w magic wand - expand by 5
On tube layer - invert - delete - invert
Xero - porcelain - default settings
Change blend settings to luminance (L) duplicate
change blend settings to screen - opacity to 75
On paper layer - invert - delete - deselect
Add drop shadow to your frame
Open 28 - c/p as new layer - place to bottom
Open tube - resize by 50% then by 75% - c/p as new layer
Xero - porcelain - default settings - hit ok
duplicate tube - change blend to soft light - merge down
On background layer
Click in it w magic wand
Open paper5 - c/p into selection
Layers - new mask layer - from image
find your mask in source window and hit ok
merge group
Open ele8 - c/p s new layer - place to bottom
Open 26 - resize by 95% - c/p as new layer - move left and down a little
open 30 - c/p as new layer - place left
duplicate - flip horizontal - move to the left - merge down
OPen ele37 - c/p as new layer
Open ele31 - c/p as new layer - place to right
Delete background layer - merge visible - add credits and name

*click on image to view full size*
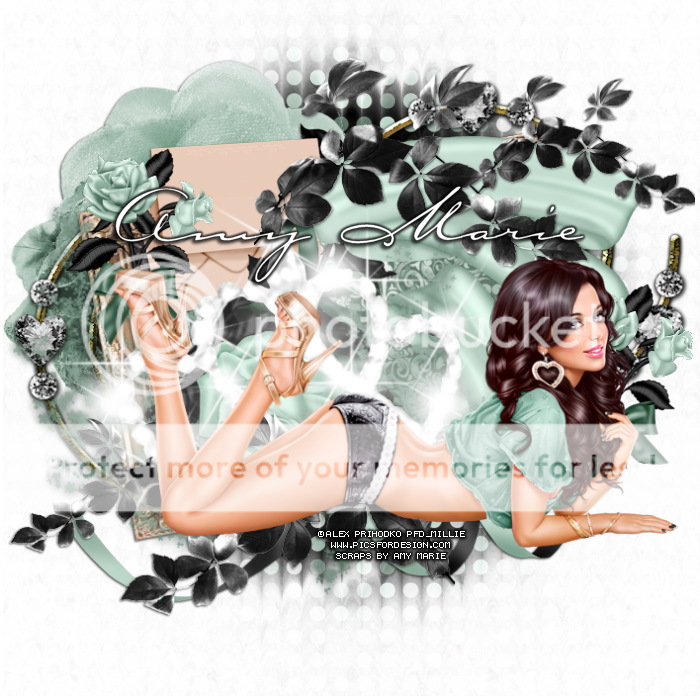
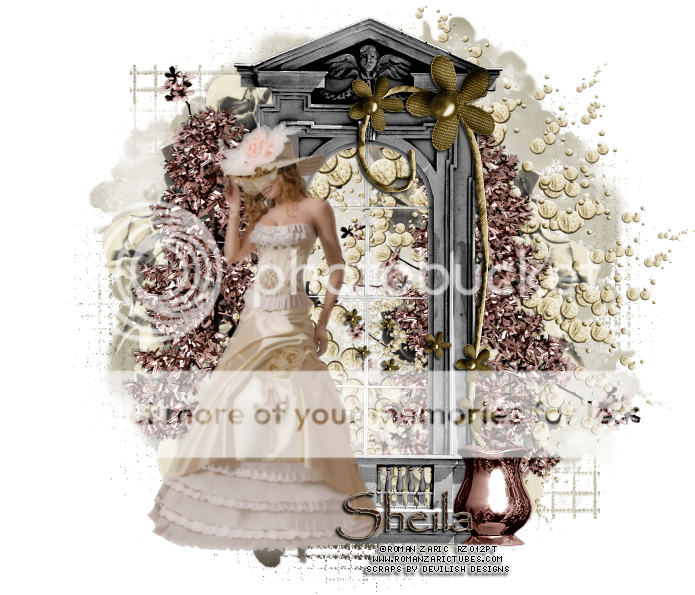
PTU From This Moment
This tutorial was written by me on May 28, 2013.
It was made out of my own creation and any similarity is purely coincidental.
I used pspx5 but any version should work without problems.
If you're doing this tutorial you must have good psp knowledge and be familiar with the tools.
Let's get started!
Artist: Corandine by Roman Zaric
Scrapkit: Moment in Time by Devilish Dezines
Mask: 44 by moonbeams and spiderwebs
Font: Freebooter Script
*open your mask and minimize it in your workspace*
File - New - 700x700 - fill with white - rename background
Open ele9 - resize by 70% - sharpen - c/p as new layer
Open ele30 - c/p as new layer
Open ele19 - resize by 65% - sharpen - c/p as new layer - place to right
Image - flip vertical
Open ele10 - resize by 65% - sharpen - c/p as new layer - place to right some
Open 15 - resize by 75% - sharpen - c/p as new layer - place to left
Open 11 - resize by 75% - sharpen - c/p as new layer - place to left
Open tube - resize to fit your tag - c/p as new layer
duplicate tube - change blend to soft light
Open ele25 - resize by 80% - sharpen - c/p as new layer - place down some
Open 26 - resize by 50% - c/p as new layer - place to bottom so its over tube's legs
Open ele1 - resize by 50% - c/p as new layer - place to bottom
Click on background layer w magic wand - new layer
Layers - new mask layer - from image - find mask in source window - hit ok
Merge group - move mask to left - duplicate - move to right - flip horizontal
delete background layer - merge visible
Add credits and your name
I have some awesome tags and tuts to show off!
I want to thank all the girls for taking the time to make me a tag and of course for always using my templates and supplies :)
Hope you like them!

This tag was made by Kimberly from Bookworm Dezines

From Jeannie

From Sam

from Kelly
Another one from Kelly :)

From Jeannine
You can find the tut HERE

Another one from Jeannine
You can find the tutorial HERE
Monday, May 27, 2013

*click on image to view full size*
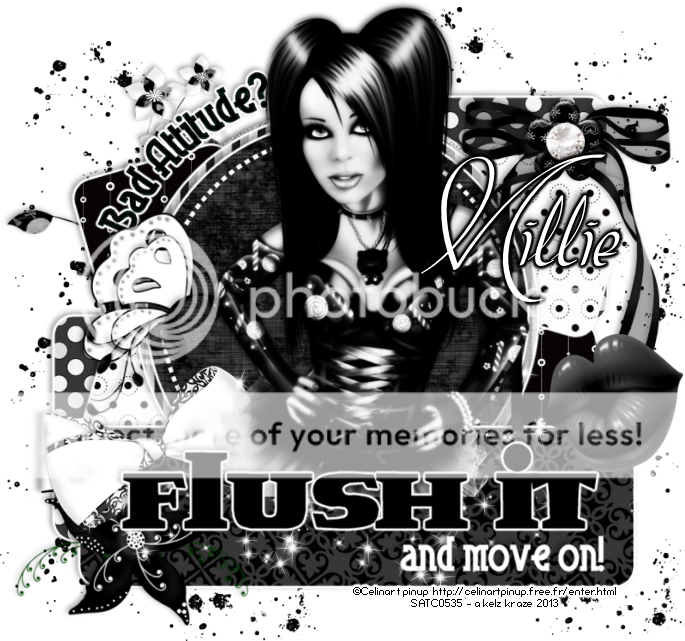
PTU She's One Hot Mama
This tutorial was written by me on May 27, 2013.
It was made out of my own creation and any similarity is purely coincidental.
I used pspx5 but any version should work without problems.
If you're doing this tutorial you must have good psp knowledge and be familiar with the
tools.
Let's get started!
Artist: Jose Cano
Scrapkit: Hot Mama by Amy Marie
Exclusive at SATC
Mask: Grunge mask of choice
Template: 269 by me HERE
Plugins: Xero - Porcelain
Font: Saginaw
*open your mask and minimize it in your workspace*
Open template - duplicate - close original
Make background layer visible and delete raster 1 (cr layer)
Click on layer 1 w magic wand - new layer
Open pp4 - c/p into selection - add drop shadow - deselect
On layer 2 - open close up tube - c/p as new layer
Place to the right so face is at corner of square
Click on layer 2 w magic wand - new layer
Open pp4 - c/p into selection - add drop shadow
On tube layer - invert - delete - deselect
Xero - porcelain - hit ok
Change blend to overlay
Open 24 - c/p as new layer - place to top right
Open 51 - c/p as new layer - place to the right
Click on layer 3 w magic wand - new layer
Open pp10 - c/p into selection - add drop shadow - deselect
Click on layer 4 w magic wand - new layer
Open pp2 - c/p into selection - add drop shadow - deselect
Open 30 - c/p as new layer - move to right as much as you can
Open 36 - c/p as new layer - place to top left
Merge layer 6 to 5
Open 12 - c/p as new layer - place to the left - flip horizontal
Merge layer 8 down to 7
Open tube close up - c/p as new layer - place to left on top of layer 7 squares
Click inside squares w magic wand
Effects - TExture effects - blinds
width: 2 - opacity: 25 - color: white - horizontal and light from left/top checked
hit ok
On tube layer - invert - delete - deselect
Xero - porcelain - hit ok
Adjust - sharpen - change blend mode to luminance (L)
Open half tube - c/p as new layer - place to your liking
Open 52 - c/p as new layer - place down
On layer 9 - move down some - add drop shadow
On background layer
Click inbackground w magic wand - new layer
OPen paper16 - c/p into selection
Layers - new mask layer - from image - find mask in source window
hit ok - merge group
Open 82 - c/p as new layer - place to top left - duplicate
Move to the right - flip horizontal
Open 37 - c/p as new layer - place to top right
Open 19 - c/p as new layer - place to right
Delete background - merge visible - add credits and your name

Sunday, May 26, 2013

*click on image to view full size*
PTU Mermaid Heaven
This tutorial was written by me on May 26, 2013.
It was made out of my own creation and any similarity is purely coincidental.
I used pspx5 but any version should work without problems.
If you're doing this tutorial you must have good psp knowledge and be familiar with the tools.
Let's get started!
Artist: Elias Chatzoudis
Scrapkit: Hannah by Amy Marie
Template: 268 by Me HERE
Plugins: Eyecandy Impact - Glass, Xero - Porcelain
Font: Satisfaction
Open template - duplicate - close original
Delete raster 1 - make background layer visible
On layer 1 - selections all - float - defloat - new layer
Selections - modify - smooth selection - smooth amt 10 - antiatlas checked
Open paper10 - c/p into selection - deselect - add drop shadow
On layer 2 - selections all - float - defloat - new layer
Selections - modify - smooth selection - smooth amt 10 - antiatlas checked
Open paper12 - c/p into selection - deselect - add drop shadow
On layer 3 - selections all - float - defloat - new layer
Selections - modify - smooth selection - smooth amt 10 - antiatlas checked
Open paper17 - c/p into selection - deselect - add drop shadow
Open 74 - c/p s new layer - place to the top left
On layer 4 - selections all - float - defloat - new layer
Selections - modify - smooth selection - smooth amt 10 - antiatlas checked
Open paper11 - c/p into selection - deselect - add drop shadow
Open 87 - c/p as new layer - place to the right
Open 2 - c/p as new layer - place to right
On layer 5 - selections all - float - defloat - new layer
Selections - modify - smooth selection - smooth amt 10 - antiatlas checked
Open paper10 - c/p into selection
Effects - Eyecandy - Impact - Glass with the following settings

*click on image to see full-sized*
Deselect - duplicate - change blend to screen
On layer 6 - selections all - float - defloat - new layer
Selections - modify - smooth selection - smooth amt 10 - antiatlas checked
Open paper14 - c/p into selection - deselect - add drop shadow
On layer 7 - selections all - float - defloat - new layer
Selections - modify - smooth selection - smooth amt 10 - antiatlas checked
Open paper18 - c/p into selection - deselect - add drop shadow
Open 102 - resize by 80% c/p as new layer - place to the left some
Open 5 - resize by 75% - sharpen - c/p as new layer - place on top of layer 7 paper
Open 120 - c/p as new layer - place to left
Open 75 - c/p as new layer - place to the bottom left
Open 111 - c/p as new layer - place to bottom left
Open 3 - c/p as new layer - place to bottom left
Open 4 - resize by 50% - sharpen - c/p as new layer - place to left
Resize your tag to 600x600
Delete your background - merge visible - sharpen
Open 24 - resize by 50% - c/p as new layer - place to the bottom right
Open 22 - resize by 50% 2x - c/p as new layer - place to bottom right
Open your tube - c/p as new layer - place to bottom of tag
Image - flip horizontal - move to right some
Xero - porcelain - change blue channel to 0
merge visible
Adjust - Brightness/Contrast - Highlight/Midtone/Shadow
shadow: 15 Midtone: 50 Highlight: 15 Relative adjustment method checked
add credits and your name

Saturday, May 25, 2013

*click on image to view full size*
PTU Gimme Butterfly Kisses
This tutorial was written by me on May 25, 2013.
It was made out of my own creation and any similarity is purely coincidental.
I used pspx5 but any version should work without problems.
If you're doing this tutorial you must have good psp knowledge and be familiar with the tools.
Let's get started!
Artist: 2013 Spring Attitude by Ismael Rac
Scrapkit: Butterfly Kisses by Kizzed by Kelz
Find this kit in Scrap Candy
Template: 267 by me HERE
Mask: any mask of choice
Font: Kingthings Wrote
*open your mask and minimize it in your workspace*
Open template 267 - duplicate - close original
Make your background visible - delete raster 1
Image - canvas size - 700x700 - fill background layer w white
On layer 1 - selections all - float - defloat - new layer
Open paper2 - c/p into selection - deselect - add drop shadow
Open pink dots - c/p as new layer - place to the right
Open branch of flowers - resize by 50% - sharpen - c/p as new layer
Place to the left - duplicate - flip horizontal
move to the top and right some - merge down
Duplicate - move to the right and rotate it to the right w deform tool
It will look like is going around the circle on layer 3
Open tree - c/p as new layer - place to the right
On layer 3 - selections all - float - defloat - new layer
Open paper19 - c/p into selection - deselect - add drop shadow
On layer 4 - selections all - float - defloat - new layer
Open paper20 - c/p into selection - deselect - add drop shadow
Add drop shadow to layer 5
Open flower 4 - c/p as new layer - place to bottom left
Open grassy hill - c/p as new layer - place to the bottom right
Open flying butterflies - c/p as new layer - place to the left
Open flower cluster - c/p as new layer - place to bottom left
Image - flip horizontal
Open froggy - resize by 50% 2x - sharpen - c/p as new layer
place to the bottom left
Open full tube - resize to fit tag - c/p as new layer
Place to the right - duplicate - change blend to soft light - merge down
Merge 7 down to 6 - add drop shadow
Merge 9 down to 8 - add drop shadow
On background layer - click in it w magic wand - new layer
Open paper9 - c/p into selection - deselect
Layers - new mask layer - from image
Find mask in source window - hit ok - merge group
Delete background layer - merge visible - add credits and your name

Posting this for my friend Kimberly while she parties with her son!
In honor of her son's 9th birthday!
Today only all her kits are 55% off!
Go grab them in Scrap Candy!

*click on image to view full size*
PTU Dont Say Goodbye
This tutorial was written by me on May 25, 2013.
It was made out of my own creation and any similarity is purely coincidental.
I used pspx5 but any version should work without problems.
If you're doing this tutorial you must have good psp knowledge and be familiar with the tools.
Let's get started!
Artist: Barbara by Roman Zaric
Scrapkit: Dreams of Yesterday by Devilish Dezines
Mask: MB & SW mask 45
Font: Papyrus
*open your mask and minimize it in your workspace*
File - New - 700x700 - fill with white - rename background
Click in background w magic wand - new layer
c/p paper3 into selection - deselect
Layers - new mask layer from image - find mask in source window - ok
merge group - resize mask by 80% - move to your liking
Open ele97 - resize by 75% - c/p as new layer
Image - free rotate to the left by 90 degrees - place to left
duplicate - flip horizontal - move to the right
Open ele13 - resize by 65% - sharpen - c/p as new layer
Place to the left and up some
Open 38 - resize by 65% - sharpen - c/p as new layer
Open ele14 - resize by 65% - sharpen - c/p as new layer
Open ele6 - resize by 50% - c/p as new layer - place to the left
duplicate and place to the right
Open 36 - resize by 50% - sharpen - c/p as new layer
Image - Free rotate to the right by 90 degrees - hit ok
Open ele7 - resize by 50% 3x - sharpen - c/p as new layer
Place to the bottom right
Open tube - resize to fit tag - c/p as new layer - place to the left
delete background - merge visible - add credits and name
Friday, May 24, 2013

Check out what's new in Arthur Crowe's Factory!
You can purchase the tubes separately or with a kit or in a pack or in a big jumbo pack!
Its all up to you!
Make sure you visit HERE


Subscribe to:
Posts
(Atom)


